Fallout 3 Modding Edition 2015

Fallout 3 Modded Edition Qt3 Build 2015:

WARNING. THIS IS GOING TO BE A LONG SLOW BURNING TUTORIAL SERIES, NO QUICK FIX!

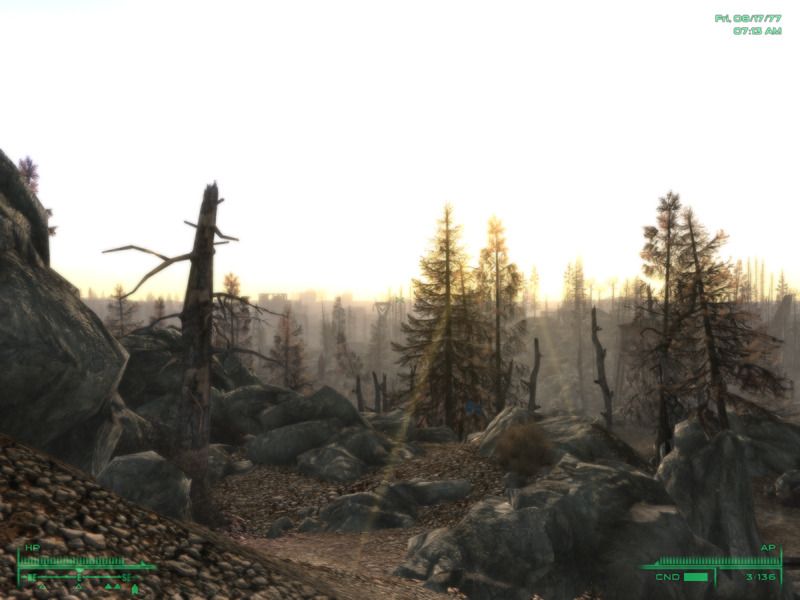
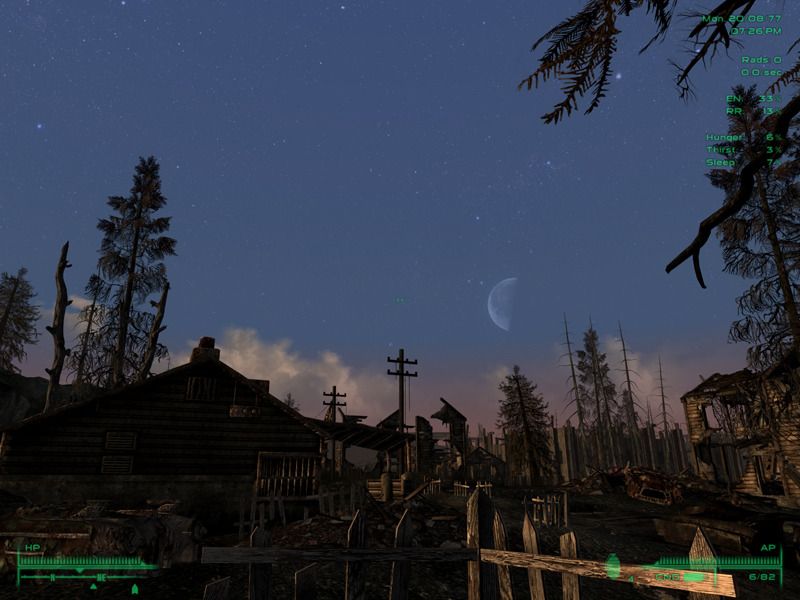
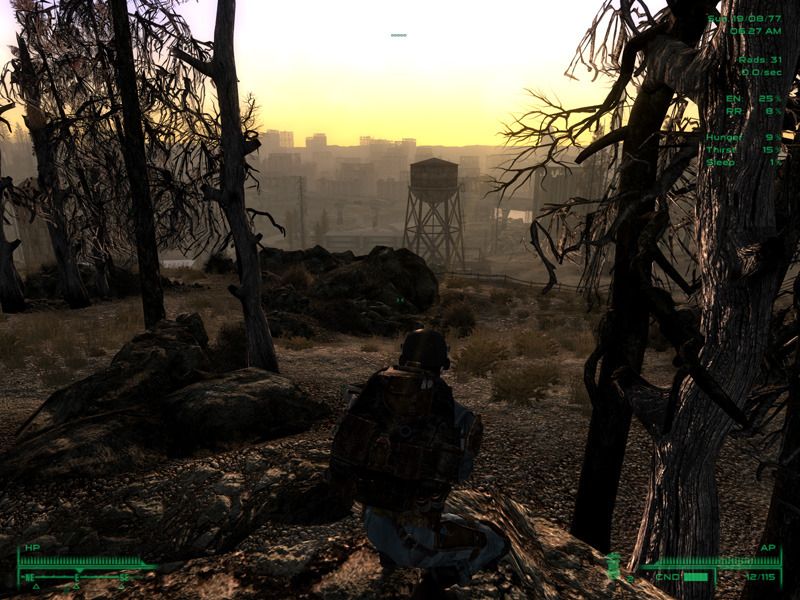
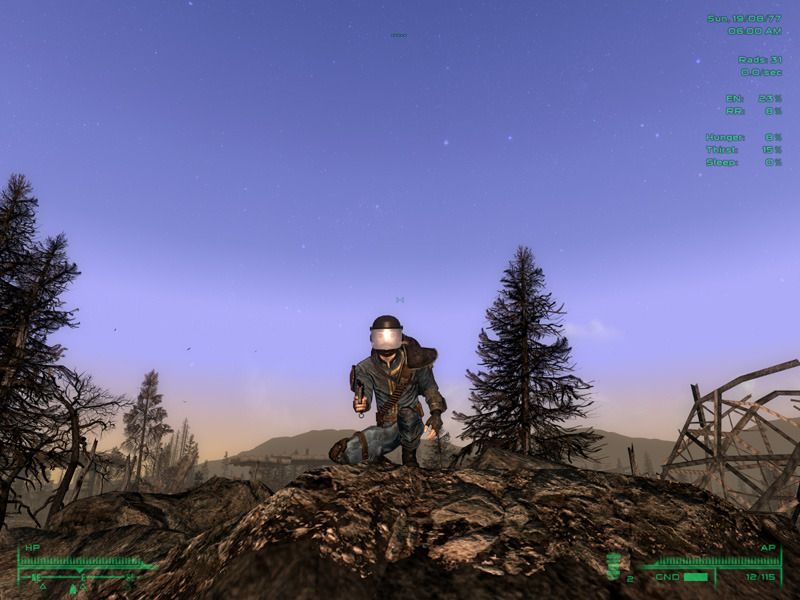
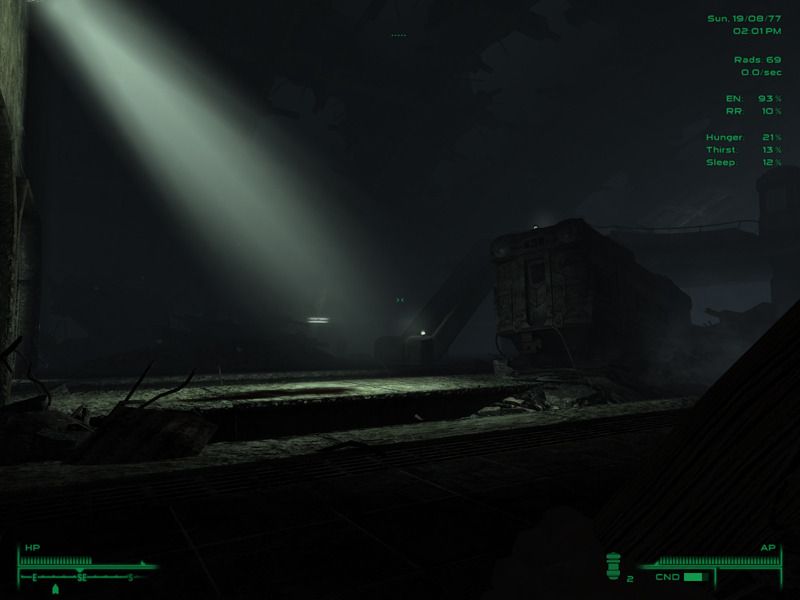
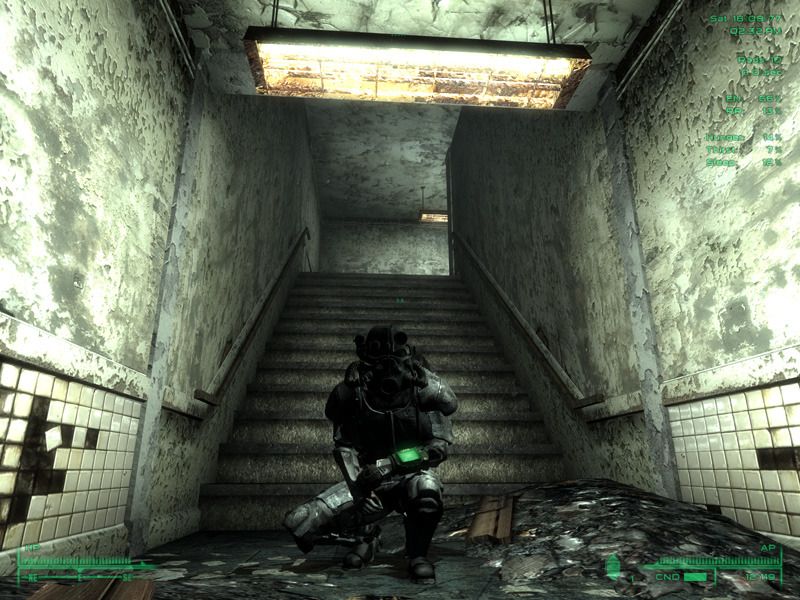
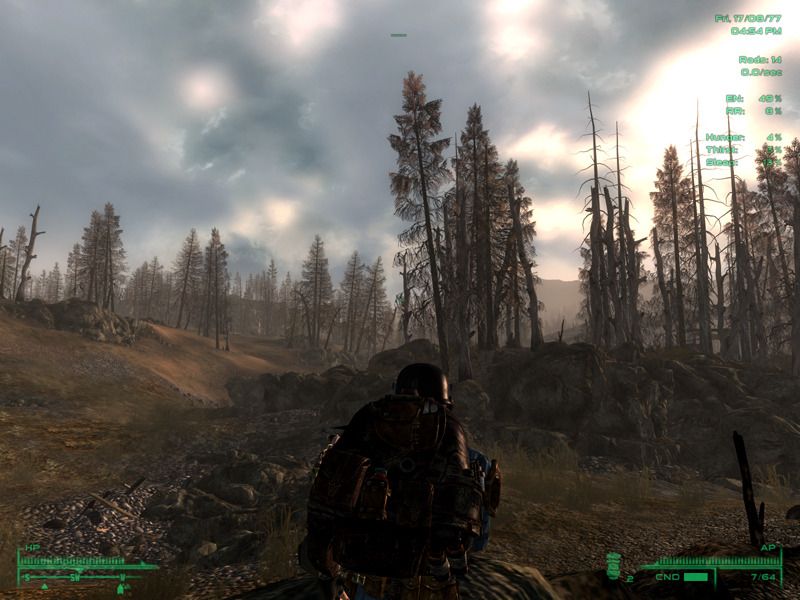
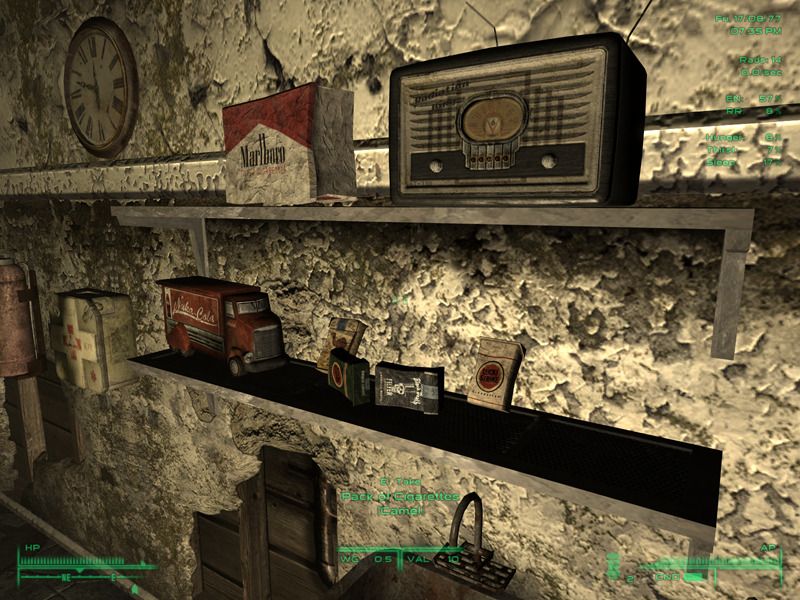
Why? Well it is a good game made great by some select mods, and we will also learn how to use tools like FO3Edit to change things we don’t like so much or fix problems in our build. Basically if you’ve ever played a modded version of Fallout 3 you will be aware of the issues that involves, sometimes game-breaking, so we will aim to avoid any of that. Once we are done it will look something like this:

Aim of the Mod build:

It should play better, aiming for a realism, more survivalist, after the apocalypse harder play style vs the default game without going OTT on mod content that adds zillion of things that might not be truly necessary for the aims of the build. To achieve this we will mostly rely on the excellent FWE mod, and to further increase the ‘toughness’ of the experience our ‘Patch Plugin Load Last’ esp includes a bunch of tweaked FWE stuff to further increase the games hardness.

Combined with Marts Mutant Mod, things can get a bit desperate at times.

The other Qt3 (Old and long) Fallout 3 thread is here, and might have handy info too:

Foreword:

[i]**Important: If your antivirus/firewall runs a virtual sandbox mode type of thing, you must switch that off before starting to install the stuff you will need in this modding guide. I learned this the hard way and had to re-install everything from scratch!

The only time you will need to go online during this process is to get the mods and then again when you run BOSS/FOMM for sorting your load order, so other than those times switch off the virtual sandbox on your security apps, or be prepared to fix the issues that can create!**[/i]

Fallout 3 is going to CTD. It’s a grand Bethesda tradition and it’s not changed, probably by the very nature of the open huge games they build, and certainly default 1.7 Fallout 3 with all the DLC’s would still crash, so modded Fallout 3 is going to crash too.

It’s just the way it is, but don’t worry about it too much as we are going to have it set up so that most CTD’s are not that big a deal, sure you’ll have to load back to your last save, but as a veteran Bethesda game player by now, you know this and have developed a ‘save often’ (but never over-write) mantra. So…save often.

Handy links for all manner of useful things (which i will try to update as needed):

Using FOMM:

Dans Gaming mod tutorial fallout 3 Intro (as you don’t always find this easily):

Dans Part 1 to Modding Fallout 3:

Nexus for getting most mods (for free!):

http://www.nexusmods.com/fallout3/mods/searchresults/?src_order=3&src_sort=0&src_view=1&src_tab=1&src_language=0&page=1&pUp=1

FWE mods website full of win:

Main Bethesda Fallout 3 mods FAQ and PC help:

Fallout 3 Wiki thing

Tweakguides stuff for later as we tweak out ini files:

http://www.tweakguides.com/Fallout3_1.html

Are you playing on an SD monitor?

Looking forward to this. Are you going to include any gameplay mods like FWE, MMM, etc?

Where to Begin:

Decide now that you are going to install it outside the default path of C:\Program Files\

This will save you from lots of potential issues if installing on Vista and above due to UAC and permissions issues when installing in Program Files on these OS.

You could use C:\Games\ or D:\ILoveUnicorns\Games\ just not C:\Program Files(x86) or any of those derivatives ok.

I use E:\ so it becomes E:\Bethesda Softworks\Fallout 3

These official Bethesda forum threads are worth a read through before we start anything:

Begin by installing Fallout 3 and all the DLC(Anchorage, The Pitt, BrokenSteel, PointLookout and Mothership Zeta). Previously the DLC broke stuff, the game, mods etc, but now it is all good with 1.7 (the version your Fallout 3 will be after Mothership Zeta) and we will use some fan patches to catch the things left that need fixing for a better less-CTD experience.

On Windows 7(and probably 8) this can be an issue if doing it from DVD, they will work, but in particular the second disc with the DLC on it can be very, very slow to do anything. You can either wait and cross your fingers or install the DLC disc in safe mode (yeah, this is a thing and works very well) which is quick and painless.

Once you have installed it all, run the fallout launcher.exe (you will need the game disc in the drive at this stage) and make sure all the DLC (which will be shown in alphabetical order, not ‘Load Order’) is ticked in the check boxes. Maybe run the game and get through the tutorial to see that all the DLC loads up in game, as it gives you all those text confirmations near the start of the game. After a few mins in game near the entrance to vault 101, you should know if your install is so far working fine. If not then refer to those Bethesda forum links for some advice on what might be the issue.

If you really can’t stand to do the tutorial level AGAIN, then maybe just wait till we have modded it up so at least you can use the Alternate Start mod that FWE adds, which will enable you to skip the tutorial section? Your call, but keep in mind adding mods also adds to the risk of something going wrong and your Fallout 3 game not working properly. So play safe or take the risk?

Follow these guides, and credit to Dan and Gopher:

To learn how to mod Fallout I used these great youtube guides by Dan and Gopher:

Some things I do a little different (based on my experience of past TES modding, and some in game results on modding Fallout exactly how Dan and Gopher does it on their vids, and I’ll cover those differences in this written guide), but in general they are the best ‘online’ guides I’ve seen for modding Fallout, and I recommend using them before we actually do anything else. Just getting a broad understanding on what we will be doing BEFORE we do it can be a good thing.

Also keep in mind Gopher uses the Nexus Mod Manager, which I do not know, so all my advice in this thread will be specific in detail to using FOMM (which Dan shows you how to use very nicely), although I suspect there is not too much difference between the two tools.

Where to get Mods:

Most of the mods and tools I mention below are available from the Nexus site, I’ll give links if different to that, and this is the Fallout 3 Nexus link to get 99% of the mods and files from:

http://www.nexusmods.com/fallout3/mods/searchresults/?src_order=1&src_sort=0&src_view=1&src_tab=1&src_language=0&page=1&pUp=1

In general I sort by ‘most endorsed’ or ‘most downloaded’, and using the search function for a mods name if need be.

Use the video guides above (and my mod list below if you like) as a guide on what mods to get, basically picking up the top rated mods helps in keeping badly made mods out of your list, not completely true, but it does help, so stick to the top ‘most downloaded’, ‘most endorsed’ mods for the most part.

One thing I will add is that in general the modding ‘quality’ has gone downhill over the years, in that more dirty/broken mods are out there in the wild. There are a combination of reasons why, and this was the same issue with Oblivion vs Morrowind (overall).

I’d hazard a guess that the increased popularity of the TES series, which also included lots of primarily console gamers that later moved to PC versions of these games (yes this is snobbish, and I was one of them!), but also less ‘perfect’ tools, and Bethesda’s own interference with modding all had an effect.

After Morrowind they sort of started to have a shift in ideology around mods, as we could see with DLC (horse armour!) for Oblivion they were shifting in a direction where by they thought they should have better ‘control’ over mods and making money from that imho.

Anyway, whatever the reasons, Fallout 3 has relatively few ‘must have’ mods that are well made and clean and worth getting to work in your mod list. In a way this is good because also it seems Fallout 3 is less stable than even Oblivion with mods, so the leaner you can keep it the better.

@ Telefrog, not sure what an SD monitor is! So probably not?

@ Bateau, modlist we are building just coming up :)

Modlist load order (as kind of suggested by BOSS/FOMM, but mostly common sense and the FWE):

Fallout3.esm
Anchorage.esm
ThePitt.esm
BrokenSteel.esm
PointLookout.esm
Zeta.esm
Alton, IL.esm
Unofficial Fallout 3 Patch.esm
CRAFT.esm
CALIBR.esm
DCInteriors_ComboEdition.esm
WYB.esm
FO3 Wanderers Edition – Main File.esm
Mart’s Mutant Mod.esm
FO3 Wanderers Edition - Alternate Travel.esp

DarNifiedUIF3.esp
GNR Enhanced.esp
CONELRAD 640-1240.esp
Overhead3PCamera.esp
WYB-Base.esp
AbandonedShack.esp
falloutshelter.esp
MaintenanceShed.esp
Dragonskin Tactical Outfit.esp
LeatherBackpack-eng.esp
Merc Advnturer Armor-eng.esp
NightvisionGoggles(Powered).esp

NotSoFast.esp
PLFewerItems.esp
PLweightadjust.esp
Shadow and Dust - Southwest DC - Public.esp
Alton Addon.esp
RandomEncounters.esp

FO3 Wanderers Edition – Main File.esp
FO3 Wanderers Edition – DLC Anchorage.esp
FO3 Wanderers Edition – DLC The Pitt.esp
FO3 Wanderers Edition – DLC Broken Steel.esp
FO3 Wanderers Edition – DLC Point Lookout.esp
FO3 Wanderers Edition – DLC Mothership Zeta.esp
FO3 Wanderers Edition – Followers Enhanced (BrokenSteel).esp
FO3 Wanderers Edition – Optional Restore Tracers (automatics only).esp

UUF3P – FWE Patch.esp

Mart’s Mutant Mod - Natural Selection.esp
Mart’s Mutant Mod - Zones Respawn.esp

Fellout-Full.esp
Fellout-Anchorage.esp
Fellout-BrokenSteel.esp
FelloutPointLookout.esp
Fellout-Zeta.esp

Flora Overhaul.esp
megalight.esp
HZSmoothLight – FO3.esp
FireLightFix.esp
Xepha’s Darkened Interiors.esp
Xepha’s Darkened Interiors – BS.esp
Xepha’s Darkened Interiors – OA.esp
Xepha’s Darkened Interiors – PL.esp

Blackened FWE + MMM.esp
Merged Patch.esp
Patch Plugin Load Last.esp

Now this is to use as a ‘guide’ to run alongside the video’s to help work out what mods you want to get. Also those last esp files, the Merged Patch and Patch Plugin Load Last i will cover how to make, as they are pretty important to keeping everything working nice (most of the time).

Standard (non-HD) aspect ratio. The images you posted look downright quaint.

We will dig into the details of the why of the modlist later on (like why an .esp file is up in the .esm section etc!), so just keep it as a guide for now. This guide on the FWE site is good:

Organise your Mods (or ‘Starting to get complicated’):

Organise your downloads into folders for different things, for example I put all Texture changing mods in a folder called ‘Graphics’, and the main NMC Texture pack goes in there along with the Clutter Replacers and things like Vurts Tree Overhaul etc.

‘House Mods’ is where I put all the player housing ones (I use three in my game)

I have a separate folder for FWE as this includes a few files plus a few patches for other things, like the DarNUI patch and Updated Unofficial Patch for FWE.

So go through the process of following Dans guide and getting the mods that interest you and putting all those in easy to reference folders for when we get to building a modded Fallout 3 game.

Below I mention you might need to manually organise a particular mod ready for use in FOMM, where the mod author has not packed their mod taking the install path of Fallout 3 into account, and also you have situations where a patch is needed and you can easily sort that out your self before installing the mod via FOMM. Here are a couple of examples from my mod list I use below.

I use a sound enhancement mod called ‘Ambient Wasteland 2 WAV edition’.

When you unzip the main file it comes with just a \Sound folder (with various sub folders in that), so to be on the safe side I create a folder called Data within the main mod folder and put the extracted mod contents in that new folder, now the mod will have a full ‘Ambient Wasteland 2 WAV edition\Data\Sound’ path for when we install it via FOMM.

That mod also has a patch file ‘Ambient Wasteland 2 Wav Patch’ and that also just has the \Sound folder and sub folders.

Now instead of installing each one separately via FOMM, I take the patch file contents and paste them inside the Data folder we just created for the main mod file above (allowing it to overwrite anything if it asks), that way all the patch contents will be included in that mod folder when we install the mod into the game.

When I do that kind of patch addition I usually rename the main mod folder to reflect that it has the patch included, in the case of this particular mod I rename it to ‘Ambient Wasteland 2+Patch’ for when I install it in my game via FOMM.

This way I can quickly see what state that mod is in (patched or not patched etc). You can rename any mod folder as you wish, but not the contents so much, and mods main .esm and .esp files will need to stay as they are designated for them to work, but the mod folder name, which we will use to identify the mod and it’s state is ok to rename as you wish to better help you keep track of things.

You can do this for many situations when modding, but not always.

For example near the end of my mod list is a patch file ‘UU3P - FWE Patch.esp’ and as that file is dependent on a number of mods it is not possible to put it’s contents safely in one particular place, so that one we will load into FOMM separately.

Whats Your Brand Enhanced is another good example to use here as it requires a lot or reorganising to be ready to install via FOMM.

The main file is WYBE_1p0 and includes a fomod folder, a readme, a WYB.bsa, a WYB.esm and a bunch of .esp files for all the Fallout DLC and extras (so there are 7 .esp files in all).

There is also a merged patch version called ‘WYBE-Base-DLCs-Merged_v1p0’ which puts all the DLC’s (so 5 of the above mentioned .esp files) in one single .esp. Much better for your game to have that version, as the less .esp files you run the more stable Fallout 3 will be.

So with these two files downloaded for this mod we will organise them so it is all in one folder ready for FOMM to load into the games load order and mod list.

So we will use the original main folder ‘What’s YOUR Brand_(Enhanced)v1.0 FOMOD’ and simply take out these files(I delete them as I have them in the zip file in my mod folder if I need them again):

WYB-DLC-Anchorage.esp
WYB-DLC-BrokenSteel.esp
WYB-DLC-PointLookout.esp
WYB-DLC-ThePitt.esp
WYB-DLC-Zeta.esp
WYB-OPT-WhiteCigarette.esp
WYB-Base.esp (this is the main mod esp)

So we are just left with a fomod folder, WYB.bsa, WYB.esm and Readme -What’s YOUR Brand_(Enhanced)v1.0 FOMOD in that mod folder.

Now we go into the WYBE-Base-DLCs-Merged_v1p0’ folder and take the ‘WYB-Base+DLCs-Merged.esp’ and put that in the main folder we just removed a bunch of stuff from. Then we rename this new .esp as ‘WYB-Base’, so it becomes the new main .esp file for this mod to go along with the WYB.esm master file, and this time includes all those DLC versions in this one file.

Now I remove the readme file (good idea to read these btw) and cut/paste that into my general mod folder where I store all the mods. I also create a Data folder within the main mod ‘What’s YOUR Brand_(Enhanced)v1.0 FOMOD’ folder and copy paste the fomod folder, WYB.bsa, WYB.esm and the newly created WYB-Base.esp into that Data folder. So the full file structure and contents now looks like this:

…\What’s YOUR Brand_(Enhanced)v1.0 FOMOD\Data\

fomod
WYB.bsa
WYB.esm
WYB-Base.esp

This mod is now prepared and ready to be installed via FOMM. As you can see it sometimes takes a bit of work to prepare a mod to be fully ready for installation, most are fine, but you will have the odd example like this where your understanding about mod packaging and install paths helps ensure you get less problems in your game from installing mods, especially if they come with patches and you want to save some of your precious .esp allocations.

Basic understanding of install paths:

In general I prefer to create my own Data folder within a mod folder where the mod author has not, just to keep things consistent and because I do not trust a tool to ‘know’ where to place things unless it is all packed accurately in the exact format that the game uses. Principles of KISS etc.

Unless specifically mentioned in the readme (like the case for setting up the FO3Edit program) all our mods are going to go into the \Data directory within your Fallout 3 installation. Mine looks like this:

E:\Bethesda Softworks\Fallout 3\Data

Now when downloading and organising all your mods you will find not all mod authors pack their mods with this structure in mind. What that means is unless your mod looks something like this:

ModName\Data\stuff(where stuff could be ‘Textures’, ‘Meshes’, Menus’ or if your really unlucky just things that should be inside one of those folders!)

It might not install properly using a mod manager. If it looks like this:

Modname\stuff

You will be safer creating a ‘Data’ folder and putting all the ‘stuff’ inside of it before installing the mod by a mod manager. Some mods even require more user end reorganising than that, so keep your eyes peeled for those badly packaged mods. It is good practise to go through all your mod files once you have unpacked them and see that they all conform to the correct install path structure to avoid any problems. Unless off course the readme has a specific reason why this should not be the case, like for FO3Edit that requires it be placed in the main \Fallout 3 folder alongside the games Fallout3.exe etc.

Now, we deserve some candy :)
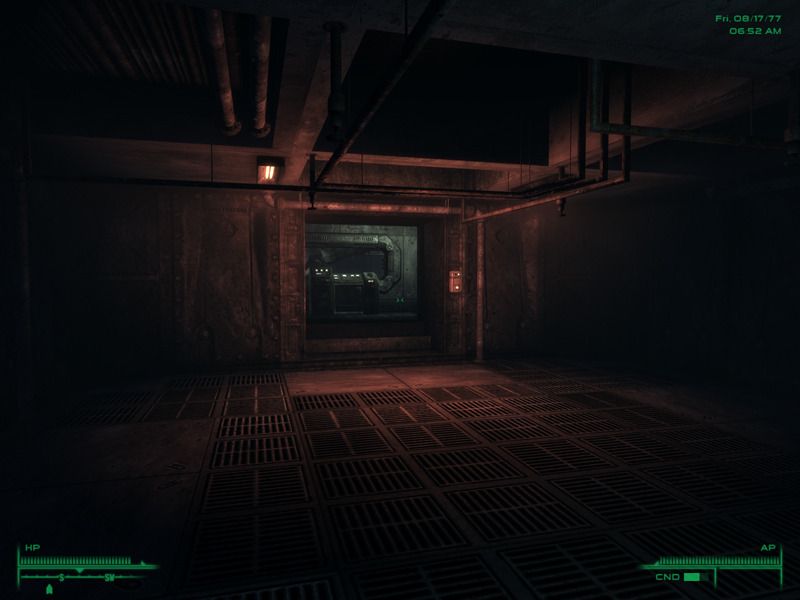
@ Telefrog, ah yes ok i get it. My monitor is 1920x1200 but i’m running it in 1600x1200 for Fallout 3 (for some reason that escapes me now). I guess all my screenshots will look quaint? The FOV is standard (but i do tweak first person mode).

Edit: The reason i don’t run it in full 1920x1200 is because Fallout 3 is one of the games that my monitor (A Samsung SyncMaster 2433) has an issue displaying in it’s native resolution. I have a couple of mostly older games that have this issue. Anyway some more candy because really we are just at the tip of the iceburg in terms of getting complicated :)

Feeling all Buck Rogers

The Dark, Underground

A Solid Snake moment?

Stormy Skies

Merging texture files (Organise our mods part 2):

In this section we will cover the various merged texture packs I’m using in my mod list, texture packs are perfect for this kind of thing and allow you to get the exact textures in game you want. Below are the names of various improved graphics mods you can find on Nexus.

First up in the list is:

‘BetterClutterCollection’ - this is the name of an actual mod we use and I just copy/paste the \Data contents of the following mods into this mods main folder in this order:

1.MgsNeatClutter
2.BetterBooze(Classic)
3.HiResBooks -Dirtier-Grimier
4.HiResSkillBooks
5.MetroMapReplacer

Allow things to overwrite if asked.

If any of those mods does not have a \Data folder I simply create one for it, as was covered in the ‘Organise your mods’ and ‘Basic understanding of Install paths’ sections previously. Then just copy/paste it into the main BetterClutterCollection folder, allowing any requests for overwrites. As these are just texture mods, and have no esm or esp files we are free to do this kind reorganisation, and it makes it quicker and easier for the final install via FOMM.

Next is ‘BetterArmour&WeaponsCollection’ which I created a folder for (as it is not an existing mod) and copy/pasted the contents of these mods into, in this order:

1.Classic Black Leather Armor Male and Female
2.Hall of Equipement FO3 v2
3.Hall of Weapons FO3 v2
4.Enclave Armor (which is combined EPA and Hellfire downloads from the ‘Enclave Power Armors Retextured’ mod)

Allow things to overwrite if requested.

These are just mods that i’m using in my game, and for the pure Texture replacement mods you can use any you prefer. If they have no esm or esp file you are pretty free to merge them all together in one file for inclusion via your Mod Manager. Why use a Mod Manager for these? Well really the main reason to use a Mod Manager over pure manual installation is so you can quickly remove stuff you decide you don’t like (or maybe creates a problem in your game). Trying to ‘unpick’ your texture files by hand takes a long time (i know as i’ve done it in Morrowind many times!), so even with no esm or esp file, it is worth using your Mod Manager for your textures too. Just make sure your files are organised properly before you start.

NMC’s Texture Pack is another important Texture mod we should use. I use the ‘Performance’ version with a different ‘rockcanyoncluster01’ texture (i make a 4096x4096 darkend version of the default Fallout 3 texture, as a preference). But if you have a top gaming PC you could try a more hi-res version like the ‘Large’ or ‘Maximum’ versions?

Vurts ‘Floral Overhaul’ (the ‘Dead’ version is more lore-friendly, and looks excellent) is also worth thinking about adding. I find the improved (sick looking) trees helps cover one of Fallout 3’s worst graphics engine problems. That is the rather terrible ‘barren’ middle distance. You can tweak the ini (as we will do later) to get both near and distance terrain looking awesome, but the ‘middle distance’ has no powerful ini tweaks to improve how it looks, so Vurts Dead trees really help cover up this weakness in the graphics of Fallout 3. Sadly only where there is tree cover, but for the most part that will be much of where the game looks worst, out and about in the Wilderness.

‘Enhanced Night Sky’ and ‘krzymar Hi Res Moon’ both actually work really well together, even in a game with Fellout installed. So they are worth checking out if you want to improve the ‘natural’ aspect of the night time sky.

‘Improved LOD Noise’ helps reduce the ‘blotches’ on the middle distance. Sadly it is the only ‘middle’ LOD mod we have for Fallout 3 it seems (Oblivion had a bunch iirc) so it is definitely better than nothing. This and Vurt’s dead trees do massively help with Fallouts worst graphics weakness.

That pretty much covers the Texture mods, so go have a look at what you can find and start to build up your graphics mod section for installation later.

A couple of pics showing some of the texture mod changes i’ve described in my actual game:

That repacked Whats Your Brand Expanded mod: - Note the original mod will only show one brand, and the Expanded version needs the manual packing like i went through with you, for it to appear in your game as in the pic below:

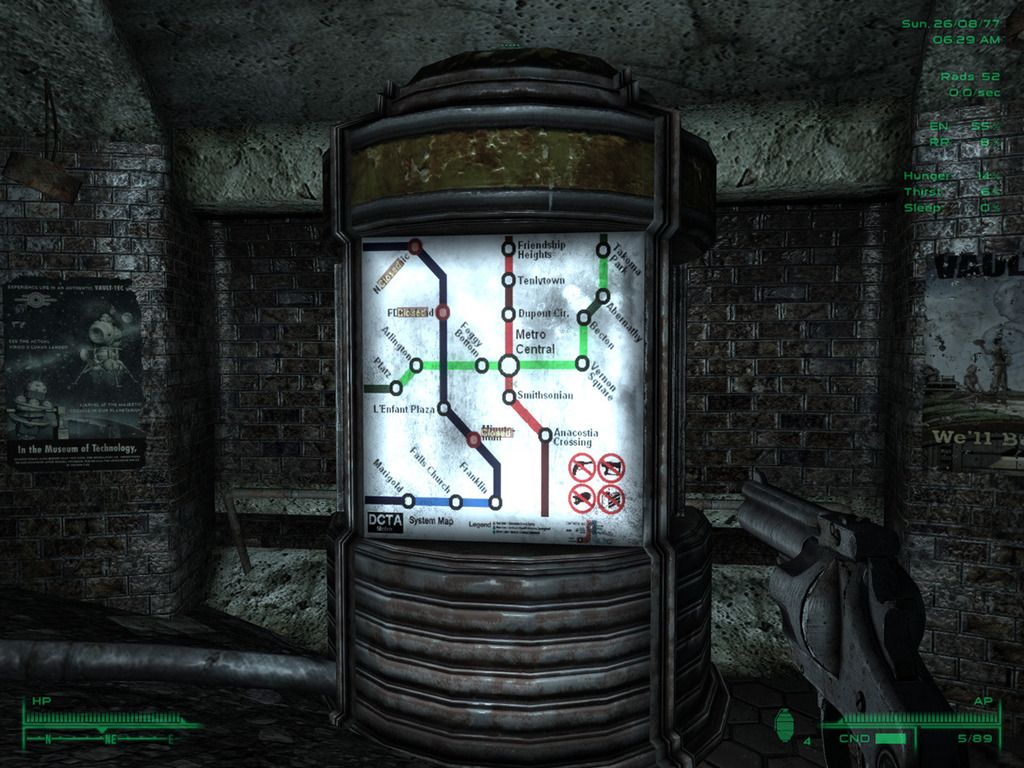
The Metro Map (underground backlit version):

Quick Recap

So far we have:

  1. Installed Fallout 3 and all the DLC.
  2. Started to watch those modding guide videos by Dan and Gopher (a few times is a good idea, some mods are big, so they are perfect to watch while you download mods).
  3. Started to download mods and organise them, checking their file structures are correct and creating a few merged texture packs for installation later.
  4. You might have already played through the starting section of the game, to check your main Fallout 3 game is working BEFORE we mod it?

So not much, yet. That is good, as taking our time will help us avoid typical errors that can break your installation.

No iron sights mod?

Two things I’d like to see in a mod guide (any, not just yours).

  1. Install order. As much as I like Gopher and his videos, he’s just too slow in his explanations. I don’t need a 10 minute tutorial on how 7zip works or how to paste files to desktop. This is why I read mod guides in the first place, to quickly skip to the important bits. Load orders are nice and all, but sometimes mods overwrite the same files so you have to pay attention to install order as well.

  2. Short writeup for each mod. What it does (or at least a link to its nexus site) and why do you recommend it.

Lastly, a short intro on your modding goals - do you aim to create a more realistic, hardcore experience, a fun and crazy sandbox or just looking to improve the looks of the game.

Merging texture files (Organise our mods part 2):

In this section we will cover the various merged texture packs I’m using in my mod list, texture packs are perfect for this kind of thing and allow you to get the exact textures in game you want. Below are the names of various improved graphics mods you can find on Nexus.

First up in the list is:

‘BetterClutterCollection’ - this is the name of an actual mod we use and I just copy/paste the \Data contents of the following mods into this mods main folder in this order:

1.MgsNeatClutter
2.BetterBooze(Classic)
3.HiResBooks -Dirtier-Grimier
4.HiResSkillBooks
5.MetroMapReplacer

Allow things to overwrite if asked.

If any of those mods does not have a \Data folder I simply create one for it, as was covered in the ‘Organise your mods’ and ‘Basic understanding of Install paths’ sections previously. Then just copy/paste it into the main BetterClutterCollection folder, allowing any requests for overwrites. As these are just texture mods, and have no esm or esp files we are free to do this kind reorganisation, and it makes it quicker and easier for the final install via FOMM.

Next is ‘BetterArmour&WeaponsCollection’ which I created a folder for (as it is not an existing mod) and copy/pasted the contents of these mods into, in this order:

1.Classic Black Leather Armor Male and Female
2.Hall of Equipement FO3 v2
3.Hall of Weapons FO3 v2
4.Enclave Armor (which is combined EPA and Hellfire downloads from the ‘Enclave Power Armors Retextured’ mod)

Allow things to overwrite if requested.

These are just mods that i’m using in my game, and for the pure Texture replacement mods you can use any you prefer. If they have no esm or esp file you are pretty free to merge them all together in one file for inclusion via your Mod Manager. Why use a Mod Manager for these? Well really the main reason to use a Mod Manager over pure manual installation is so you can quickly remove stuff you decide you don’t like (or maybe creates a problem in your game). Trying to ‘unpick’ your texture files by hand takes a long time (i know as i’ve done it in Morrowind many times!), so even with no esm or esp file, it is worth using your Mod Manager for your textures too. Just make sure your files are organised properly before you start.

NMC’s Texture Pack is another important Texture mod we should use. I use the ‘Performance’ version with a different ‘rockcanyoncluster01’ texture (i make a 4096x4096 darkend version of the default Fallout 3 texture, as a preference). But if you have a top gaming PC you could try a more hi-res version like the ‘Large’ or ‘Maximum’ versions?

Vurts ‘Floral Overhaul’ (the ‘Dead’ version is more lore-friendly, and looks excellent) is also worth thinking about adding. I find the improved (sick looking) trees helps cover one of Fallout 3’s worst graphics engine problems. That is the rather terrible ‘barren’ middle distance. You can tweak the ini (as we will do later) to get both near and distance terrain looking awesome, but the ‘middle distance’ has no powerful ini tweaks to improve how it looks, so Vurts Dead trees really help cover up this weakness in the graphics of Fallout 3. Sadly only where there is tree cover, but for the most part that will be much of where the game looks worst, out and about in the Wilderness.

‘Enhanced Night Sky’ and ‘krzymar Hi Res Moon’ both actually work really well together, even in a game with Fellout installed. So they are worth checking out if you want to improve the ‘natural’ aspect of the night time sky.

‘Improved LOD Noise’ helps reduce the ‘blotches’ on the middle distance. Sadly it is the only ‘middle’ LOD mod we have for Fallout 3 it seems (Oblivion had a bunch iirc) so it is definitely better than nothing. This and Vurt’s dead trees do massively help with Fallouts worst graphics weakness.

That pretty much covers the Texture mods, so go have a look at what you can find and start to build up your graphics mod section for installation later.

@ Alun Au, to be honest for the added complexity i found it didn’t add enough for me to keep it. It is one of Fallout 3’s most downloaded mods and i did try it, but stability in the overall build and trying to keep complexity to a minimum meant it didn’t stay longer term, atleast for now.

@ Bateau, we’re working towards installing things, and that includes a step-by-step guide to all that (pretty much, stuff like the ‘Large Address Aware (3GB/4GB etc)’ enabler, stutter removers etc. We are just not there yet. It is important (i feel) to fully get a handle on the basic underlying principles of modding Bethesda games, so this guide will be quite large and extensive and cover pretty much everything from setting Fallout 3 up, to adding mods, to changing mods and getting it all working nice.

As i mentioned after posting my mod list load order, i will talk about the why of those choices later on. I figure people can find them on Nexus easily enough (although not all of them, like a couple of the ‘quest mods’), and that comes in more detail later.

I will however improve the modding goal of this build, i briefly mentioned it right underneath those first set of picutres, but you are right it needs to be more prominent. Let me go fix that :)

Preparation of Mod Tools:

(There are other Mod Managers you could use like Nexus Mod Manager or Wrye Flash, but I only know how to use FOMM for Fallout 3)

Download and install Fallout Mod Manager also known as FOMM (I use the ‘Old FOMM’ which is version 0.12.6, it is maybe a bit more stable?) and FO3Edit (latest 3.1 version) which we need for any mod edits and making the all important ‘Merged Patch’ and ‘Patch Plugin’ that load last to keep modded Fallout 3 happy.

FOMM:

http://www.nexusmods.com/fallout3/mods/640/?

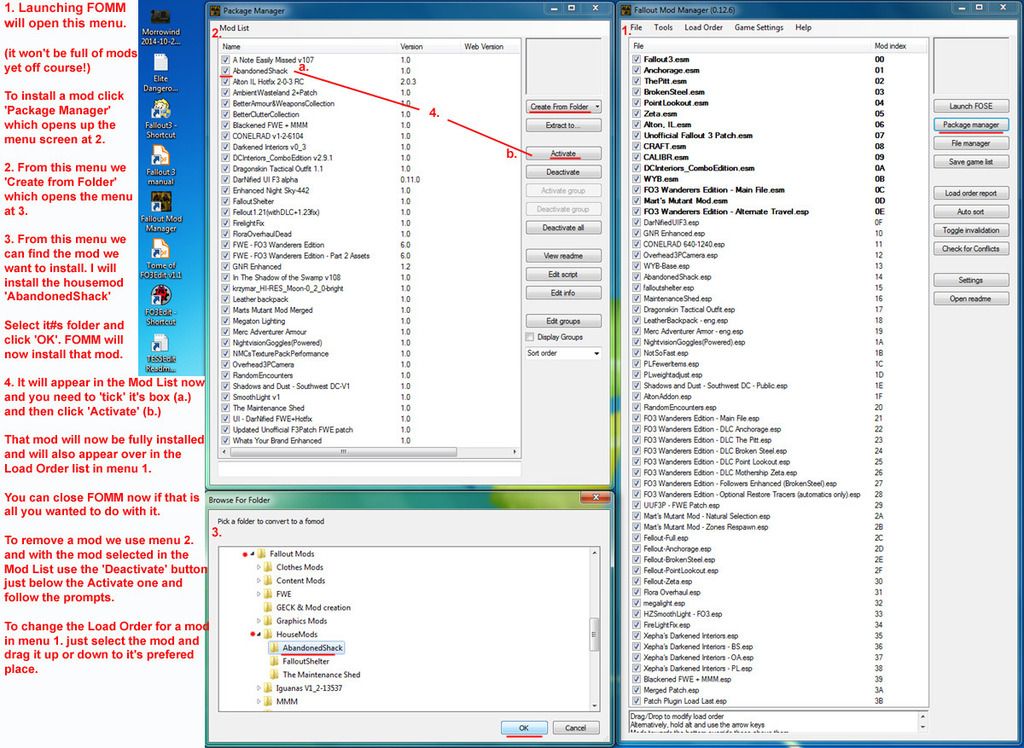
A quick reference screenshot on using FOMM’s basic features (i suggest reading the tutorial i’ve linked to in the OP):

FO3Edit:

http://www.nexusmods.com/fallout3/mods/637/?

Read their install instructions and install them before we start. Keep in mind here that the install instructions for FO3Edit specifically says to put it in your main \Bethesda Softworks\Fallout folder (so alongside the Fallout3.exe etc). That is mentioned in the ‘Fallout 3 Training manual’ that you also want to get via the link on the tools Nexus download page. In fact you need that guide to install it properly, the readme that accompanies FO3Edit has no installation information!

Once you have put the files for FO3Edit where they should go, just create a shortcut to your desktop for the main FO3Edit.exe, and that will be much easier than digging inside your Fallout install each time you want to run FO3Edit.

With these two tools we can install all our mods correctly (and easily uninstall or change mod load orders etc) and also create a ‘Merged Patch’ and ‘Patch Plugin’(where we manually build our own patch to the installed game) and edit the games files. We can also clean ‘dirty’ mods if needed. And that is about all you need to keep modded Fallout happy, but you can go further using the GECK which we will not be covering in this guide.

Using FOMM & FO3Edit to change some mods before we add them to the final modded game:

Section 1: Using FOMM to install the MaintenanceShed mod (Get some good strong coffee in and be prepared to read):

Yeah. We sort of need to do all this now i’m afraid. I mean you could not do it and just use the mods as is and the game will still be cool…BUT. But there are a couple of things you will start to notice that you might feel need tweaking.

The problem is when a mod maker makes their mod they might not be making it with another mod in mind, and in-fact that is really hard to make a call on isn’t it. So what you are likely to notice on playing a decently sized modded version of Fallout 3 is a general uneven handling of various game ‘things’. One bit of Armour with stats x,y,z is cheaper than another that has worse stats, or that the mod author added a feature to an item you find over-powering in the game. Those kind of things.

From my modlist we need to tweak a couple of mods before we install them.

falloutshelter.esp
MaintenanceShed.esp
Dragonskin Tactical Outfit.esp
LeatherBackpack-eng.esp
NightvisionGoggles(Powered).esp

These all can be changed via FO3Edit to better fit in the overall aims of our mod effort. So lets start with the easiest and work our way up.

First we need to install the mods with our Mod Manager, before we can change them in FO3Edit, so we are going to do that to our pristine default Fallout 3 GOTY install. We will make the changes that will go in your own Patch Plugin Load Last.esp, then using our Mod Manager uninstall the mods (as we have an install order to follow later on). It might be a good idea to read up on using FOMM, or watch Dan’s guide alongside this section? I don’t have picks for what is pretty simple process, so it is all text for section 1.

So we have checked all the above 5 mods are packed correctly, and using our FOMM shortcut on the desktop will launch that. It should open up showing your current modlist and mod load order, which should look like this at this stage:

Fallout 3.esm
Anchorage.esm
ThePitt.esm
BrokenSteel.esm
PointLookout.esm
Zeta.esm

If they are not in that order simply click>drag them into that correct order. Fallout 3 is weird sometimes.

Now on the top right section of FOMM click the ‘Package Manager’ tab. It will open another screen and in that we want to click the top tabs pull down menu and make sure it is on ‘Create From Folder’.

This will open up a browsing dialogue and you need to navigate to the first mod we are going to change, a folder called ‘MaintenanceShed’. So go find it in your by now beautifully organised list of mods.

Once you have selected that folder click ‘ok’ and FOMM will install it into your mod list. In that second Package Manager screen you will see it appear and you simply tick it’s box and click ‘Activate’ over on the right. You will get a message that it is now active and installed.

We can close the Package Manager screen, and you should see the MaintenanceShed.esp underneath Zeta.esm in the main FOMM mod list view. We can close/exit FOMM now, if it looks like it installed all ok and is in those list as mentioned. If you get any kind of error, check your mod is packed correctly and retry the process. If that does not fix the issue then your going to have to dig around in readmes and those website links i gave for using FOMM. It should be pretty easy and straight forward as described above (and Dan shows how easy it is to use FOMM).

Section 2: Using FO3Edit to change the MaintenanceShed mod(with Pics!)

Now we are going to use FO3Edit for the first time. There should be that shortcut link on the desktop, and one to the PDF Training Guide for using FO3Edit, it will be called ‘Tome of FO3Edit v1.1’ unless you changed it’s default name. Go ahead and open that just in case you need more detail than i’m going to give for this section, open it at page 40 section 4.7 ‘Creating a Patch Plug-in (manual method)’.

Double click/open the FO3Edit program. It won’t take long with the tiny install we currently have! You will see a box-out screen called ‘Master/Plugin Selection’ and all the files under it will be ticked by default. This is important for most of the FO3Edit editing we do, so get into the habit of doing this.

  1. Right click somewhere in the box where there is no text (so on some white space). You will get a small dialogue choice box and you want to ‘select none’. This will deselect everything, all the ticks will un-tick.

  2. Now just click on the MaintenanceShed.esp and click ‘OK’

What this will do is ensure we only load the MaintenanceShed.esp into FO3Edit, so we won’t accidentally change anything else at all. You’ll be surprised at how easy it is to forget this and make a mess in other mods by mistake (been there done it got the t-shirt), especially at quarter to three in the morning after 10 pints of bitter. Oh, being tired and trying to do this stuff is also not a good idea.

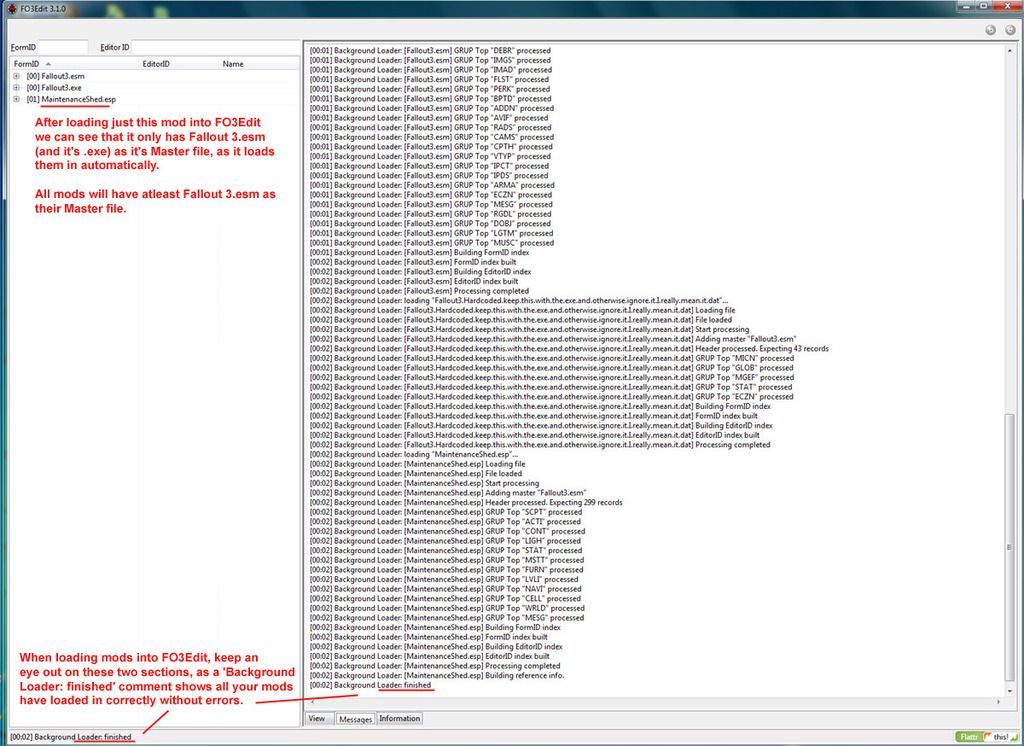
So we will now have a view where on the left is the MaintenanceShed.esp and ALL the details that mod contains (which is not that much as this is a very nice smallish mod). We will also see that it’s Master Files of Fallout 3.esm (Fallout 3.exe) have been loaded in automatically by FO3Edit, as in the pic below:

We are going to make one single, simple change to the mod. We are going to add a lock to the front door.

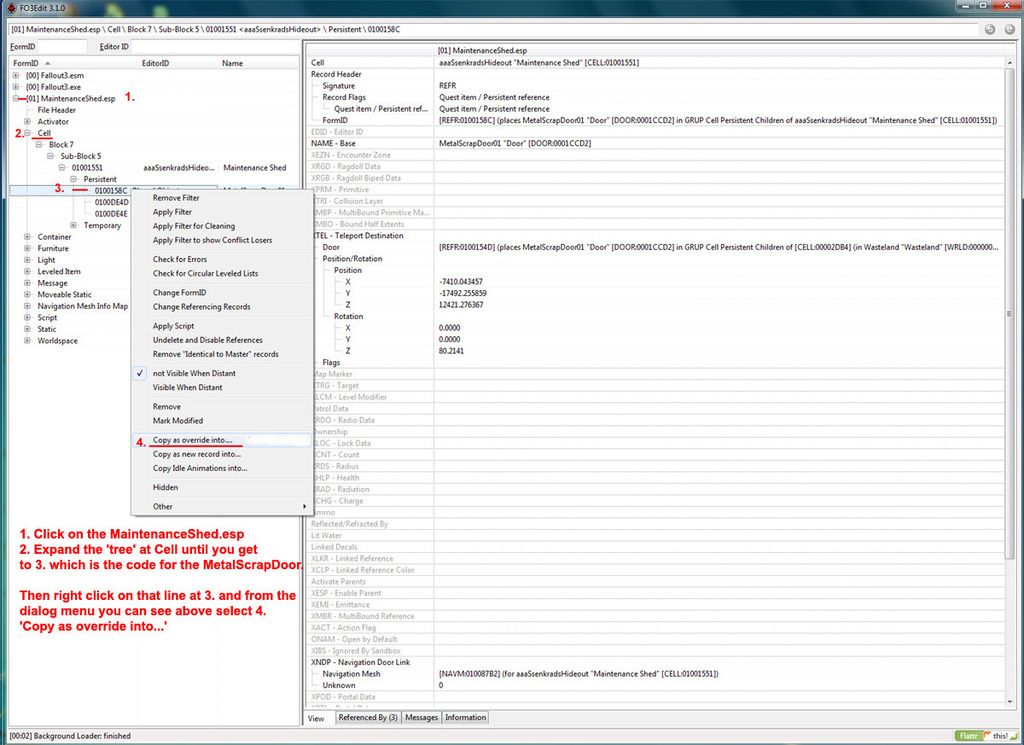
So on the top left click on the MaintenanceShed.esp and expand it to navigate to Cell>Block 7>Sub-Block 5>0E001551>Persistent>0E00158C Placed Object MetalScrapDoor01 “Door” [DOOR:0001CCD2]

you do this by clicking down through the ‘branches’ until you arrive at that last entry, which is for the front door of our Maintenance shed. Once you have clicked on the last entry it will pop-up all it’s full details in the right hand panel, and it is in here that you do your mod edits. The left panel is the navigation panel. You can see the expanded tree in the screenshot below.

So before we actually change anything we need to create our own Patch Plugin Load Last.esp file, because it is not a good idea to directly edit and change things in someone else’s mod, you want to make those changes clean and in your own file, and keep the original mod details as they were download and made by their author, if for no other reason than having the default values to reference just in case you make a mistake.

To do this, create our own patch, have a quick look through the FO3Edit guide, that section 4.7 on page 40. It describes the process in detail there.

What i will say is in that left panel, right-click on that currently selected entry, the 0E00158C Placed Object one.

A dialogue menu will open and we want to select ‘Copy as override into…’

See the Pic below for how this will all look on screen: