I’m still not sure, but I’m two and a half games in (one was interrupted by my having to start cooking on Christmas), and all two and a half of them have been delightful. See the folded battle report (reposted from another forum) below:
Battle Report
I got a chance to play a game with my buddy parvusimperator today, taking advantage of the slightly larger amount of floor space available at his apartment to bring out the printed scenery and the expanded armies. Since it’s parvusimperator’s baptism by fire, we decided to play without any extra rules, Original Wells style. So, without further ado…
The Battle of Chopinburg House
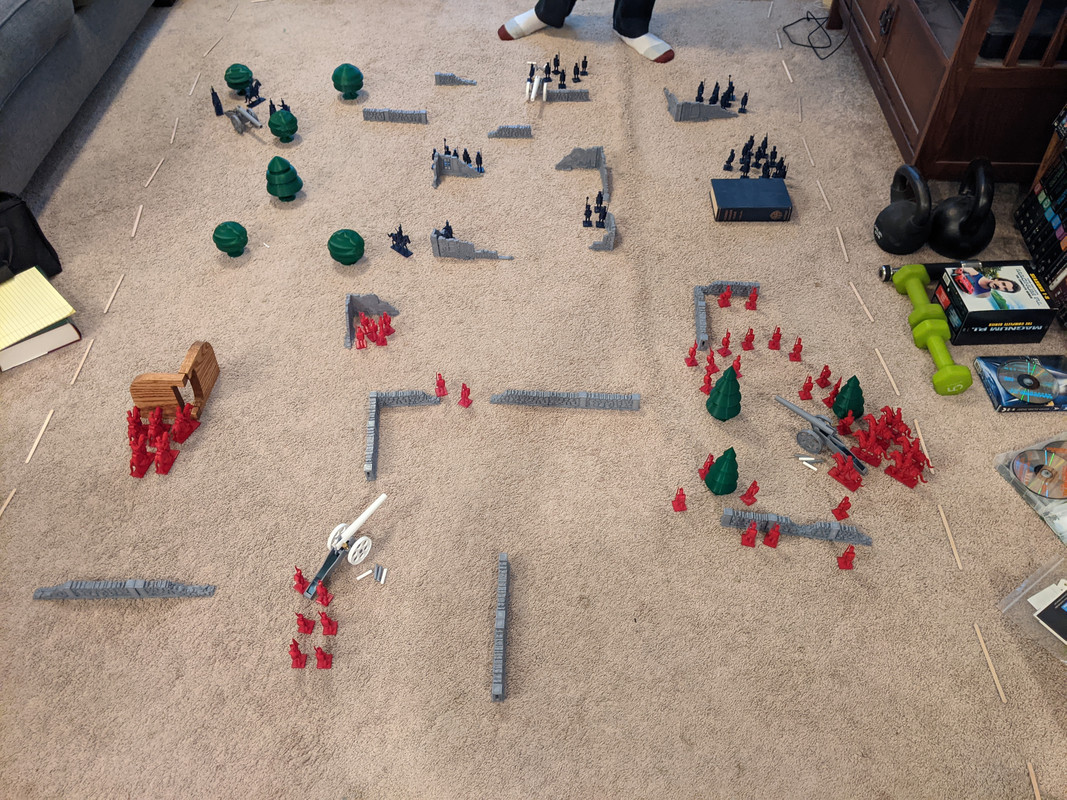
The red and blue armies meet at the ruins of Chopinburg House, a manor on the Continent destroyed in an earlier battle, and a vital point in the local road network.
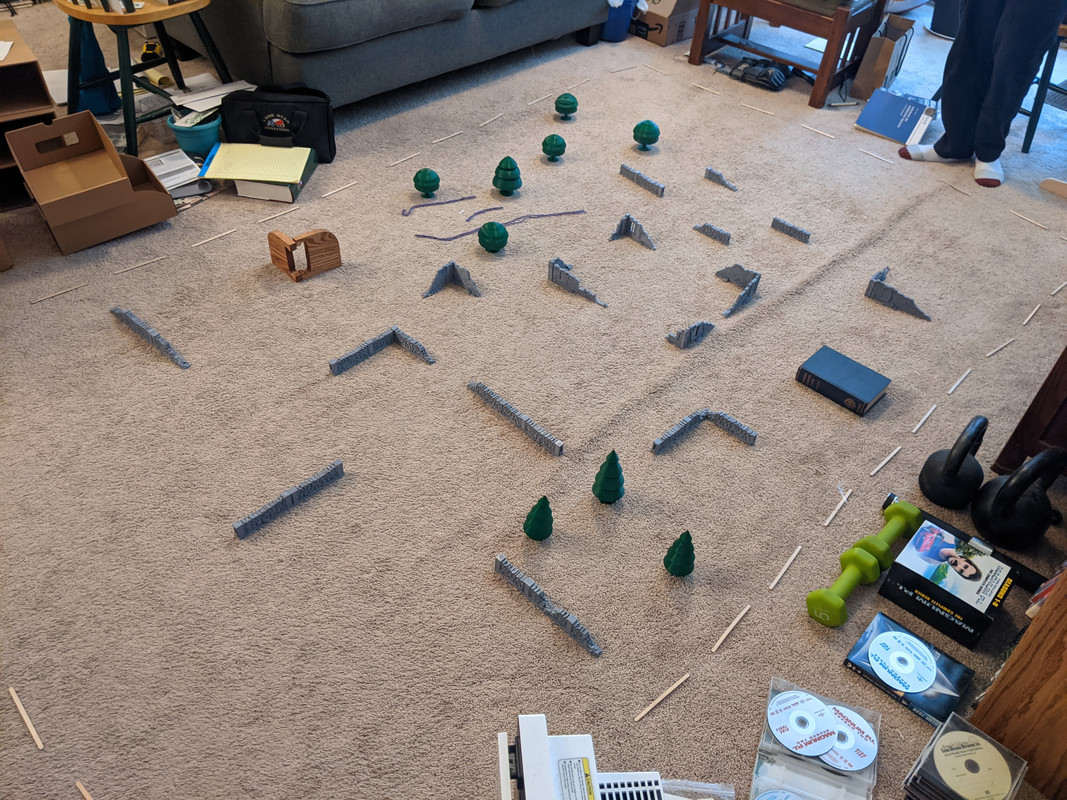
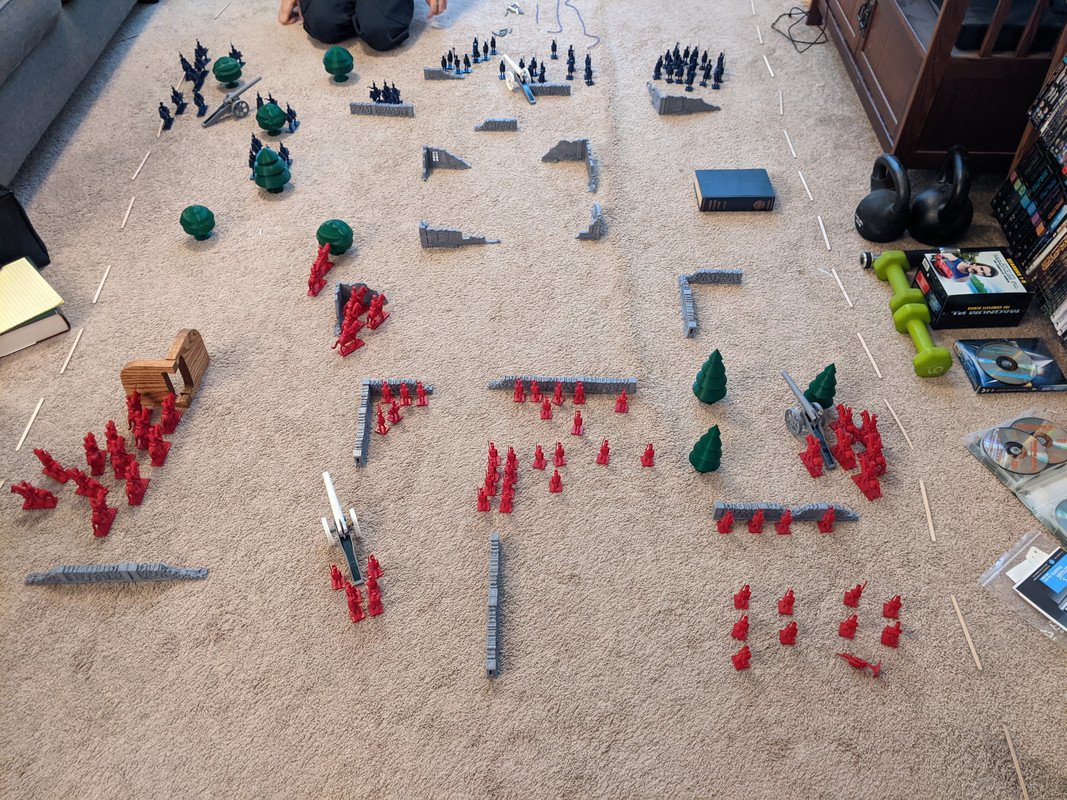
North is to the upper right. I’m controlling the red forces; parvusimperator has the blue.
The central feature of the battlefield is Chopinburg House itself, just north of the center of the field. To the west of Chopinburg House is the orchard, and south of the orchard is the chapel. On the north and south of the house are the northern and southern fields, marked by stone walls. Southeast of the house is Chopinburg Wood, and the various remaining ruins and buildings (one represented by a book) are various outbuildings for the manor itself.
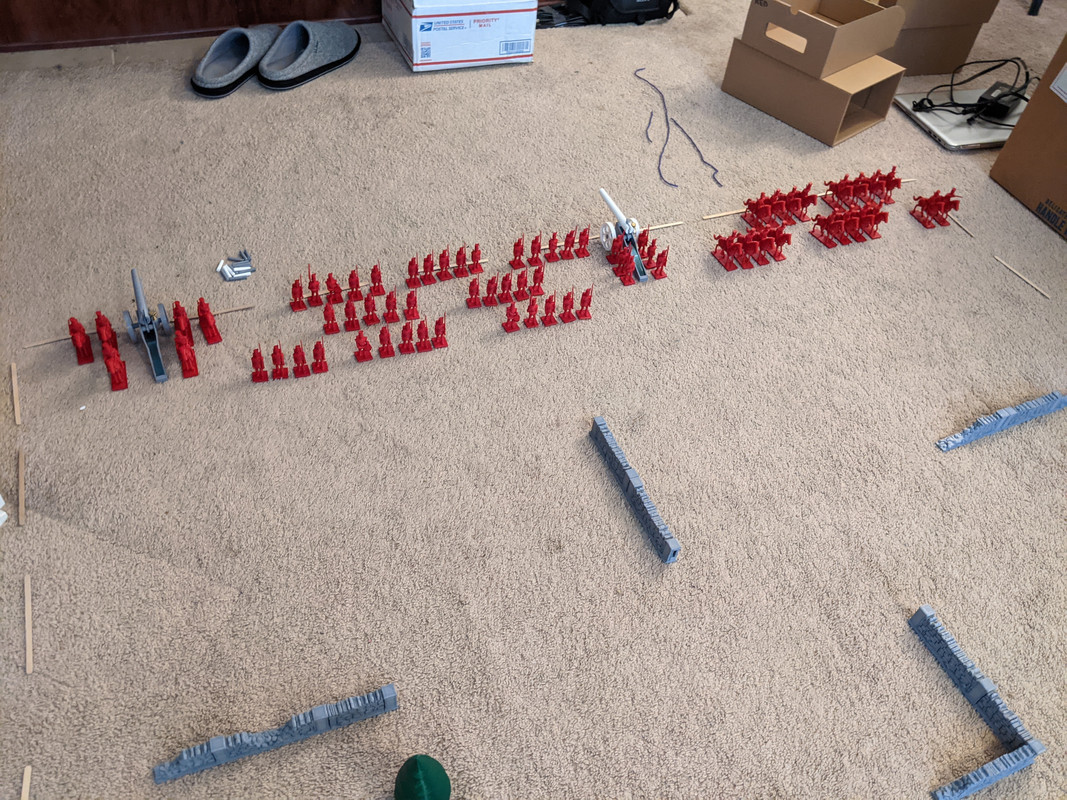
The red forces deploy in what’s becoming my traditional formation: infantry in staggered files to make a harder artillery target, cavalry striking force on the left, one unit of horse artillery and one of foot artillery.
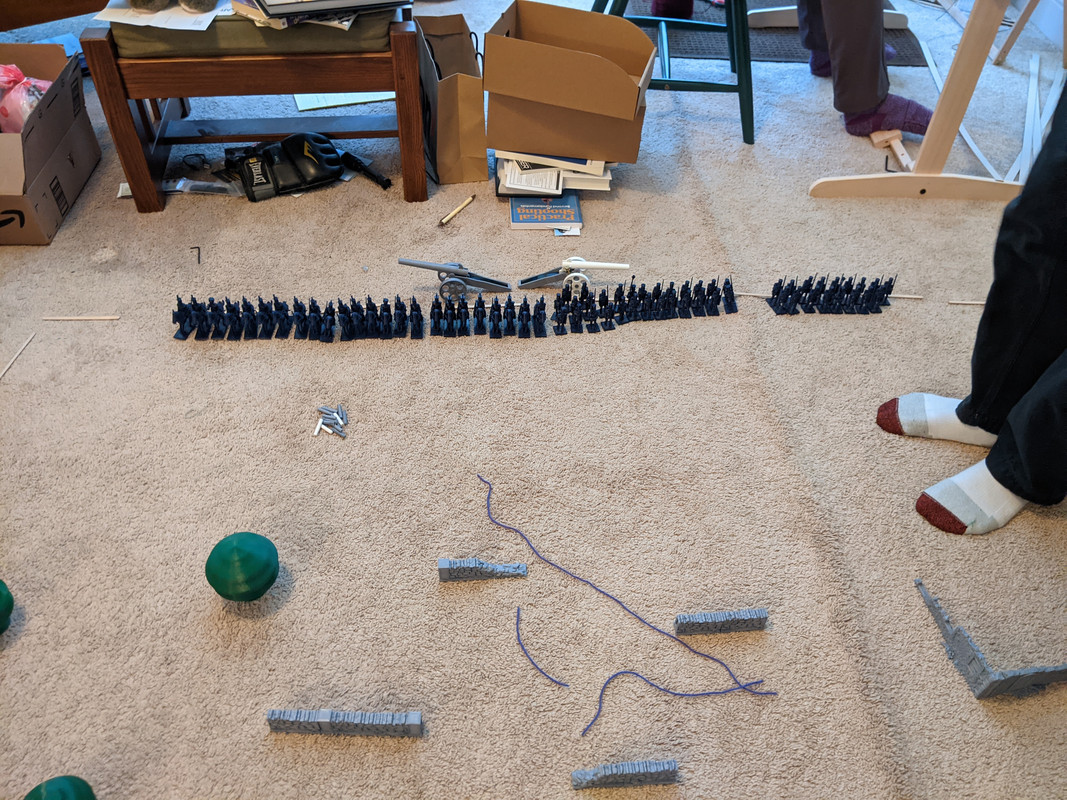
Parvusimperator’s deployment is ‘blob’, which is faster to set up and doesn’t make much difference beyond aesthetics. His cavalry is largely concentrated on his right, opposite my left.
My opponent, given that this is his first game, chose to defer moving first.
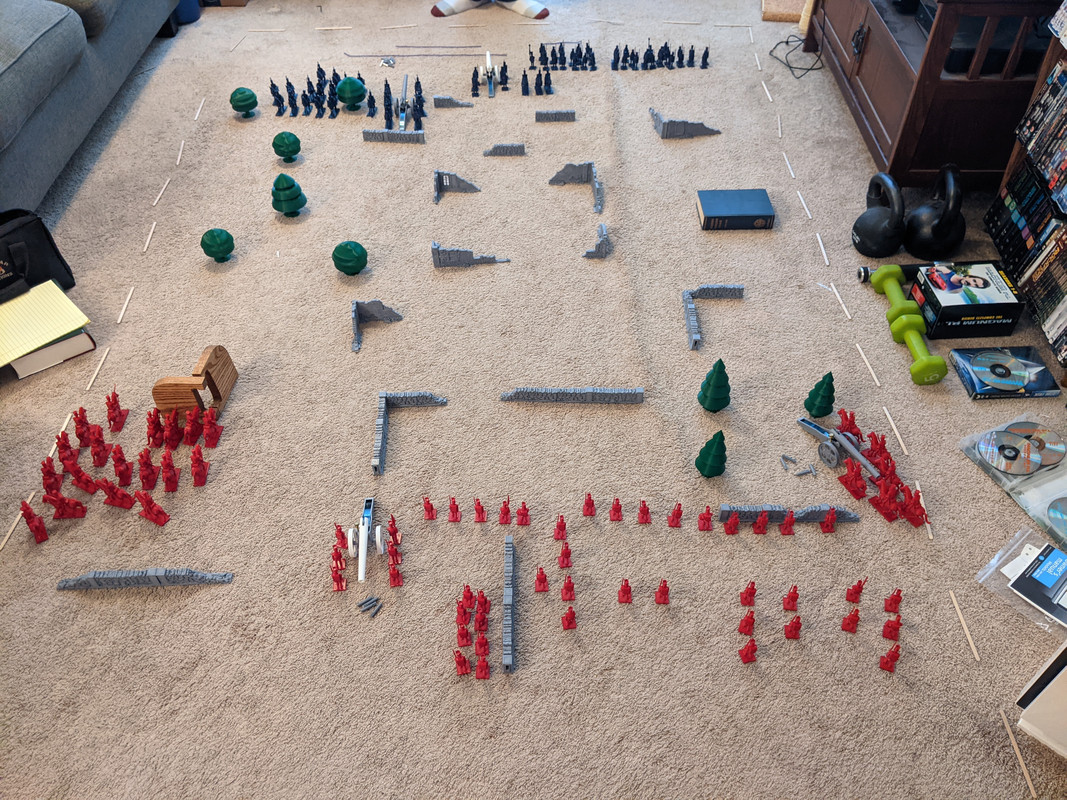
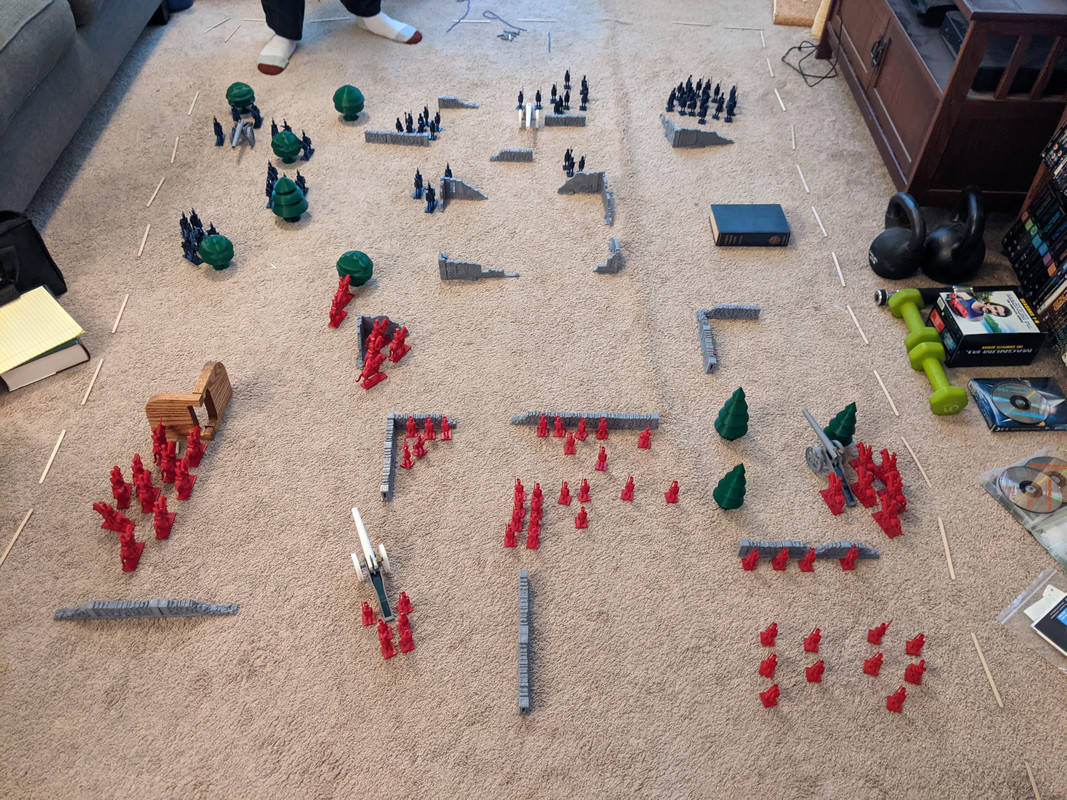
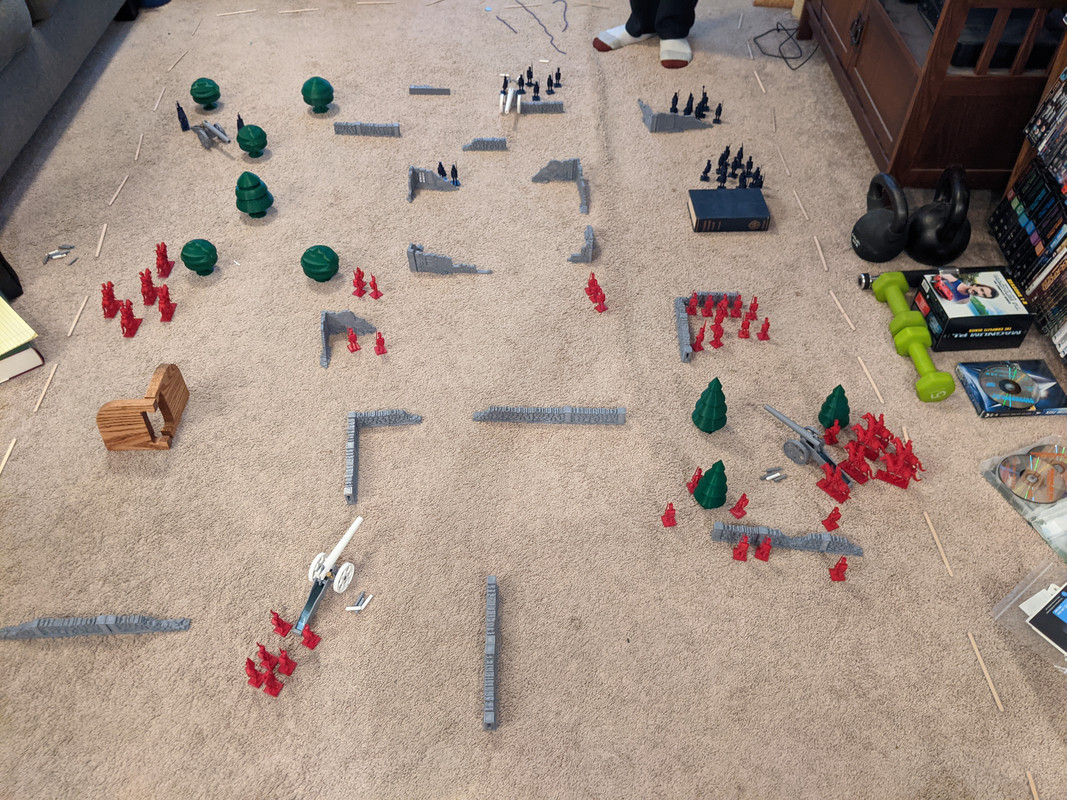
One and a half rounds in, I’ve moved twice and parvusimperator has moved once. My artillery has reached the positions where it’ll spend most of the game: my horse artillery gun, on the strength of its faster movement, takes up position in Chopinburg Wood, while my infantry gun sets up in the southern fields.
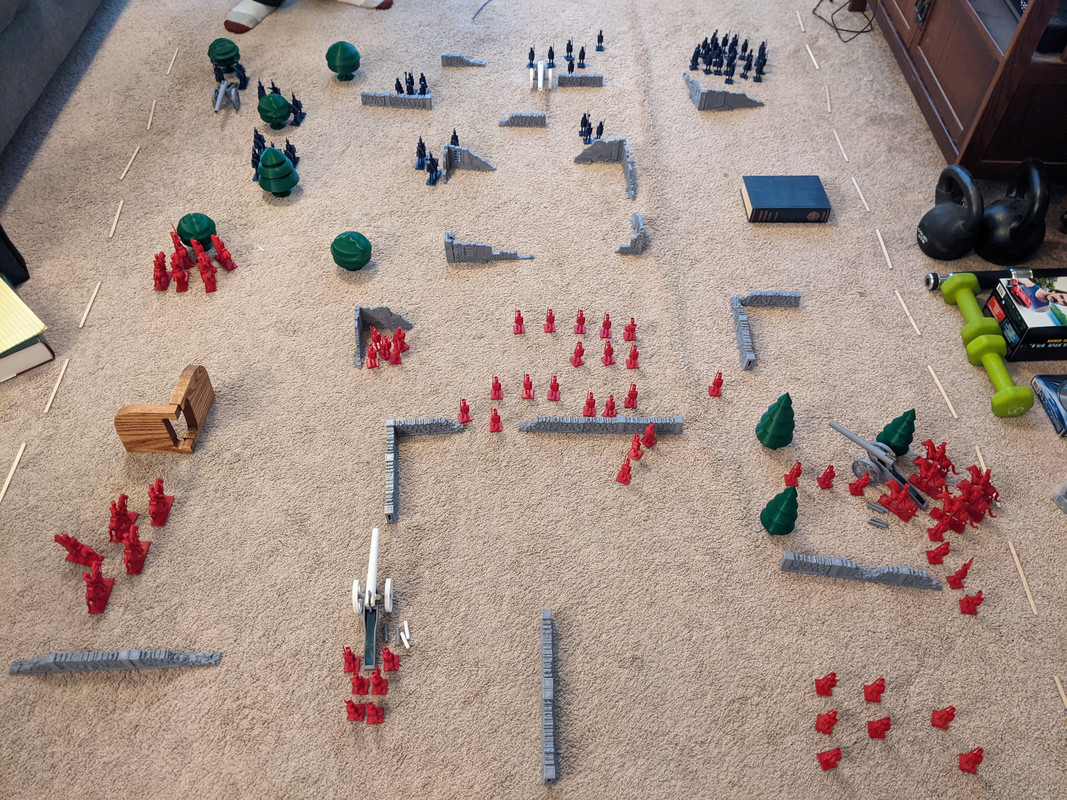
This picture is two turns later, halfway into round 3: parvusimperator has had two turns, and I’ve had three, so my artillery has opened up. Lucky shooting on my part knocks out a number of his cavalrymen on my left, while the gun in the wood hits a few of his men in the northern fields.
The enemy gun on my left returned fire, clearing out a few of the cavalry massing behind the chapel. Heavy but ineffectual fire from parvusimperator’s center gun hits the stone wall sheltering my center infantry repeatedly, but there are no casualties.
In the meantime, parvusimperator moves some of his cavalry up, obscured from my guns by the shelter of the orchard.
Our first melee! My cavalry at the chapel, along with the detachments that pushed forward therefrom last turn, charge parvusimperator’s squadron in the orchard, eliminating it. My artillery has a poor turn, only accounting for a pair of infantry.
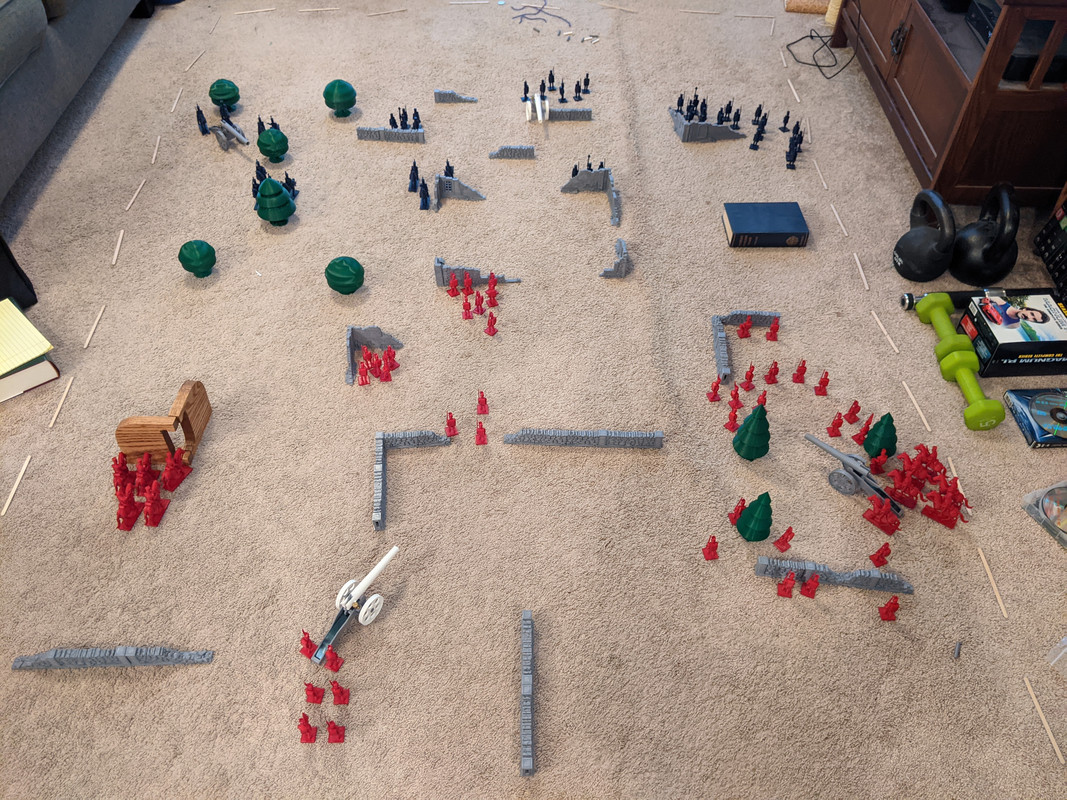
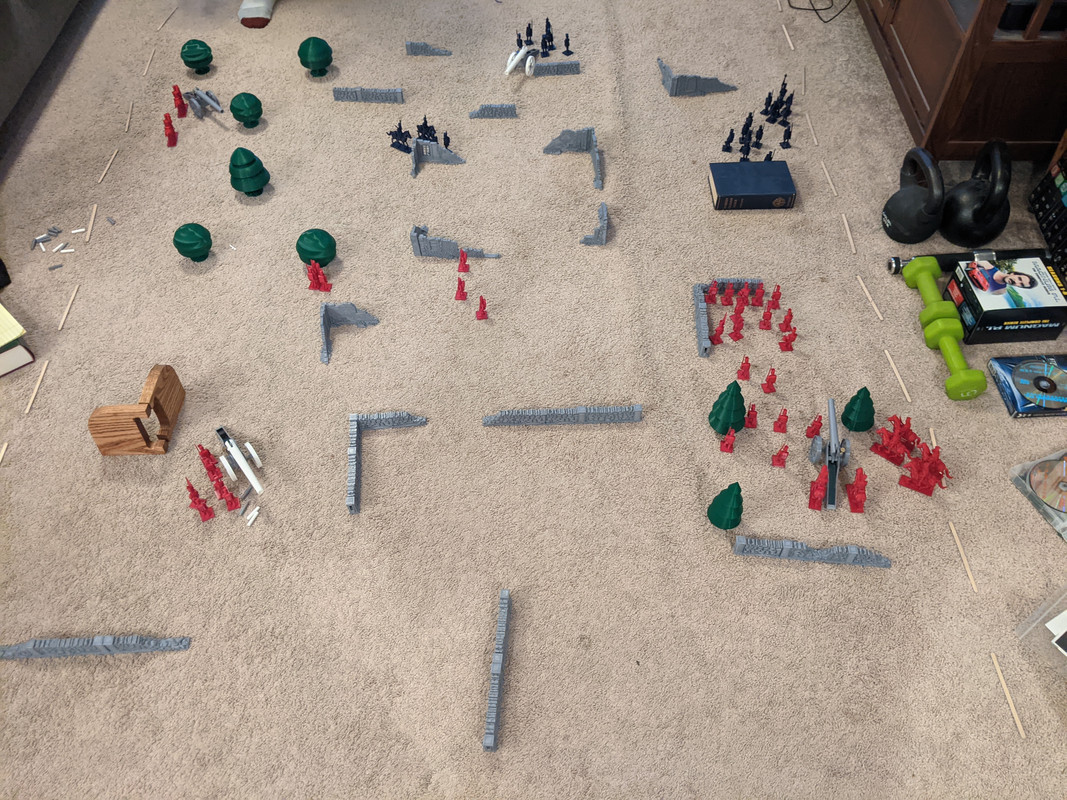
From the last photo to this one, it’s a gap of two turns again. Parvusimperator has begun to advance on my right, sheltered from my guns by the eastern outbuilding. My center gun did take some shots at the advancing blue infantry, but had little effect.
The biggest story of this round was the utter annihilation of my advance cavalry force: parvusimperator’s center gun, with a single shot, took down five horsemen, domino-style. My five remaining cavalry on the left hunker down behind the chapel, while my center infantry advance toward the manor proper, taking cover as the blue guns turn in their direction. I’ve begun to move men north of Chopinburg Wood, arraying them to meet parvusimperator’s impending attack.
Another melee: parvusimperator’s cavalry at the orchard and the northern wall of the ruins charge my infantry at the southern edge of the manor, after artillery fire weakens them sufficiently for the charge to succeed. On the other flank, his infantry gather behind the outbuilding at Chopinburg House, preparing to advance on my right.
My artillery opens the turn with a key victory: my gun in Chopinburg Wood disables the enemy gun in the orchard. My other gun chips in by taking out parvusimperator’s detachment advancing through the ruins, hitting individual infantrymen three of four times—accurate fire!
With the gun in the orchard out of action, I’m free to do two things: first, my cavalry at the chapel makes a run for it, hoping to reach and capture parvusimperator’s orchard gun. Second, my infantry sheltering in the southern outbuilding charge parvusimperator’s two remaining cavalrymen who made the attack last turn, killing them.
Regrettably, I missed taking a picture after parvusimperator’s turn again, so this is another two-turn gap. It’s also where we decided to end the battle by mutual agreement.
Parvusimperator’s center gun, which earned its keep many times over, hit three of my five cavalry moving on the orchard gun. Even so, he decided to withdraw: his cavalry on the gun were badly placed, far enough apart so that I could engage one without engaging the other, and sheltered from the center gun to boot. My gun in the wood, with some very careful aiming, managed to put a few shots into the infantry massed behind the eastern outbuilding, reducing their strength to the point that parvusimperator no longer felt comfortable making an attack into the teeth of the gun. We tallied the forces on the field, and I emerged the victor with a score of 67 to 35 (counting the partially-captured gun for half).
At this point, neither of us thought we could push our advantage to a decisive victory. According to Wells’ rules, I could have made him play out the retreat, giving myself the chance to reduce his forces further. This would have been deeply unsporting, however, since I realized that I never actually put ‘how to retreat’ in my rewriting of the rules. Oops.
Here are some glamor shots of the final state of the battlefield.
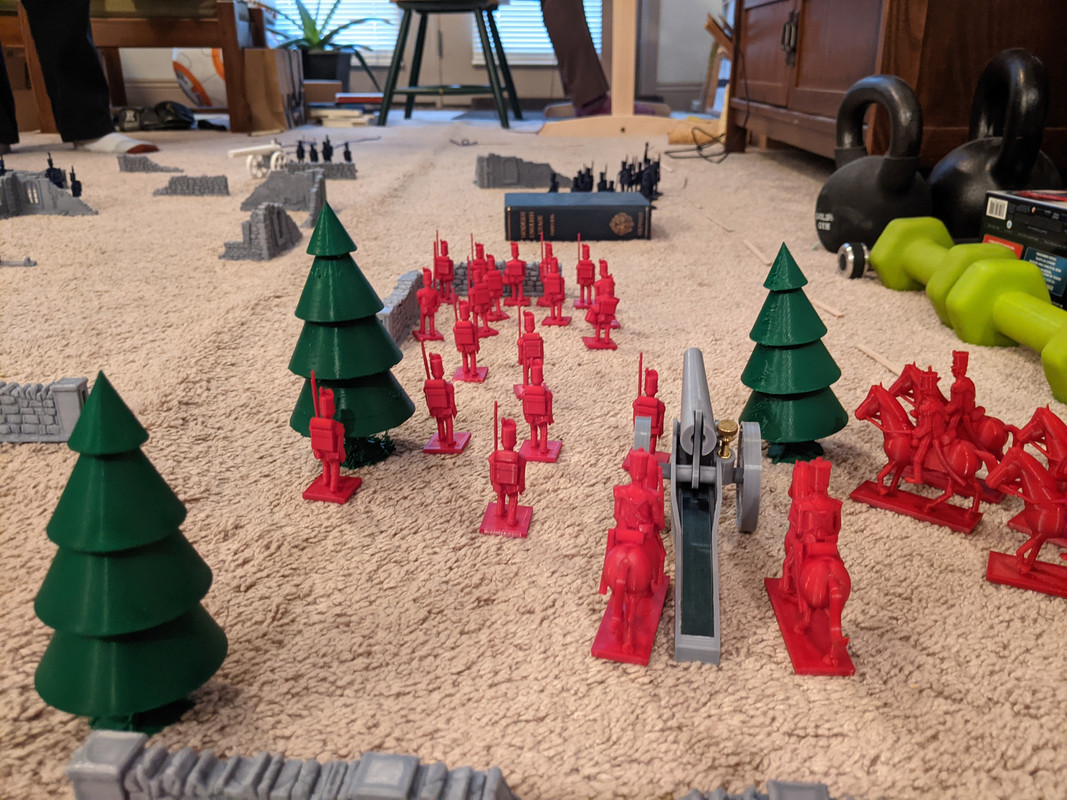
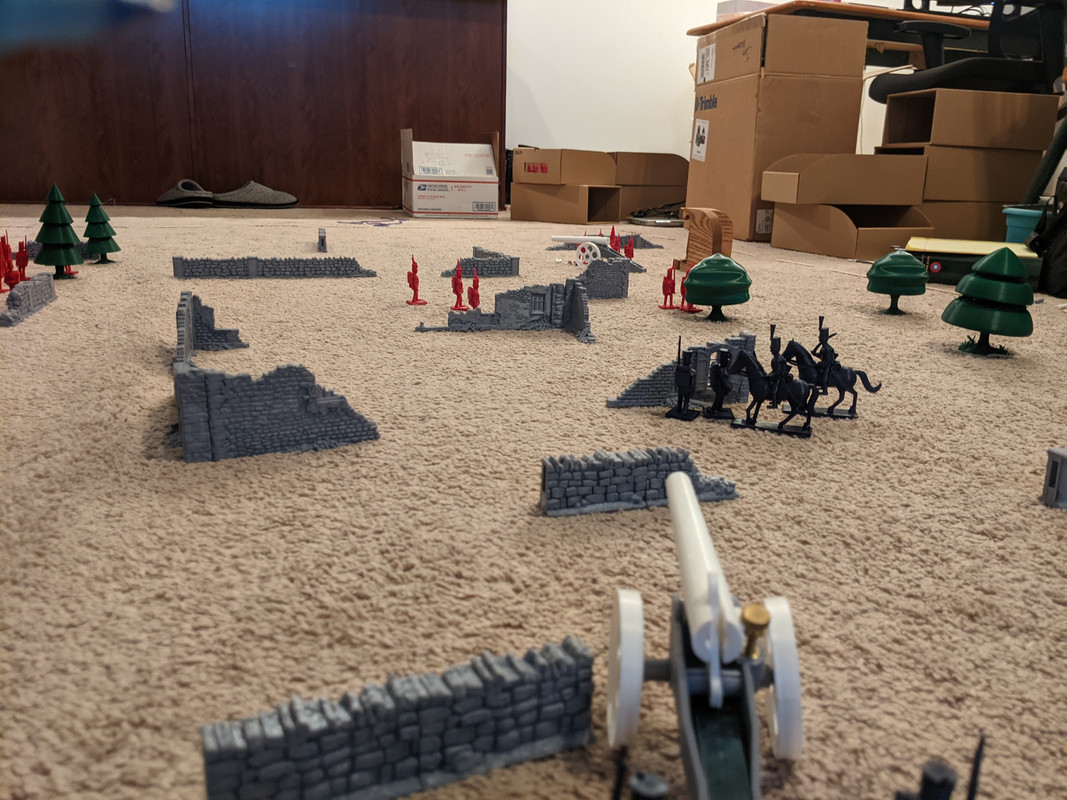
Looking north from my position in Chopinburg Wood, the bastion that survived until the end of the game.
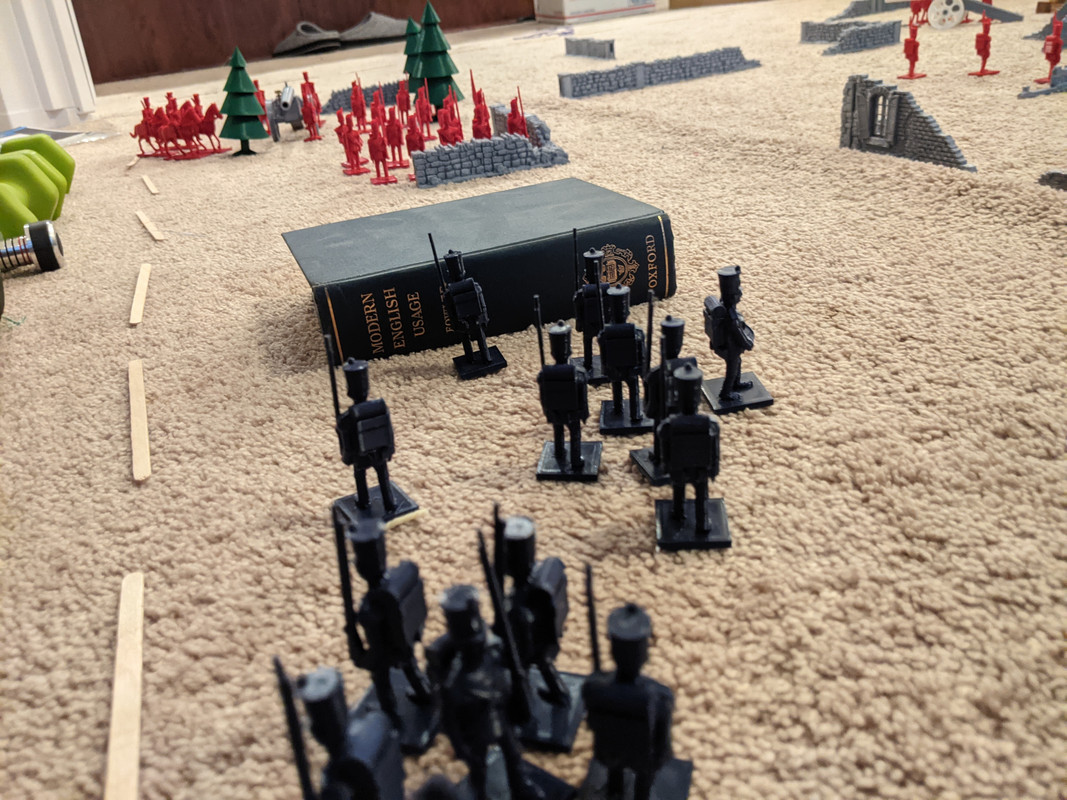 French soldiers shelter behind Modern English Usage, which we thought was funny.
The view of the field from Parvusimperator’s center gun. A commanding position, fire from which adroitly and repeatedly stymied my attempts to assault in the center and down my left.
And a quick summary GIF: 
Nearly everything we use is 3D printed, and the rest is cheap (a pack of 200 coffee stirrers for marking boundaries, string for measuring distances, the occasional book we already have). Lately, I’ve taken to putting Warhammer battle reports on as background noise at work, and there’s some amount of enjoyment to be had tallying up what a 2000-point army costs and realizing it’s more than the 3D printer and all the filament I’ve purchased to date.
Here are the rules we’re playing under. They’re Wells’ originals (everything under the Basic Game heading, at least), along with some as yet untested amplifications later on.
edit: fixed images…