Possibly the longest post I have done to date, as far as a Let’s Play entry goes. Buckle on up because we have a smorgasbord pictures and words incoming. Including some trips and tricks for hauling resources and acquiring trade contracts.
Today’s scheduled train service leaving for City of Hopes & Dreams is about to depart the station. Please ensure you have finished boarding the train and have your tickets ready for inspection by the conductor!
Let’s Play City of Hopes & Dreams - Schedules make the world go round!
Click to reveal...
It’s time for yet another entry in our Let’s Play of the City of Hopes & Dreams scenario on the PC edition of A-Train: All Aboard! Tourism. When we last met our company had just concluded acquiring the rolling stock and automobiles necessary to operate our expanded transportation infrastructure. On the agenda for today is letting our stations finish construction, scheduling some of the new vehicles we acquired recently, and a dash of wheeling-and-dealing in trade contracts.

Our first step for today will be to adjust the operation route and schedule for our preexisting electric multiple unit (EMU). Currently, the train is operating on the railway tracks linking Oma and Toyonami and thus needs to be shifted onto the railway tracks constructed for the Shin Isoya - Ajiro service.
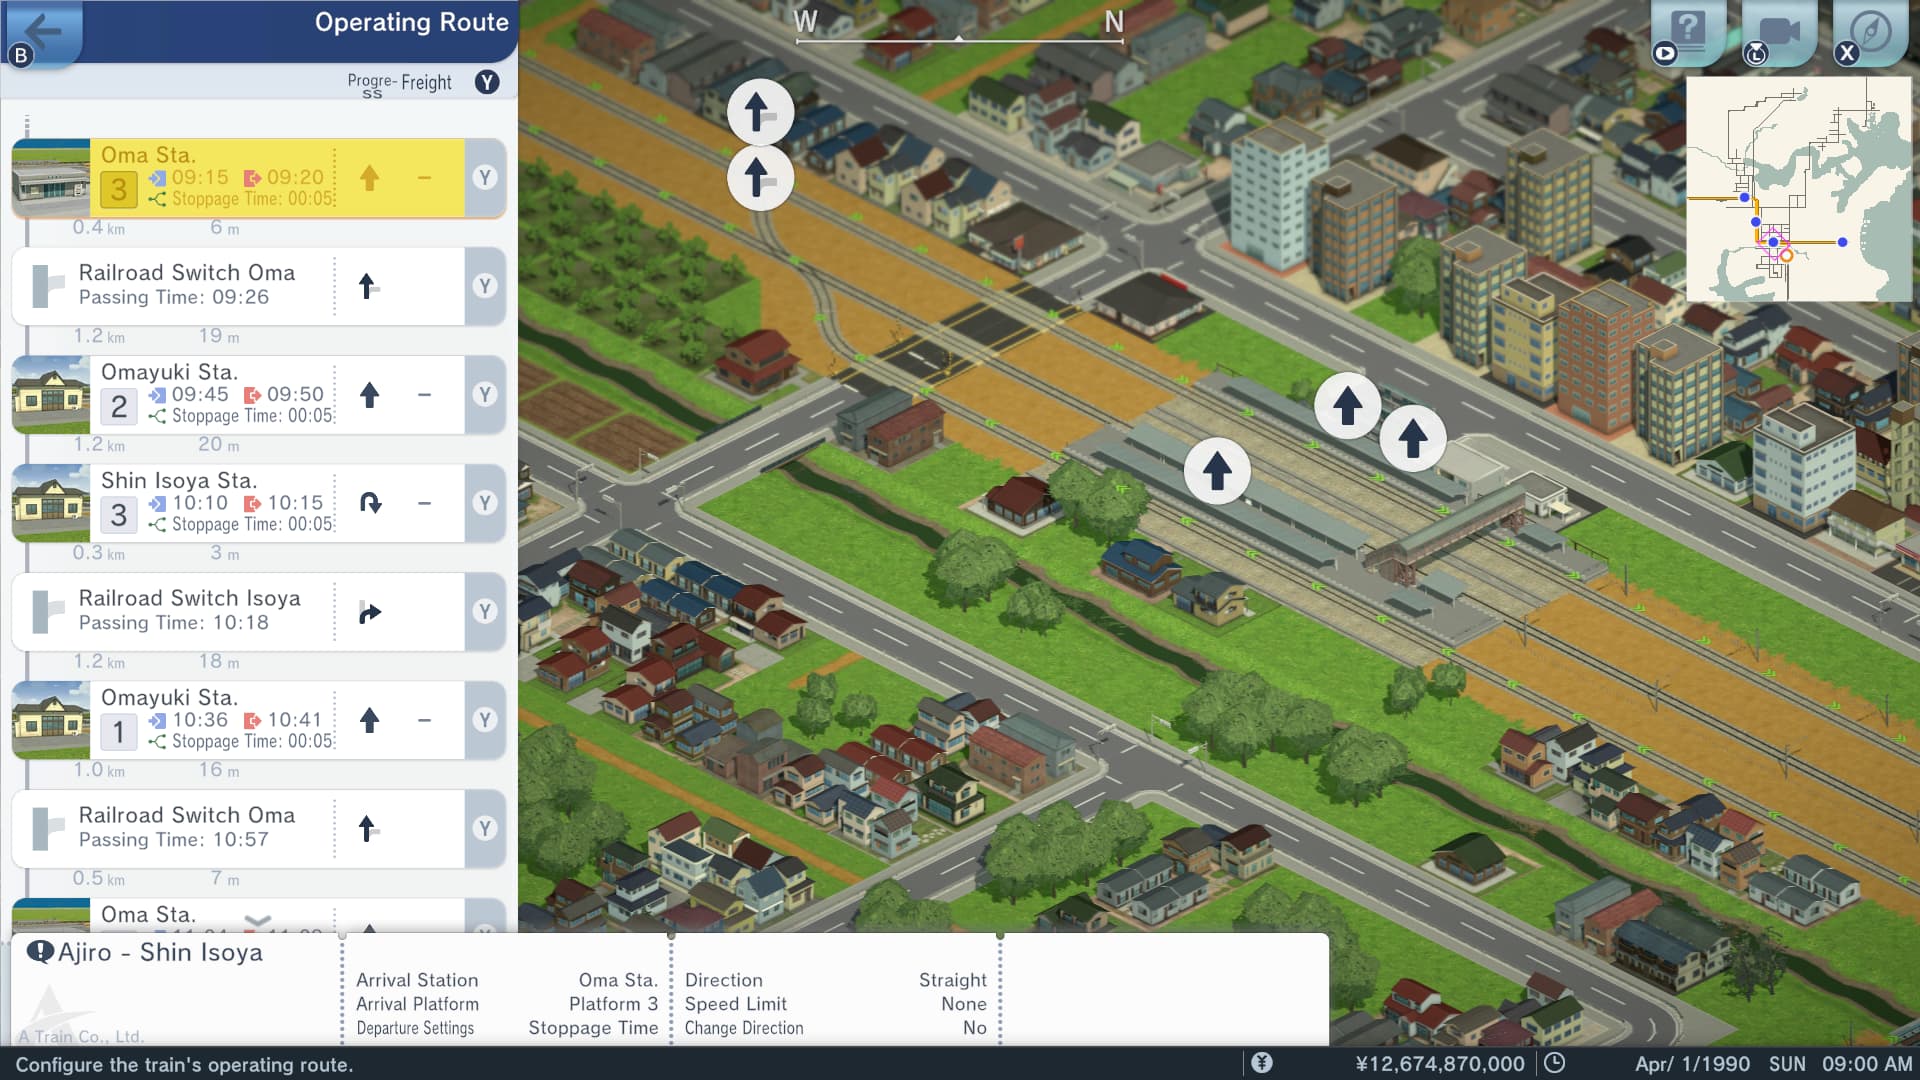
Accomplishing this will be as simple as just letting the train continue on through Platform 3 of Oma Station and onto the railing line servicing between Shin Isoya and Ajiro. While we are at Oma Station we will also adjust the departure setting for Platform 1 from Turn Back to Straight. Thereby allowing the train to travel through to the station at Ajiro.

At Ajiro we will adjust the route settings to have the train turn back upon departing the station’s solitary platform. Making sure to also set the railroad switch near Ajiro to the the Branch setting, so that our train always travels on the left-hand side of the double tracked railway line.

Then at Shin Isoya we will make sure that Platform 3 of the station is set to have the train turn back upon departure. Again making sure that the nearby railroad switch is set to have the train branch rather than going on straight ahead, to ensure all travel is conducted on the left-hand side railway track.
Finally, we give everything a double check to ensure all our route settings are correct. During this spot check we notice that the settings for Platform 2 of Oma Station have to be adjusted from Turn Back to Straight. Now that everything is in order we can move onto setting up our train’s schedule, which will begin and conclude at Oma Station each day.

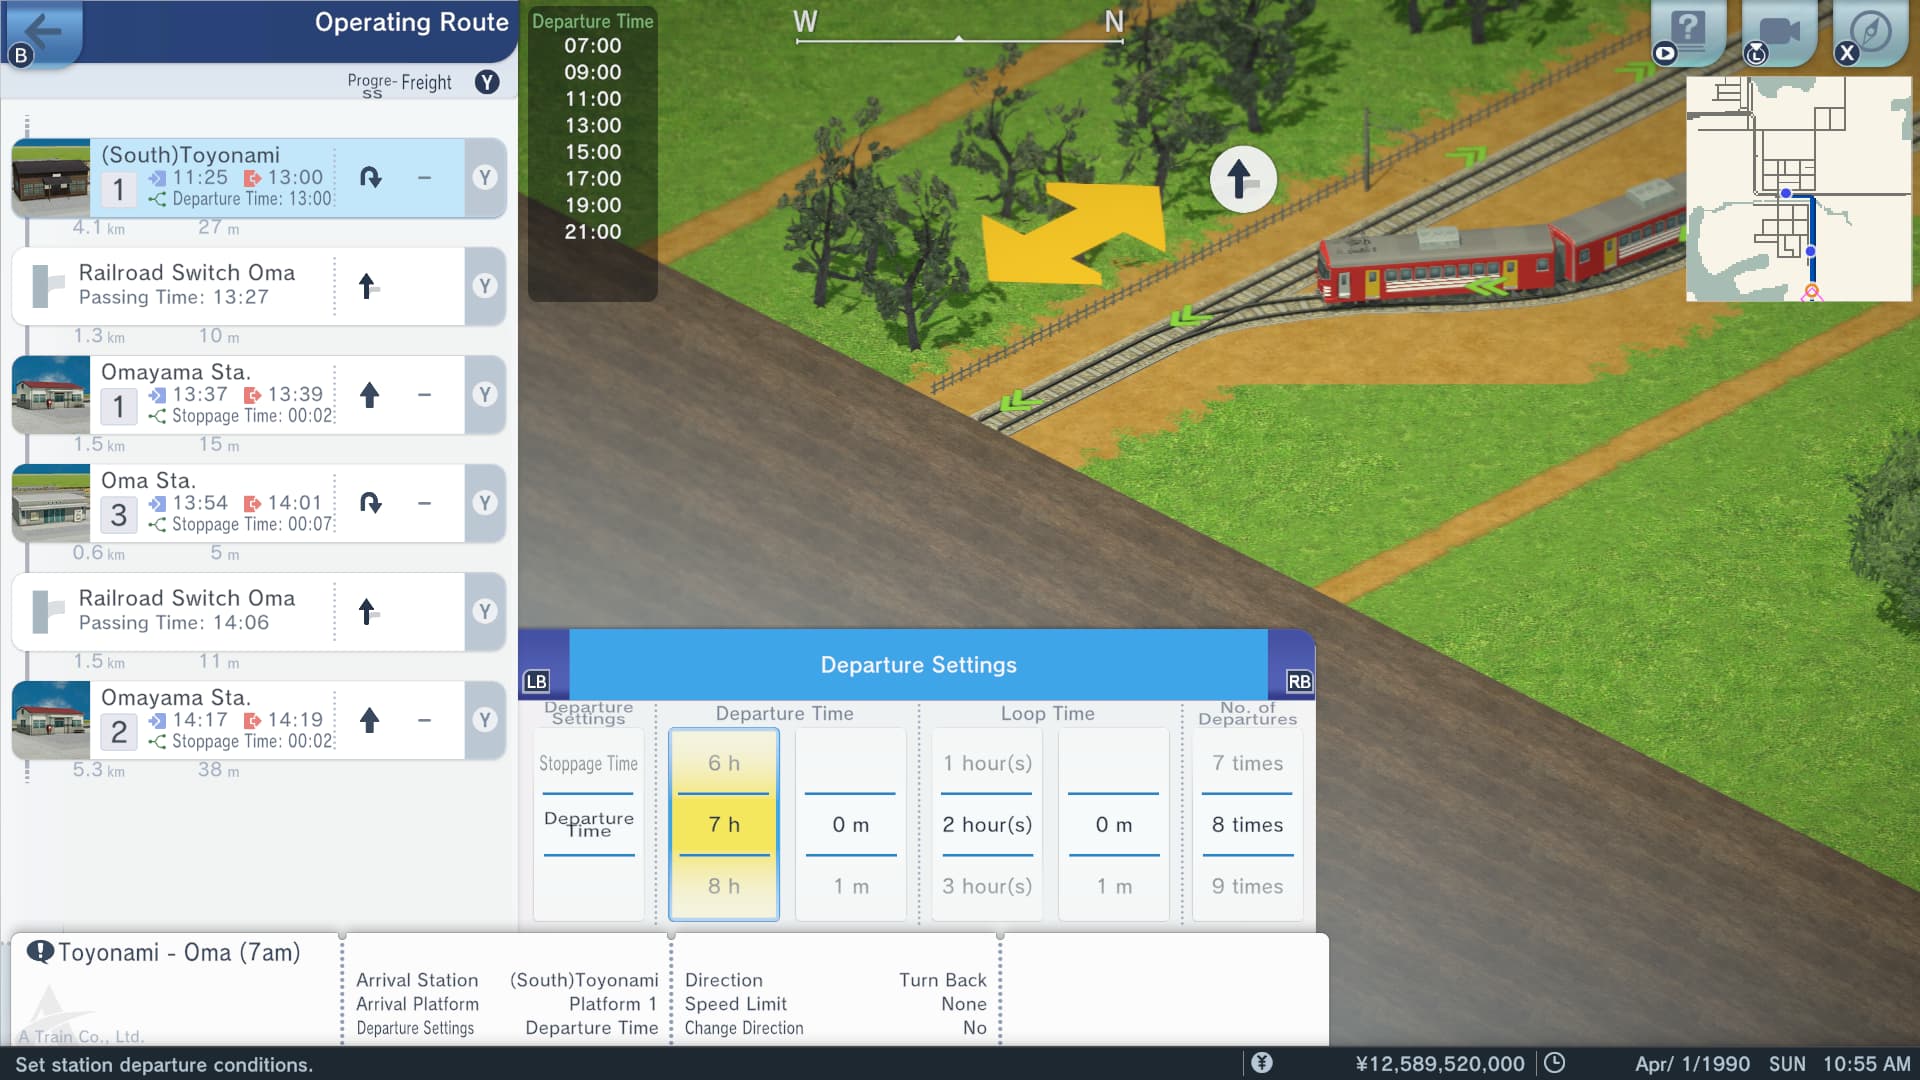
We will begin by telling our train to pass through Platform 3 of Oma Station, to let it get onto the right railway line without any delays.
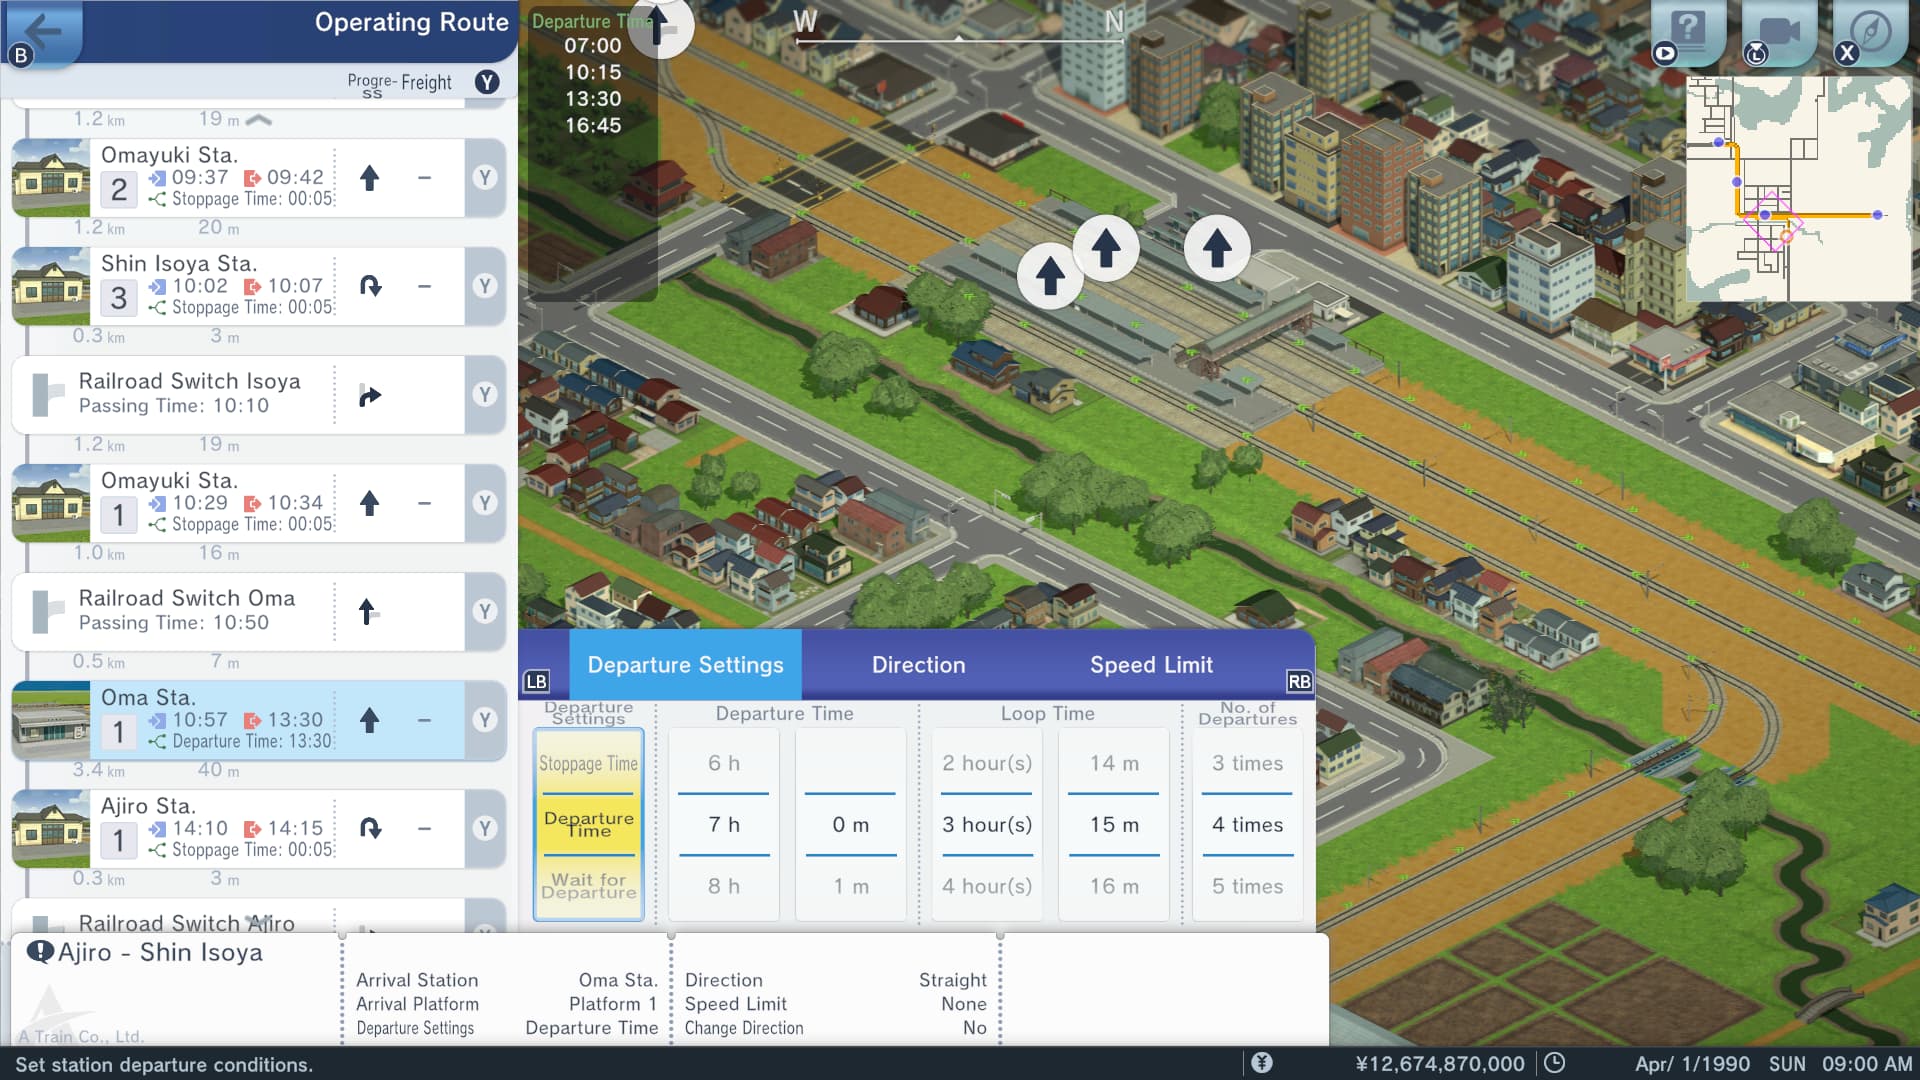
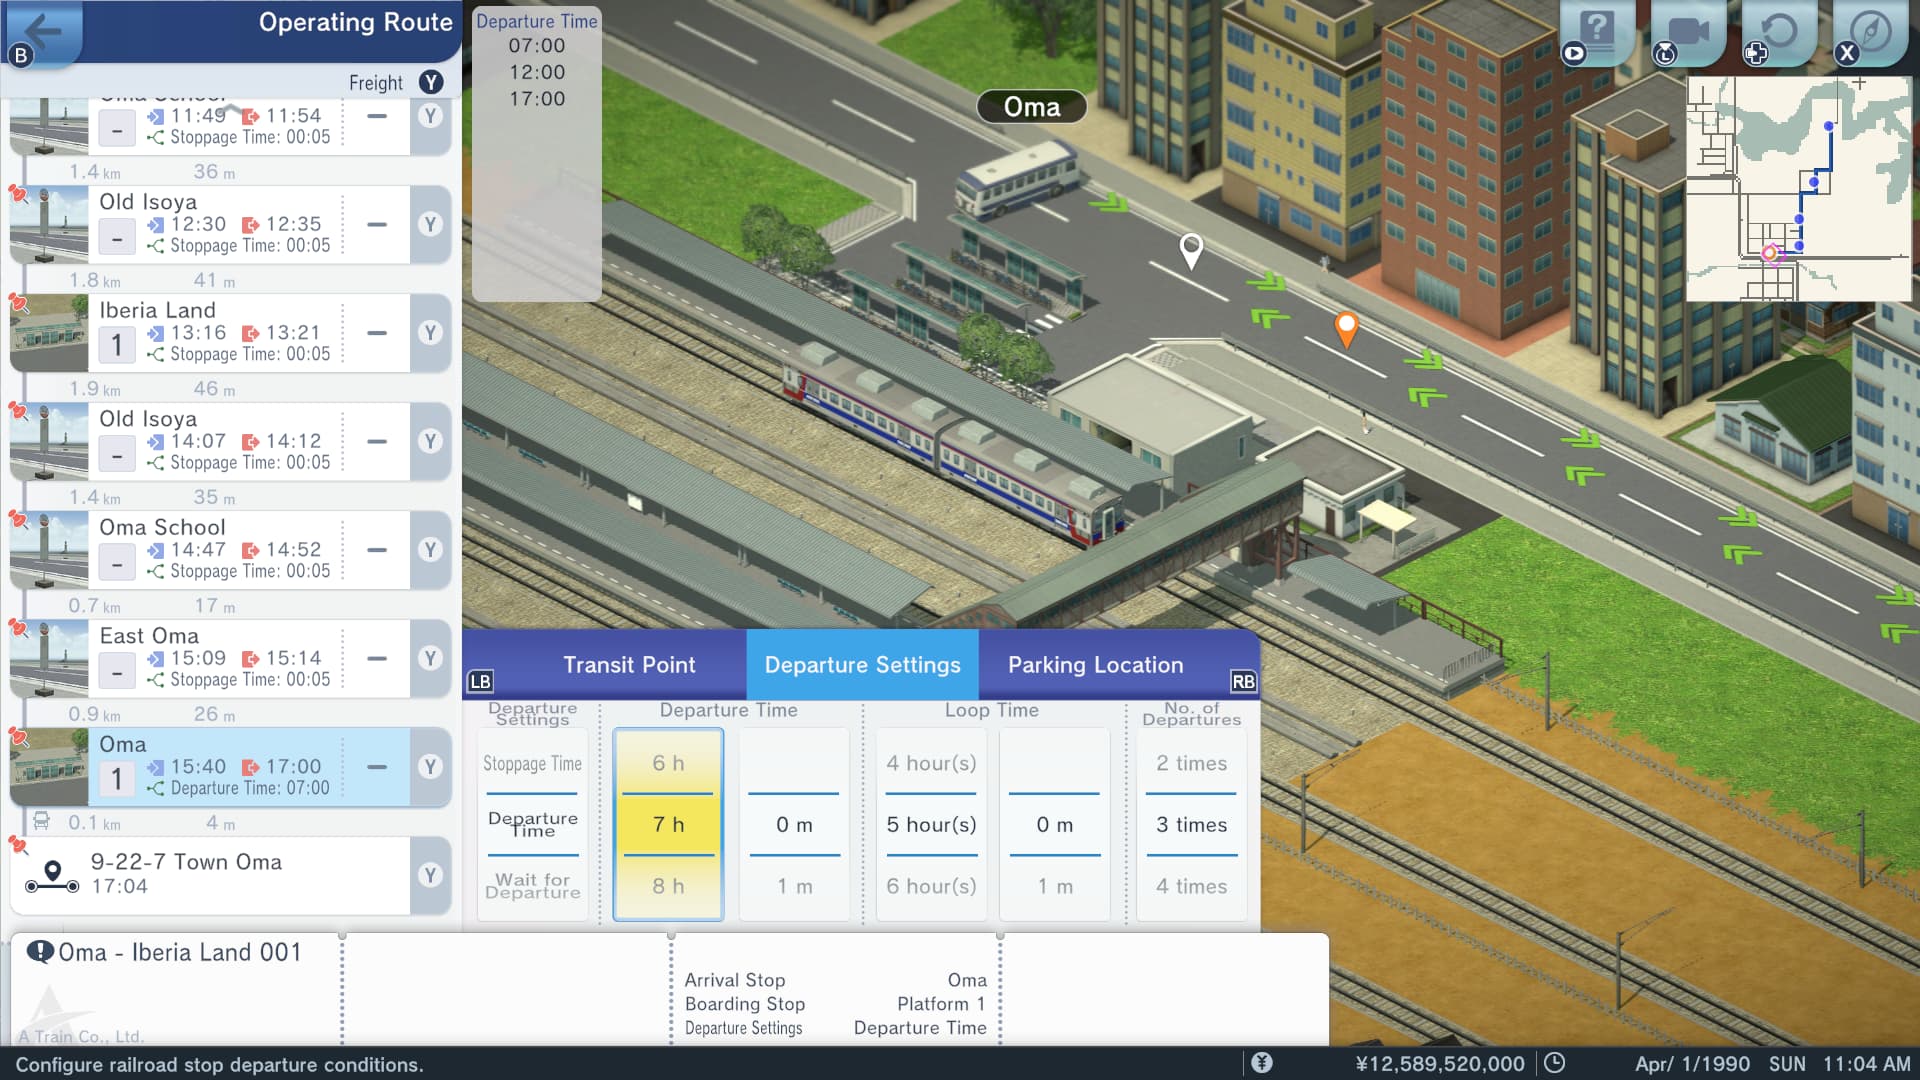
Then we will jump across to Platform 1 of Oma Station and adjust the departure settings so that they give a scheduled departure time of 7:00am. One full loop on the Shin Isoya - Ajiro service is calculated to take a duration of 3 hours and 20 minutes, inclusive of a one minute boarding (stoppage) time at Platform 1 of Oma Station. However, with some adjustment of stoppage times at other stations we can bring this time down to 3 hours and 15 minutes.
Based on the patronage our company expects to see in these early stages of the scenario we will set the number of departures to four times; giving us departure times of 7:00am, 10:15am, 01:30pm, and 04:45pm over the course of one 24-hour day. Meaning that our train will begin its daily operations from Platform 1 of Oma Station and 7:00am and subsequently conclude it at 8:00pm at Platform 1 of Oma Station.
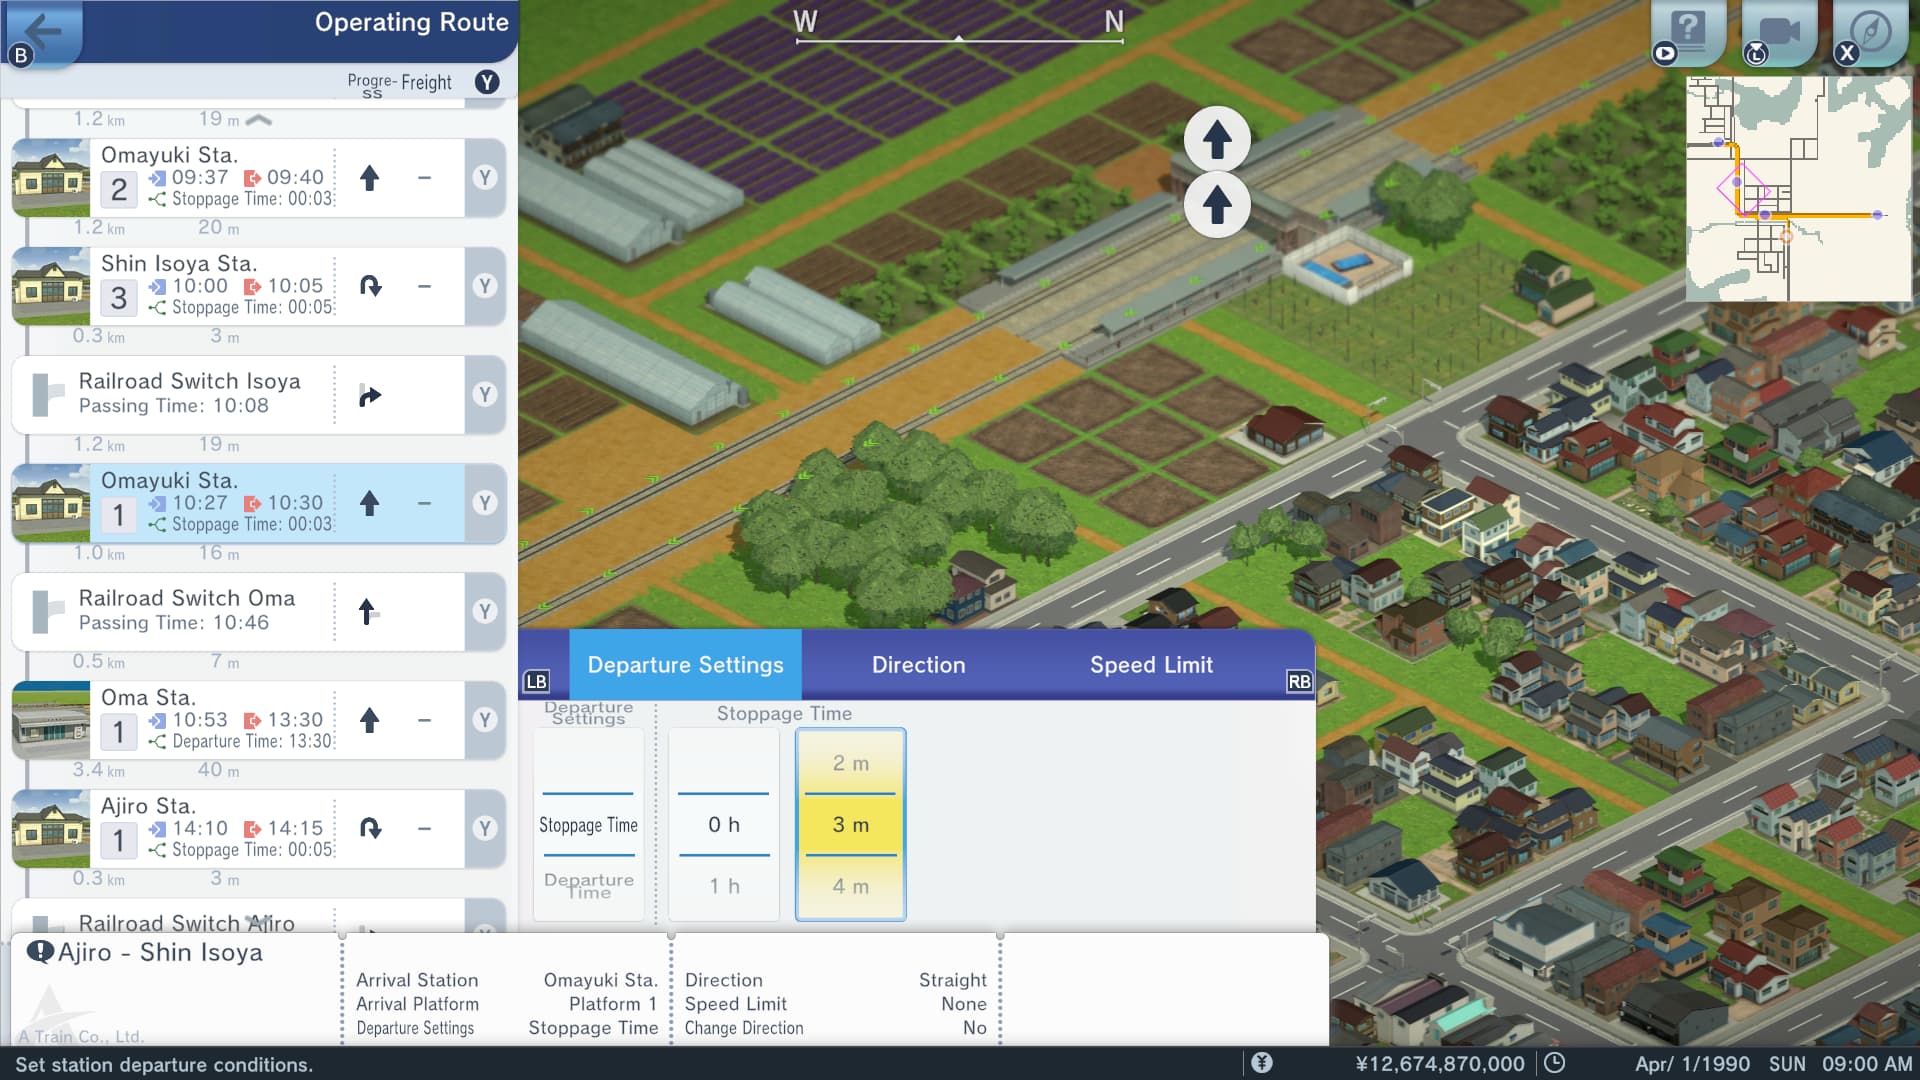
To achieve the requisite time savings we will shorten the duration of the stoppage time of both Platform 1 and Platform 2 at Omayuki Station from five minutes down to three minutes.

To allow people at Platform 1 of Oma Station sufficient time to board the 10:15am, 01:30pm, and 04:45pm departures we will also reduce the stoppage time duration of Platform 2 down from five minutes to four minutes. Thereby giving passengers on Platform 1 a period of two minutes to alight or board the train.
Currently, only Oma Station and Omayama Station are operational in the region. Our other passenger stations will not be in operational until Apr/07/1990 at the earliest. Thus, we currently have two options for our train in the meantime. It is a choice between letting it operate during this period, accruing a temporary minor operating loss, or letting the in-game clock run until it reaches Platform 1 of Oma Station and then setting the train to be out of service.

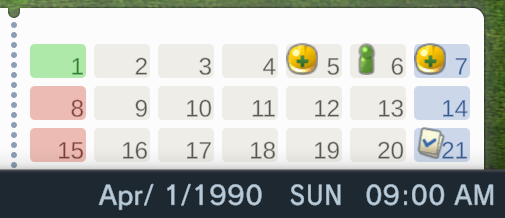
Similar to renaming objects and reordering lists, the ability to designate specific days and months of operation is yet another optional advanced setting.
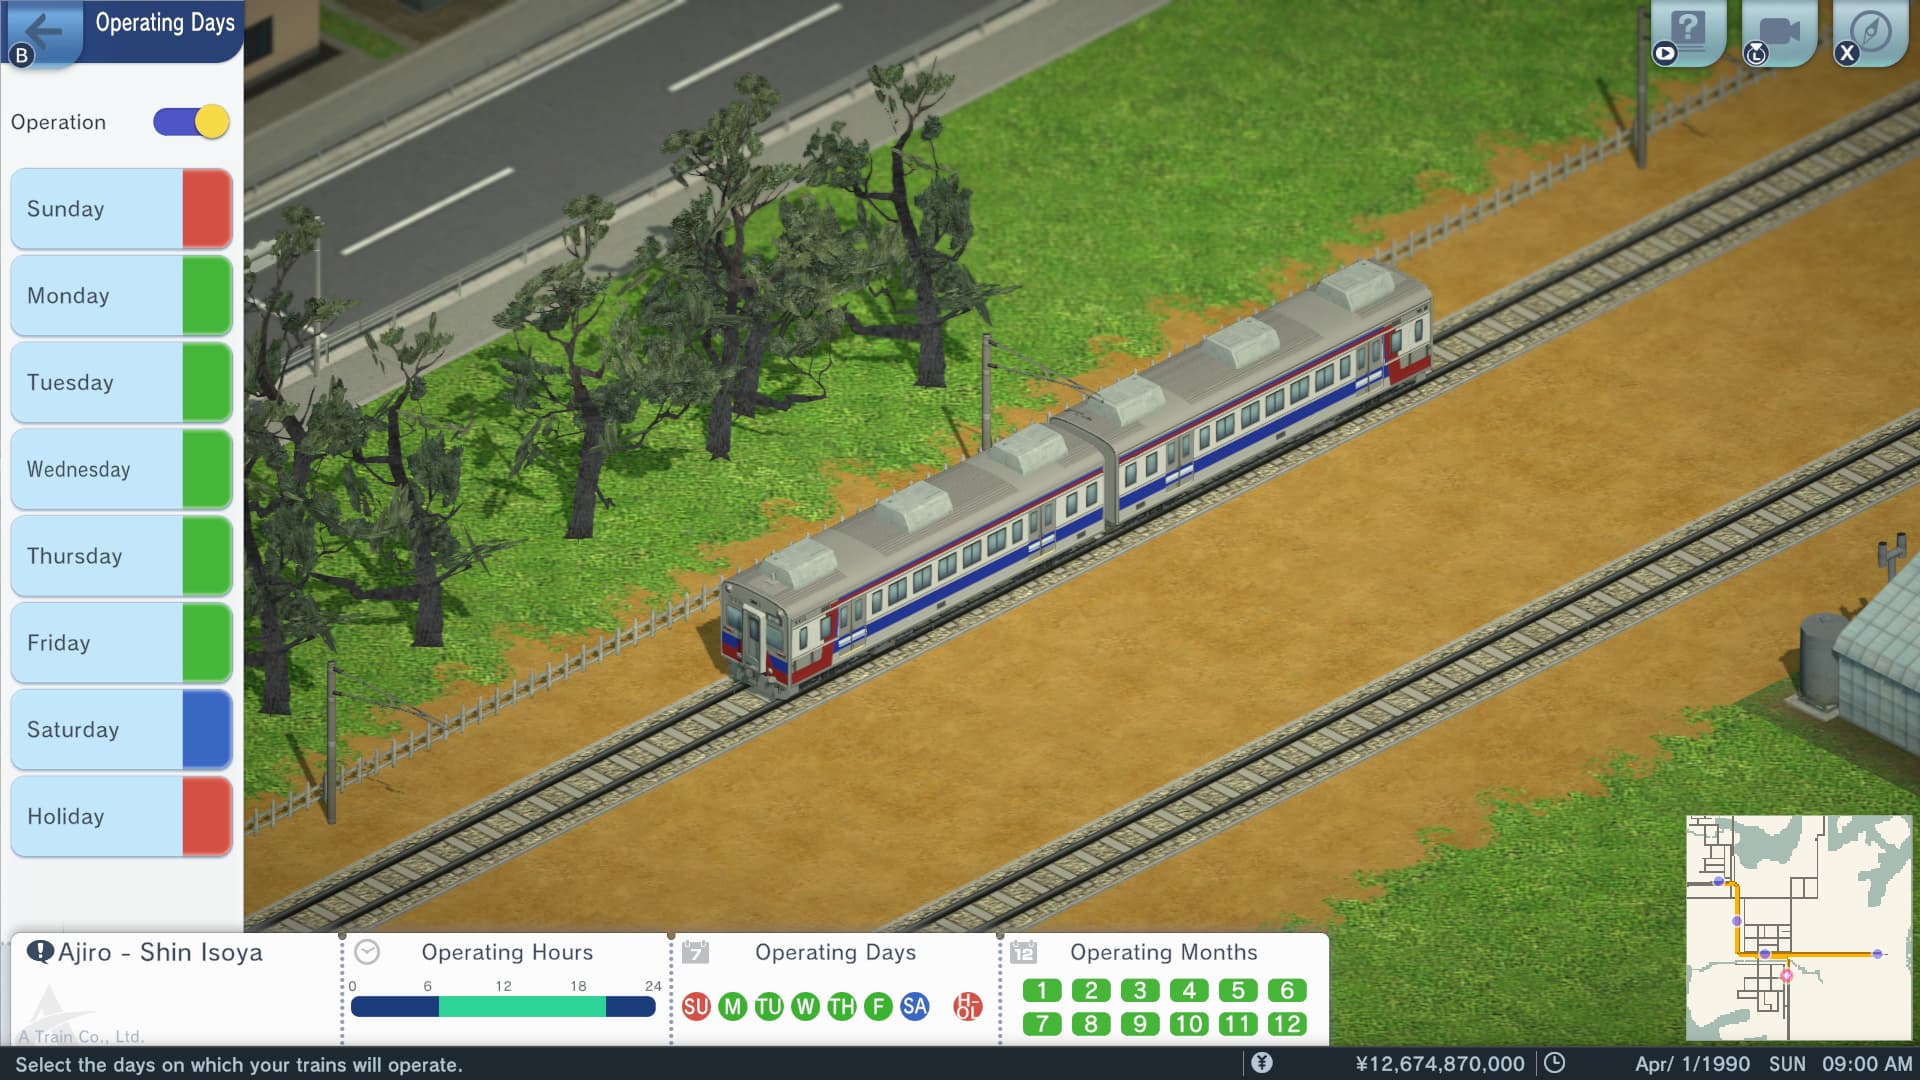
When activated, the Operating Days menu, accessed via the Operating Schedule menu, allows us to micromanage which specific days we want our individual vehicles to be operational during. Alternatively, we can also just toggle the train’s operational status if need it to be withdrawn from operation for a period of time.
Strictly not necessary for completion of any of the game’s scenarios, in my opinion. However, a very useful optional gameplay feature for people who like to construct complex transportation networks with elaborate operation schedules.

After letting the in-game clock progress until our train almost reaches Platform 1 of Oma Station, we will toggle the train’s operational status to off until Apr/07/1990. Our company is hardly going to bleed massive amounts of money if we just leave it operational, but never pass up an opportunity to showcase a gameplay feature I say.

Since the transportation links between Iberia Land and the metropolis of Toyonami to the south are already primed for active services, next we will setup our Limited Express trains. These will operate between Toyonami and Platform 3 of Oma Station. Before we can begin scheduling anything though we need to fire place our trains, at a cost of ¥950,000.

At Toyonami we will set our train to have a departure time of 6:00am each day. The simple reasoning behind this decision is that the window for tourist activity begins at 6:00am. Whilst some arguments could be made for delaying services by an hour, to begin at 7:00am, our company is interested in transporting as many tourists into the region as possible.
Currently, a complete loop of the service requires two hours and 2 minutes, inclusive of station stoppage times. However, we can adjust this down to a nice, even one hour with some adjustment of station stoppage times. We will subsequently have our train complete eight round trips during the course of a 24-hour day. The reasoning for this decision is that ridership will die down by around 10:00pm, and we want our Limited Express trains to be making as many profitable trips as possible.
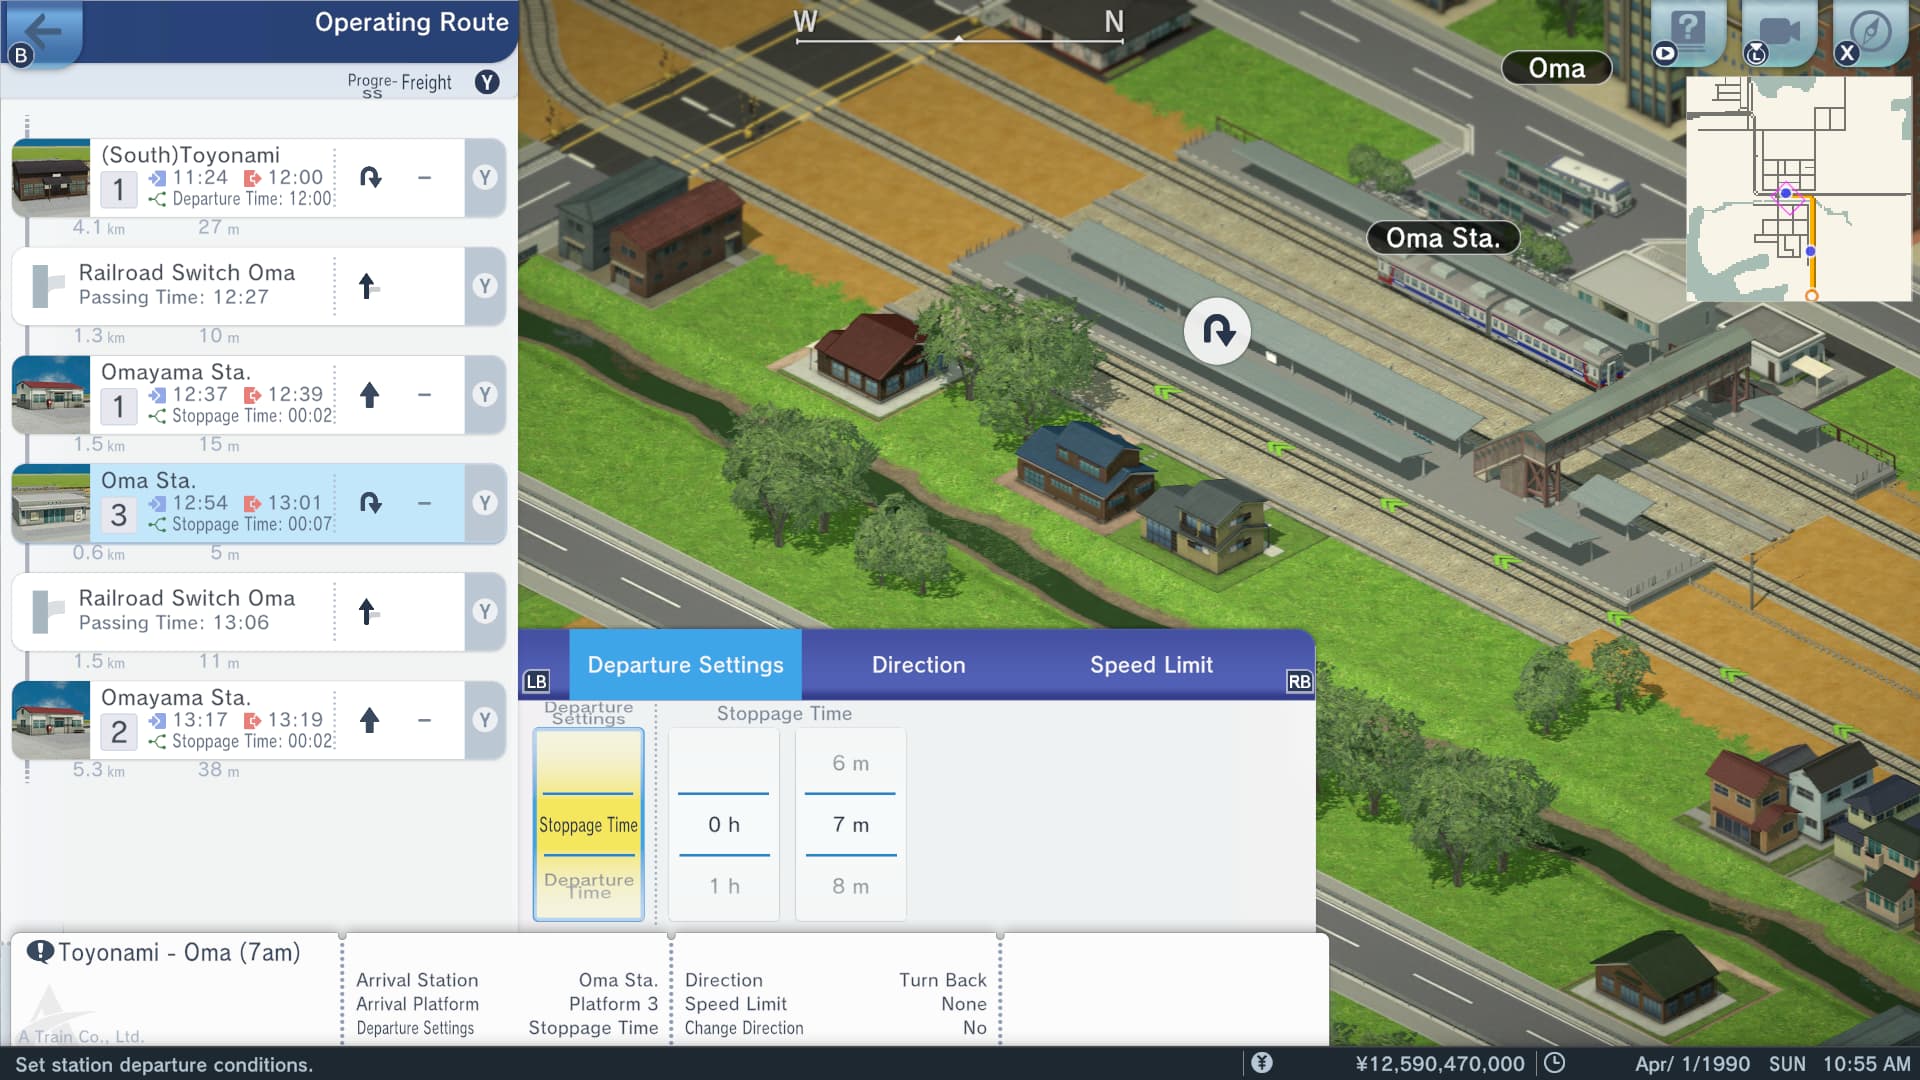
Thus, the following adjustments will be implemented to the train’s operational schedule. Firstly, stoppage time at Platform 3 of Oma Station will be increased to seven minutes, and the train set to turn back upon departure. Secondly, stoppage times at Platforms 1 & 2 of Omayama Station will be decreased from five minutes down to two minutes. Thereby, allowing tourists and other passengers at Oma Station plenty of time to catch our services to Toyonami.
Consequently, there will be a stoppage time of five minutes at Toyonami for passengers to alight or board our services.
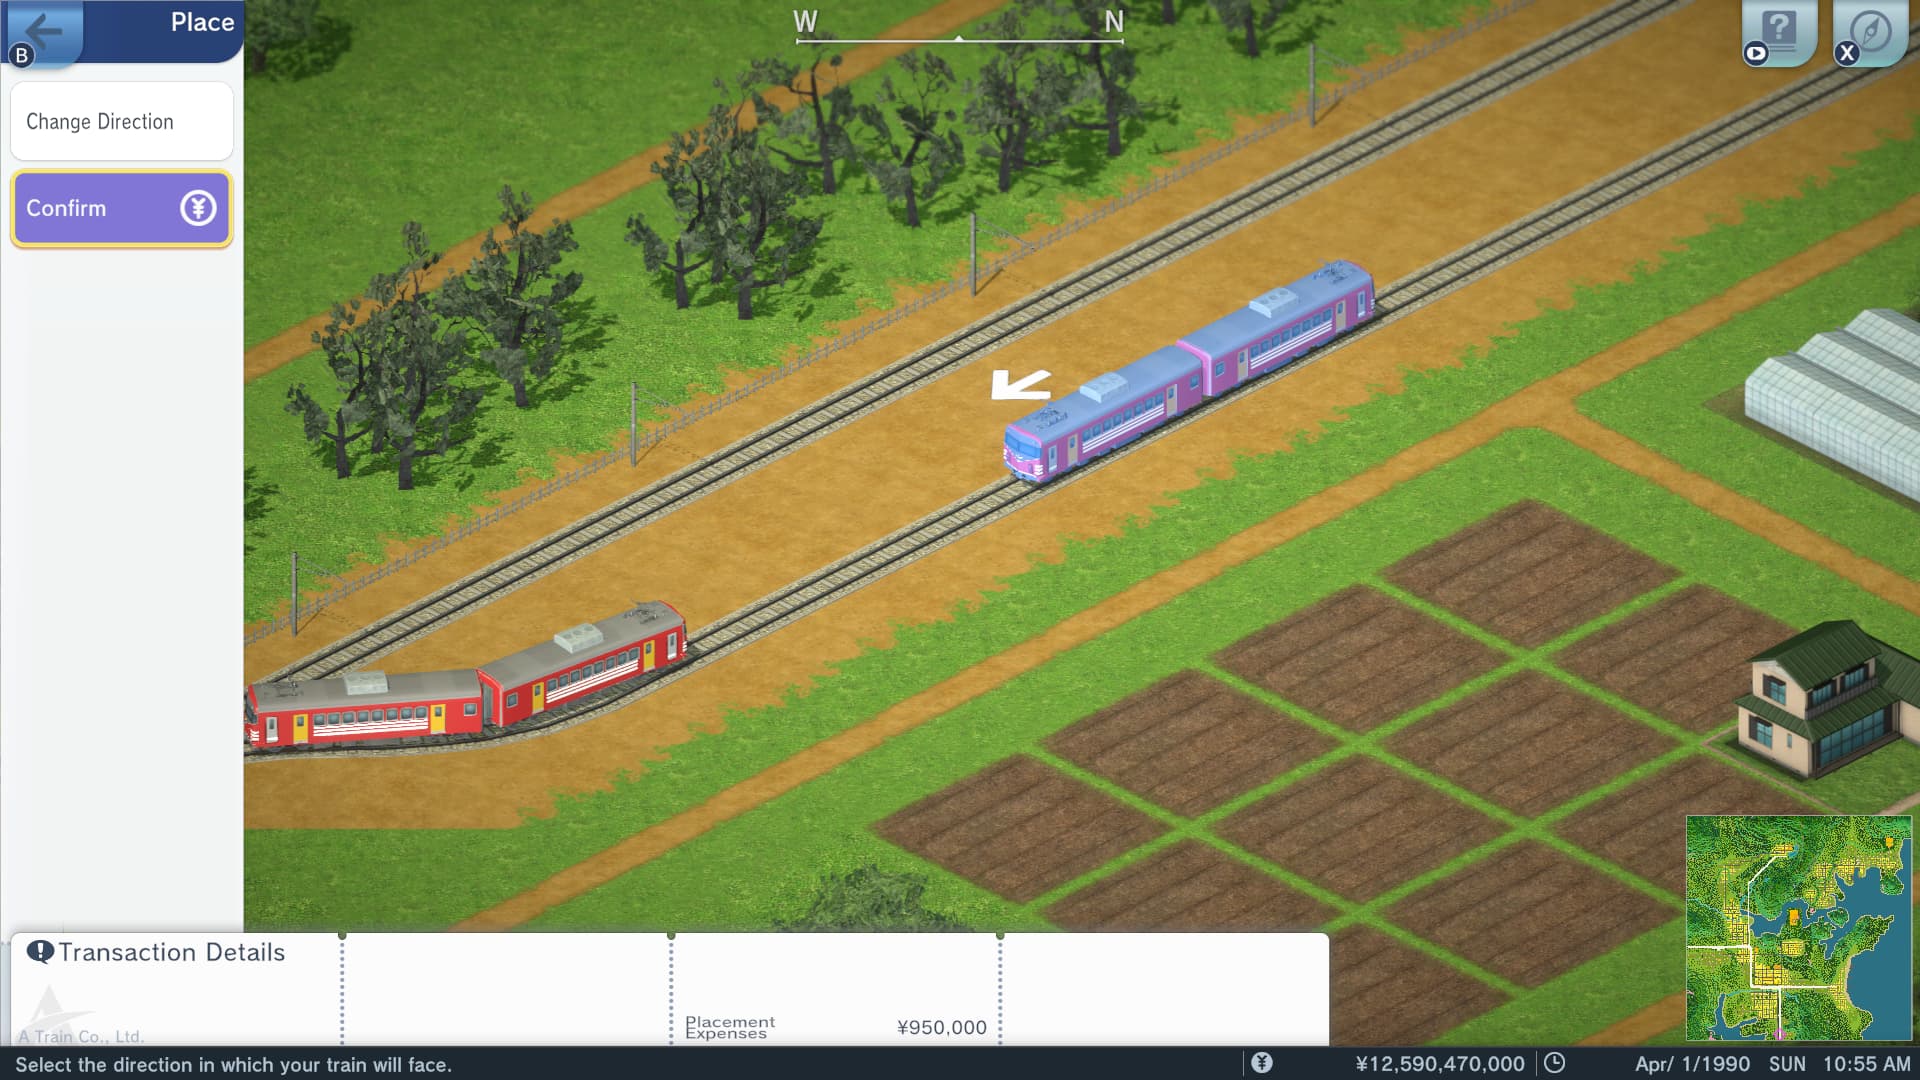
Next up, placing down our second Limited Express train that will be operating on the Toyonami to Oma route.
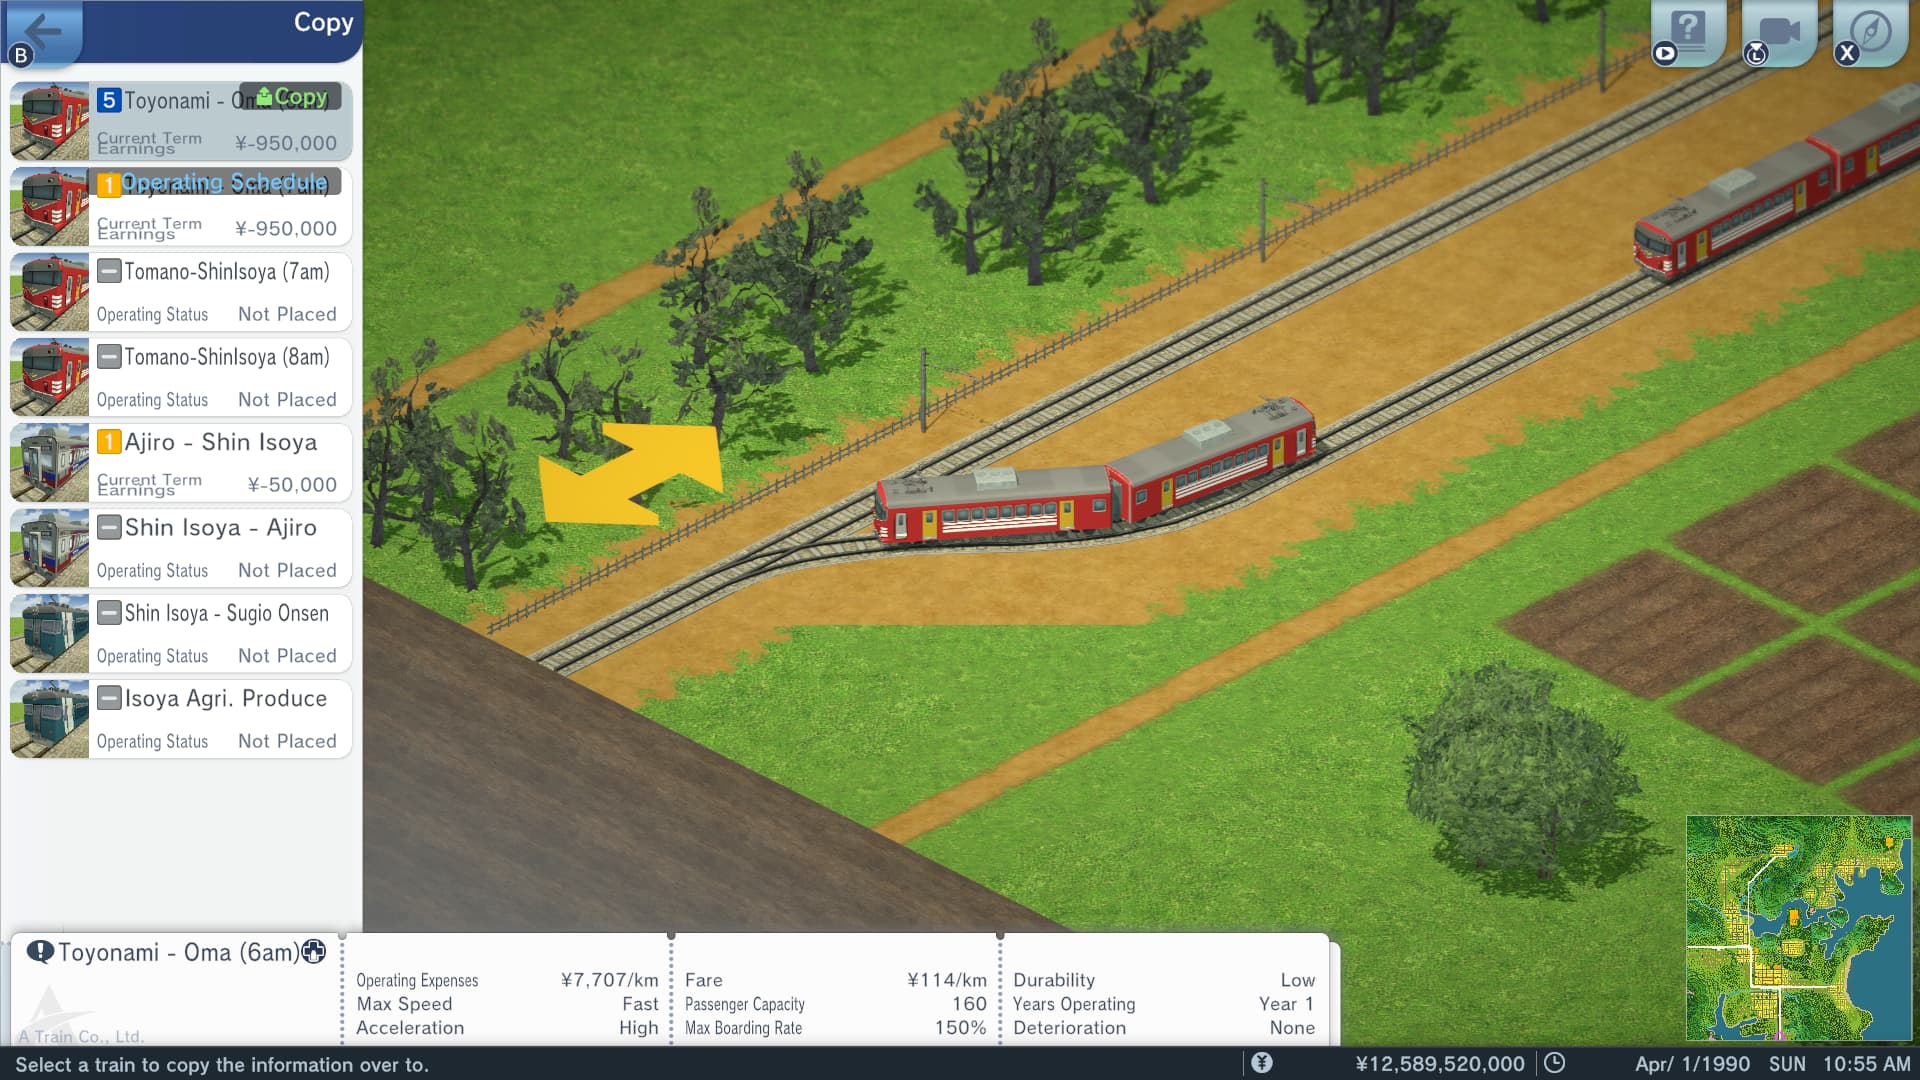
With both trains operating out of Toyonami Station setting up our second Limited Express train will be as simple as copying across the Operating Schedule settings. Thus, we’ll select our first train, utilise the copy function, select our second train twice so that the game only copies the operating schedule settings, and then back out of the menu to finalise the copying procedure.
Afterwards, we just need to make a simple tweak of our second train’s departure time setting so that it departs at 7:00am, instead of the 6:00am assigned to our first train. After completing all those steps we have now established a one train per hour (1TpH) service on the Toyonami to Oma route between the hours of 06:00am to 09:00pm.
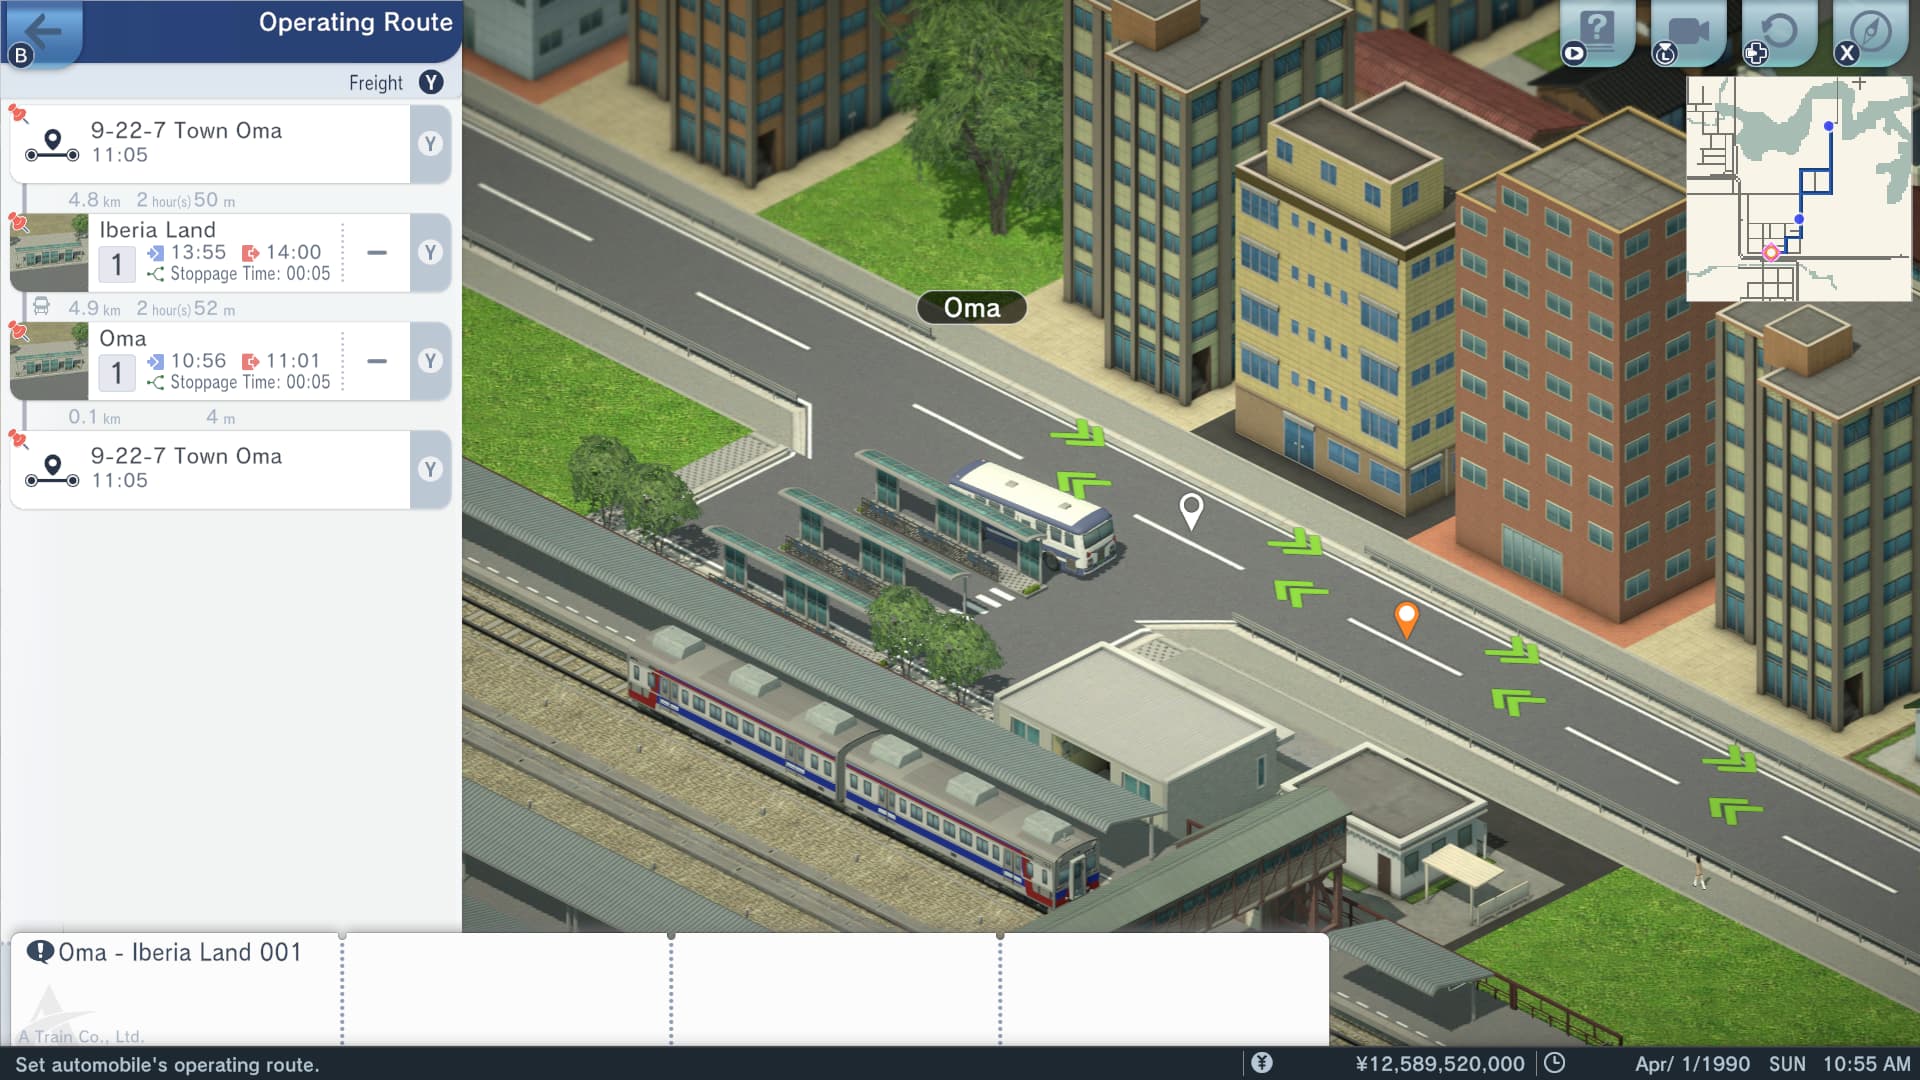
Next, we will progress onto setting up the new operating schedules for our three buses servicing the Oma to Iberia Land route. It will be worth noting where our first bus was placed in the map, and in which direction, when it comes times for us to place our other buses. Copying operating schedules between buses can tend to break if we place the buses in a wildly different location and direction of travel. Here we can notice that our first bus was originally placed close to the Oma station and headed towards Iberia Land.
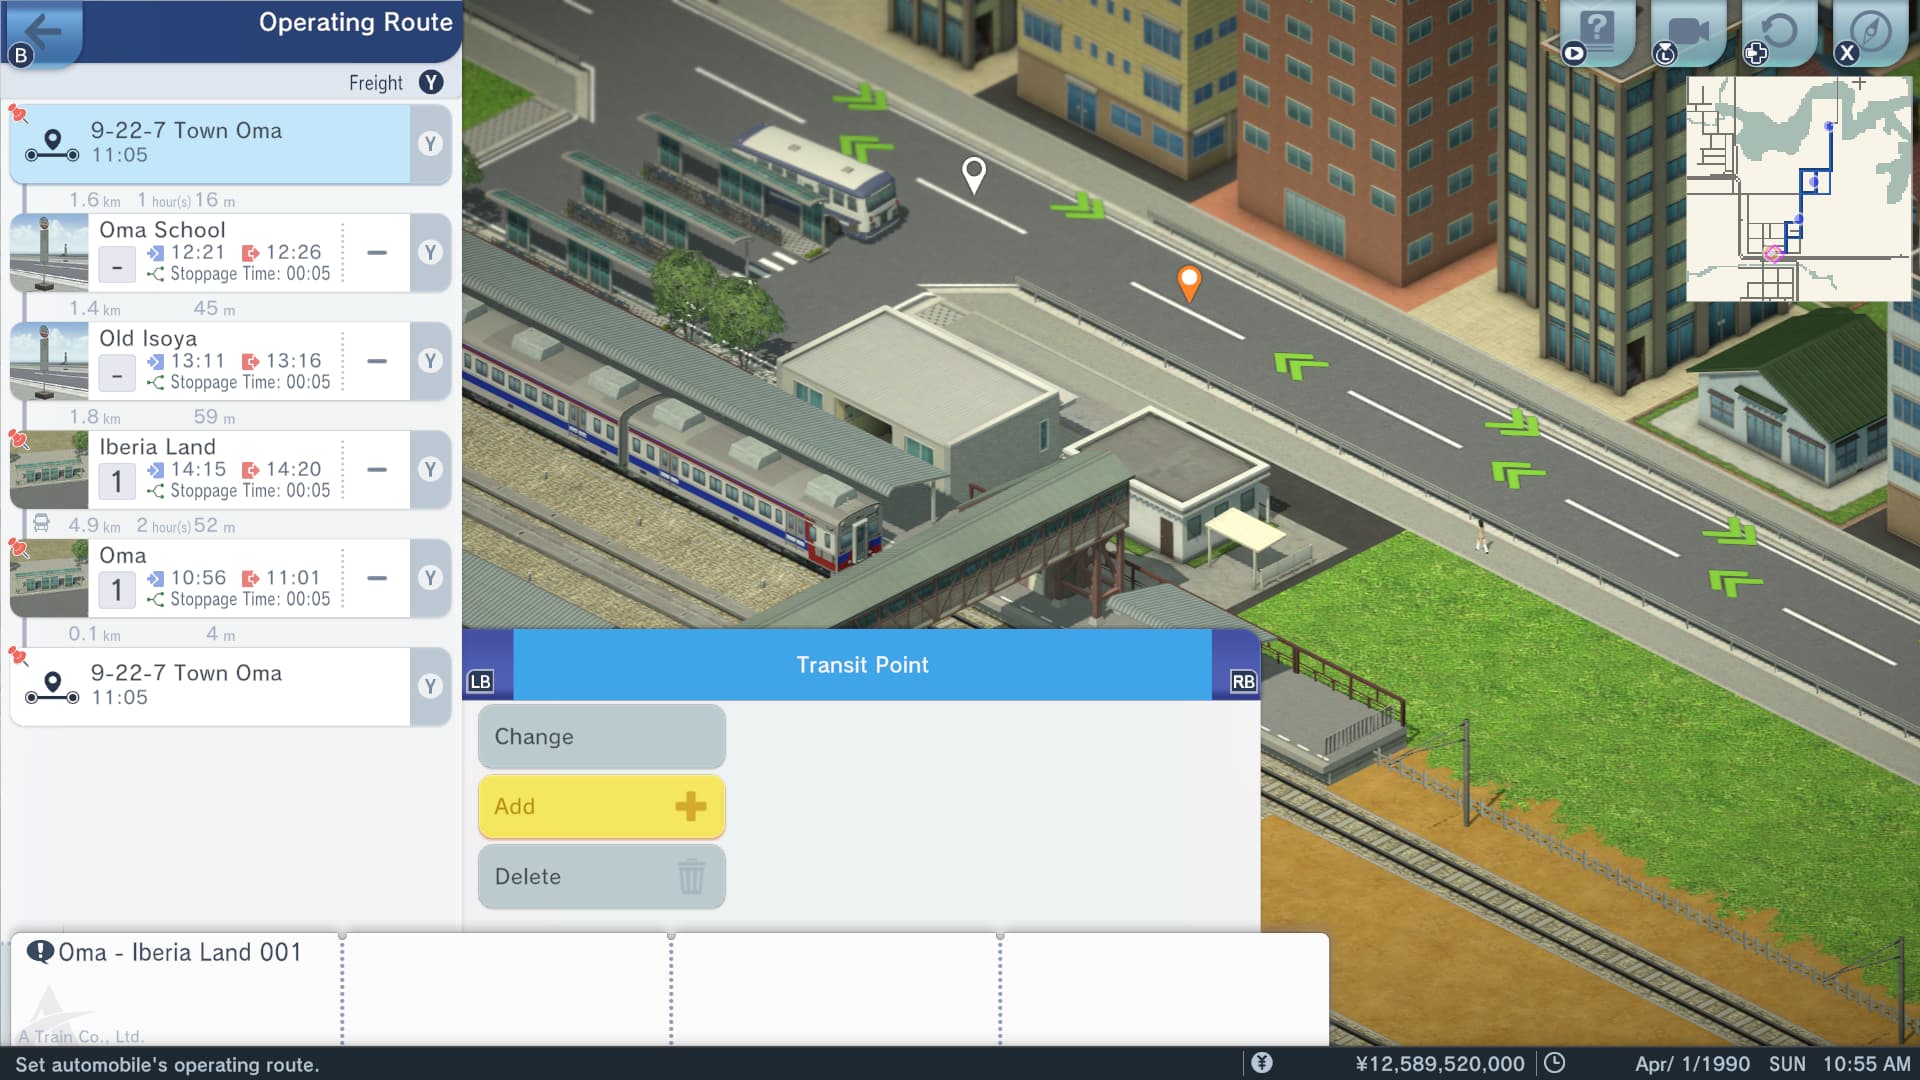
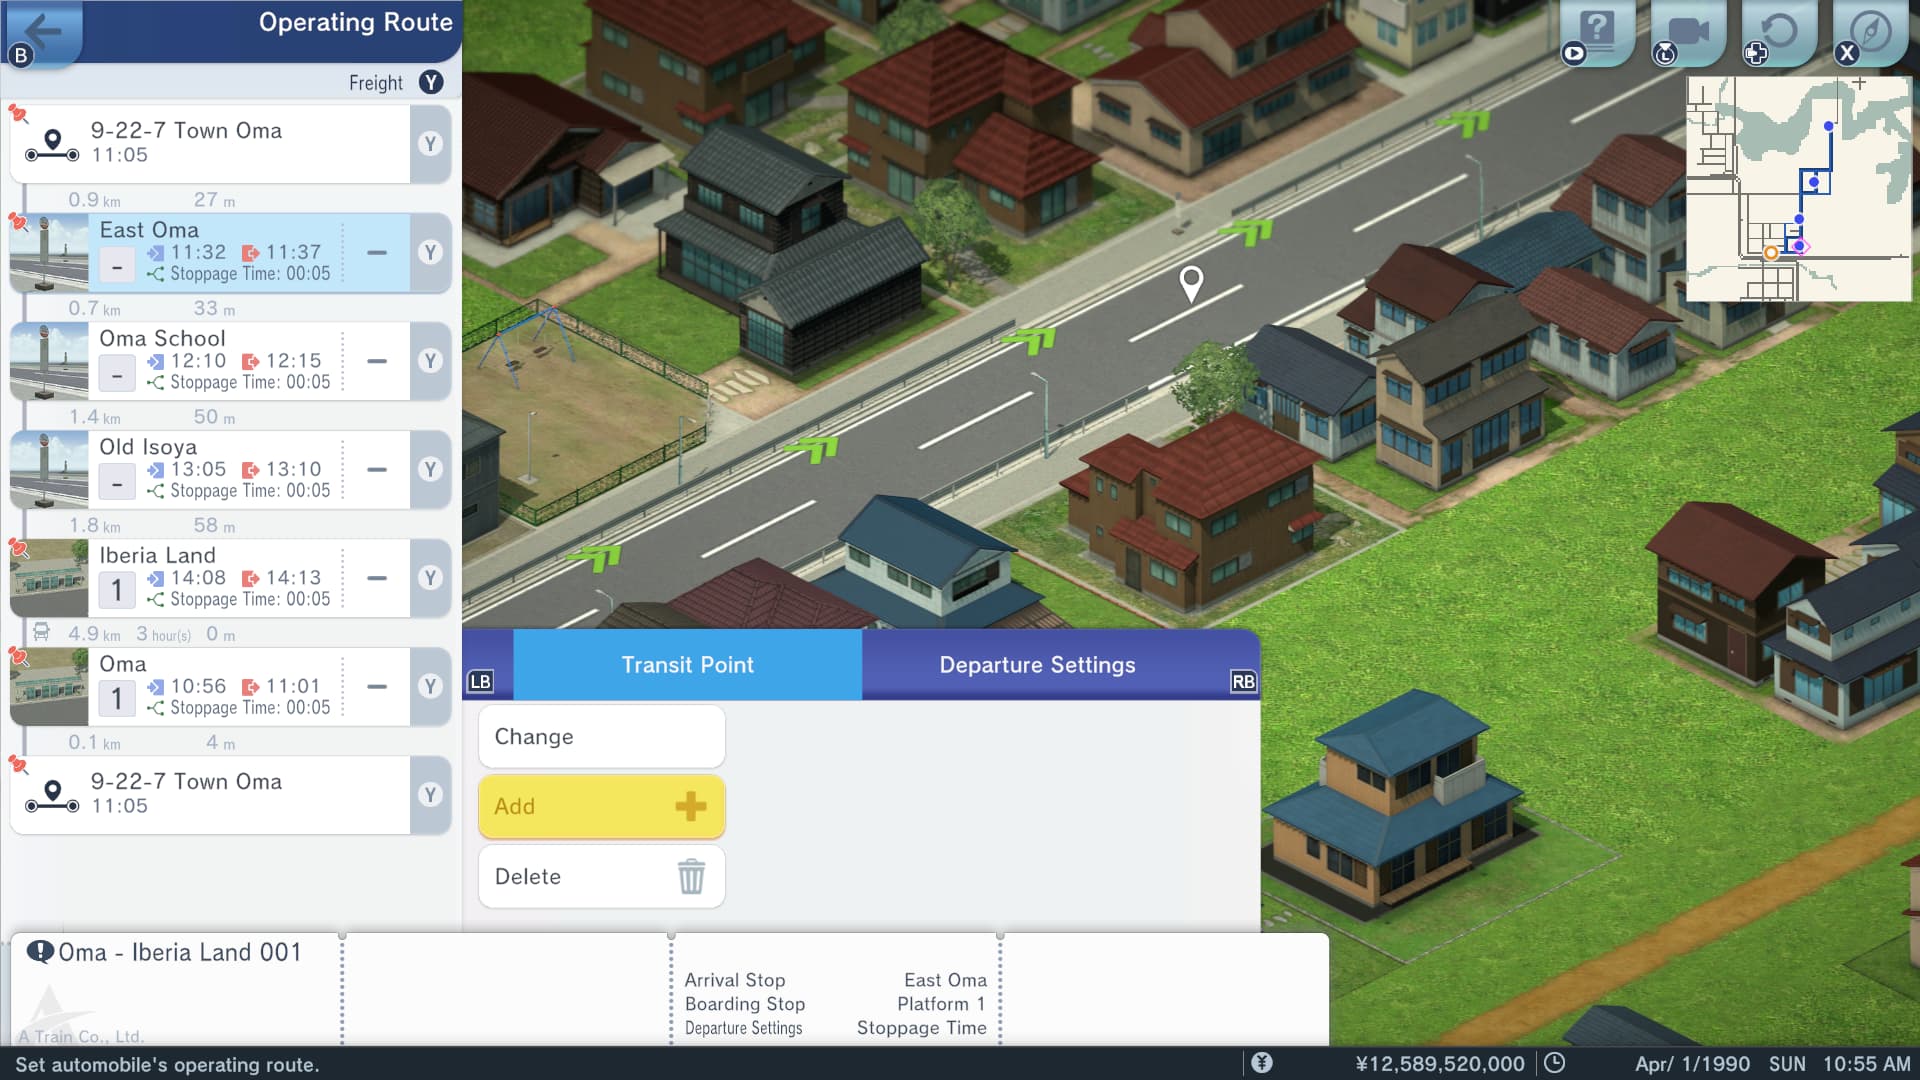
A bus will automatically include any stops that it encounters along its travel route to the route list on the left. However, since we want to ensure that our buses visit all our newly constructed bus stops we will add explicit instructions for the route to go via the East Oma, Oma School and Old Isoya bus stops. These explicit route instructions are signified by the pin icon in the graphic user interface. To achieve this we select the location prior to the location we wish to include and then use the Add function.
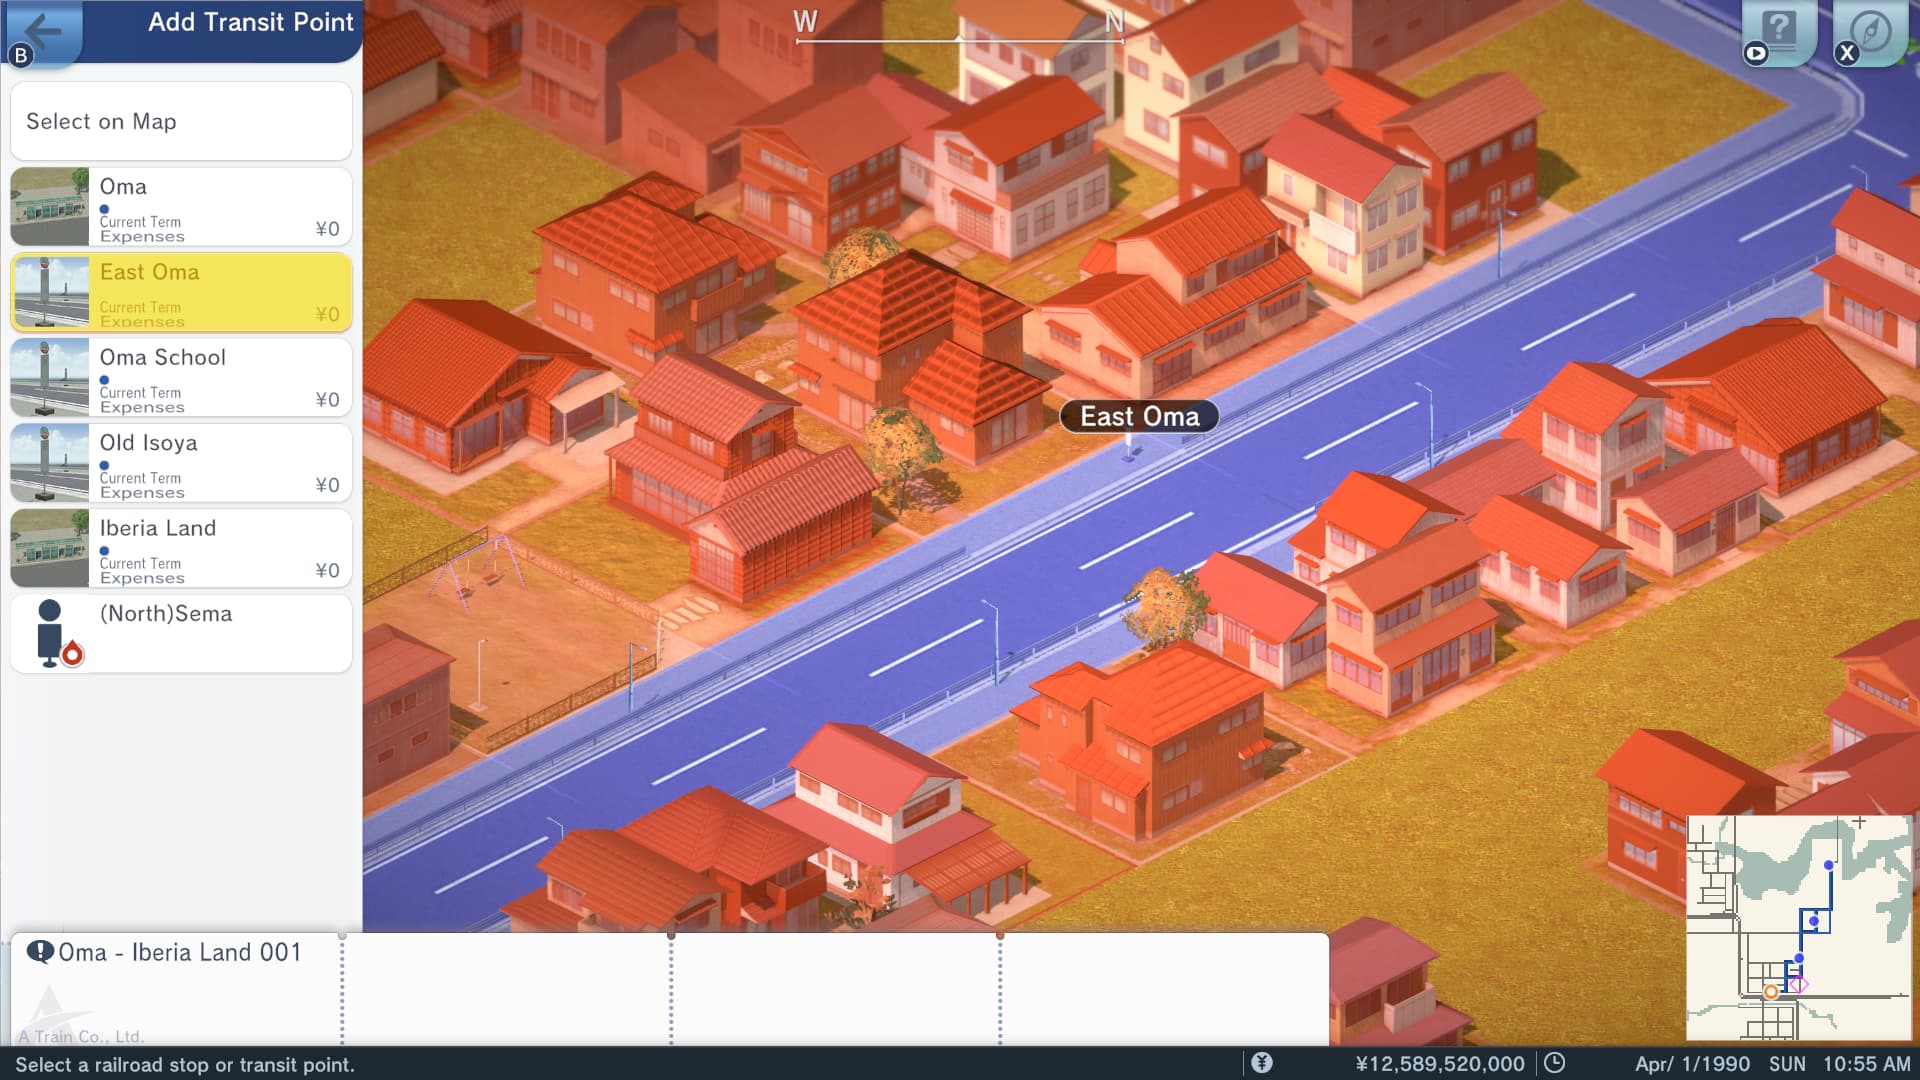
This opens up a sub-menu that allows us to either create a waypoint on the map, useful for micromanaging vehicle routes, or select from a list of accessible bus stops. Since the first stop we want our bus to visit on the way to Iberia Land is the East Oma stop, we will select that option.
Then we just rinse and repeat those same steps until we are done.
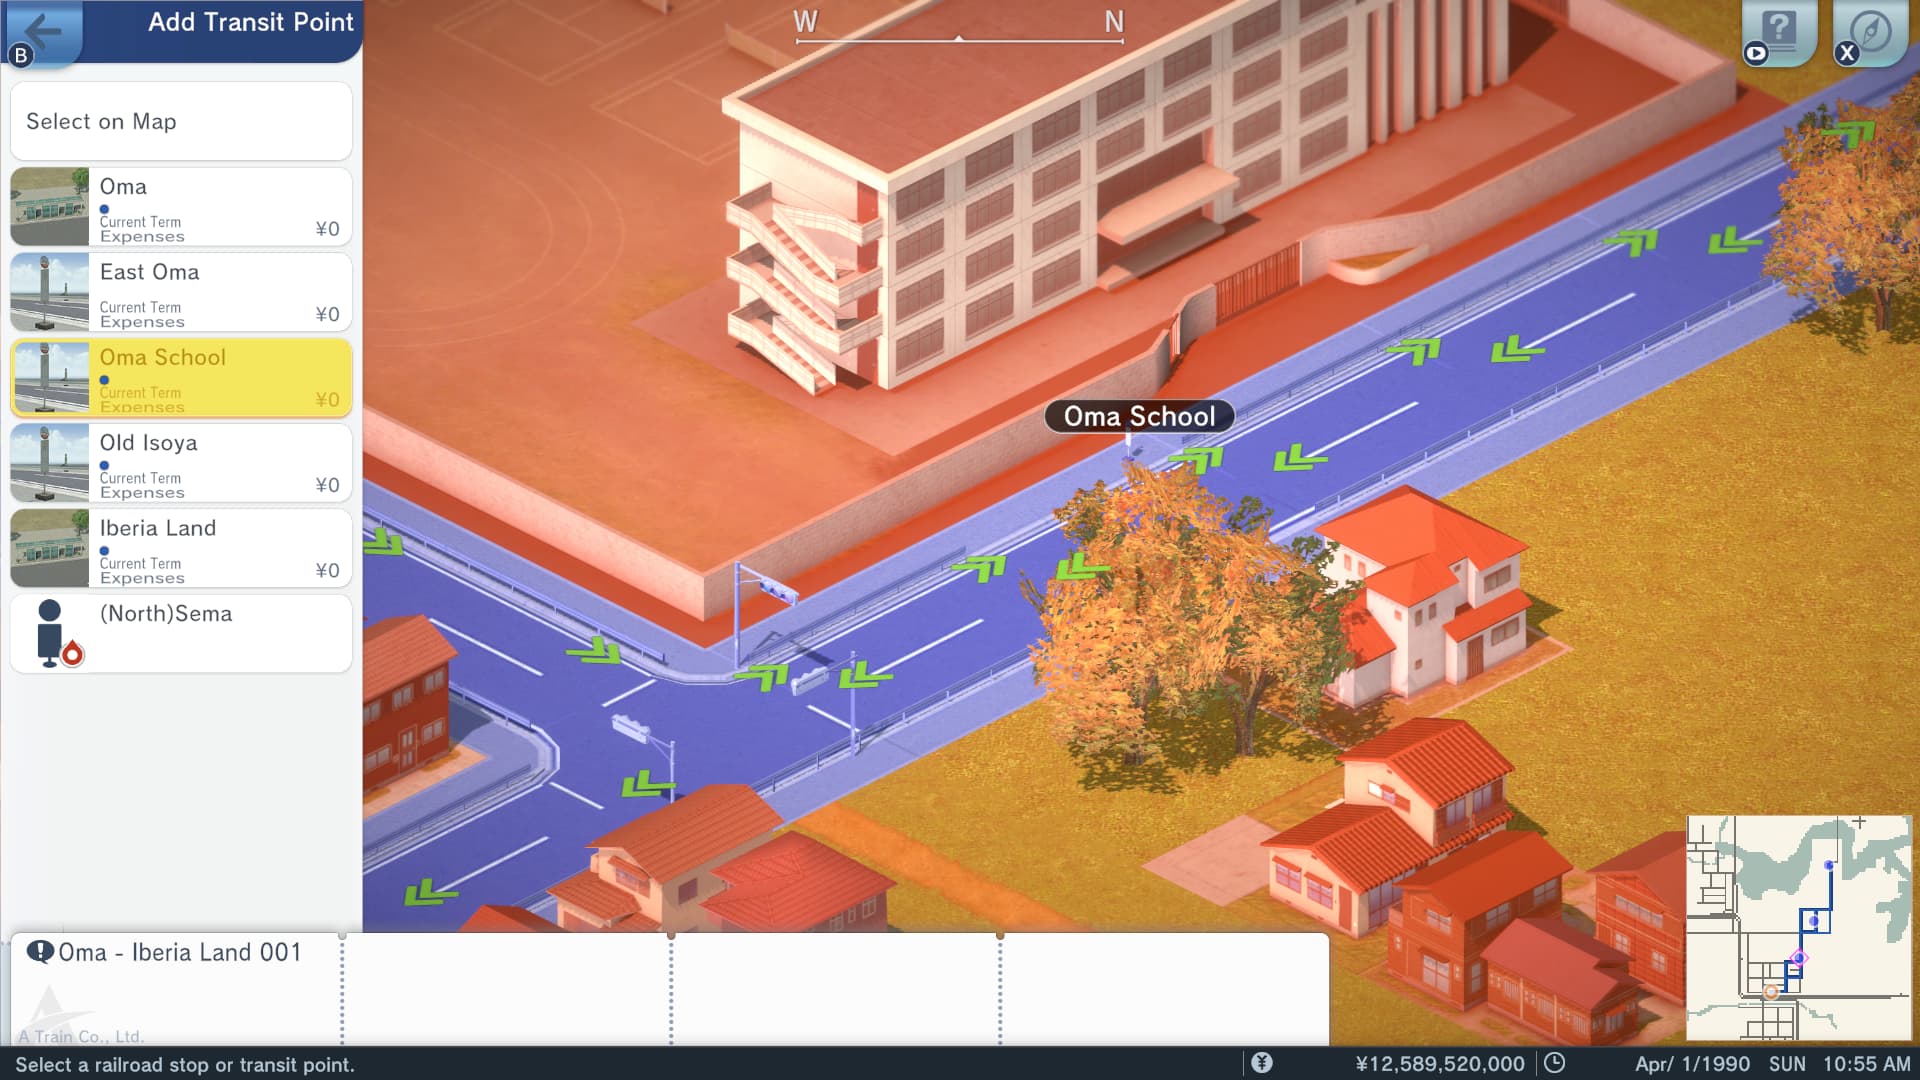
Remembering to move down the route list as go about adding in the rest of our bus stops. So, selecting East Oma when adding the transit point for the Oma School stop, in this example.
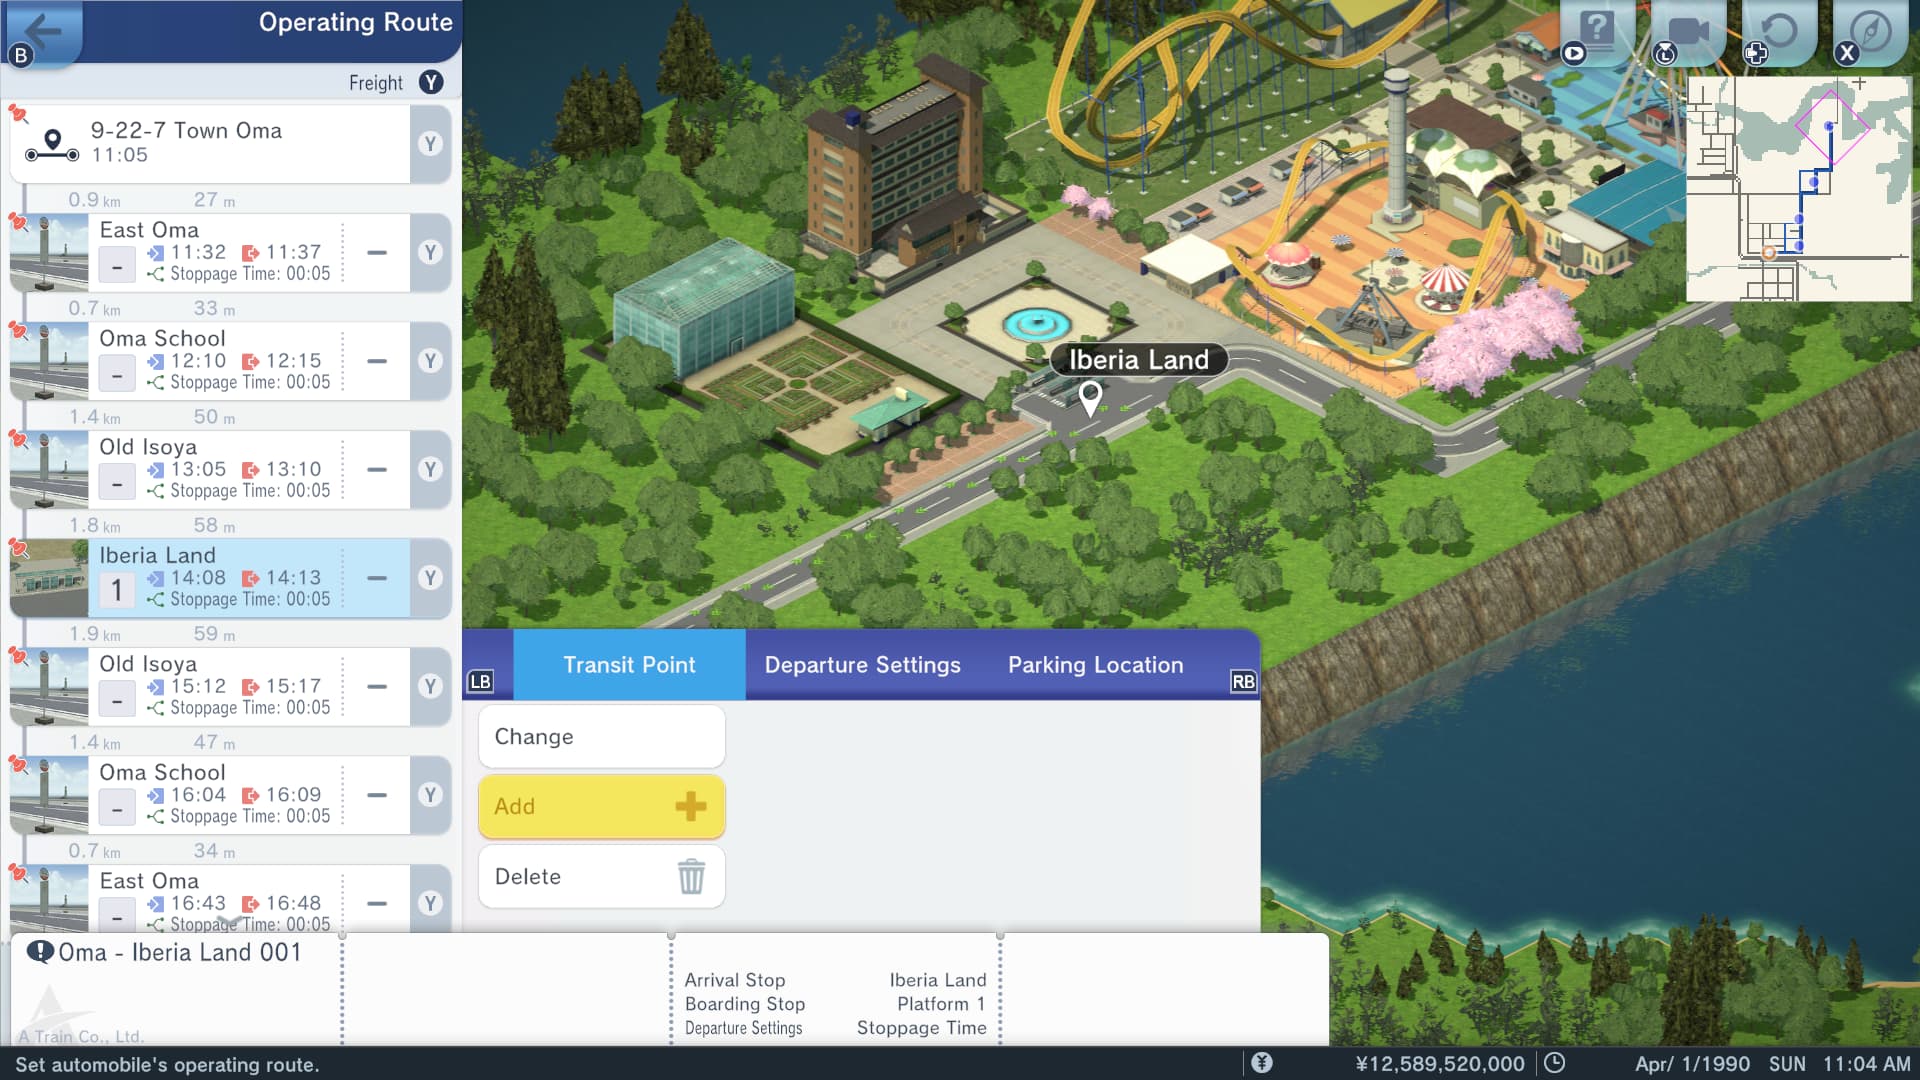
If for some reason the game has the Change, Add, and Delete options unavailable then one tip can be to try progressing the in-game clock. In the case of our preexisting bus between Oma and Iberia Land, we were unable to add any stops after the Iberia Land marker until the bus reached the Oma stop. Thereby, completing its previously instructed Iberia Land to Oma journey and moving onto the next step of its route.
Next, we will designate our bus a departure time of 7:00am. This will allow our first Limited Express train from Toyonami to arrive at Oma Station and drop off any tourists wanting to travel to Iberia Land. The round trip time was calculated to be 4 hours and 38 minutes, inclusive of stoppage times. Consequently, we will set the Loop Time setting to be a nice, even five hours. Easier to schedule around and it gives tourists at Oma Station plenty of time to catch a bus service to Iberia Land if their train arrives shortly beforehand.
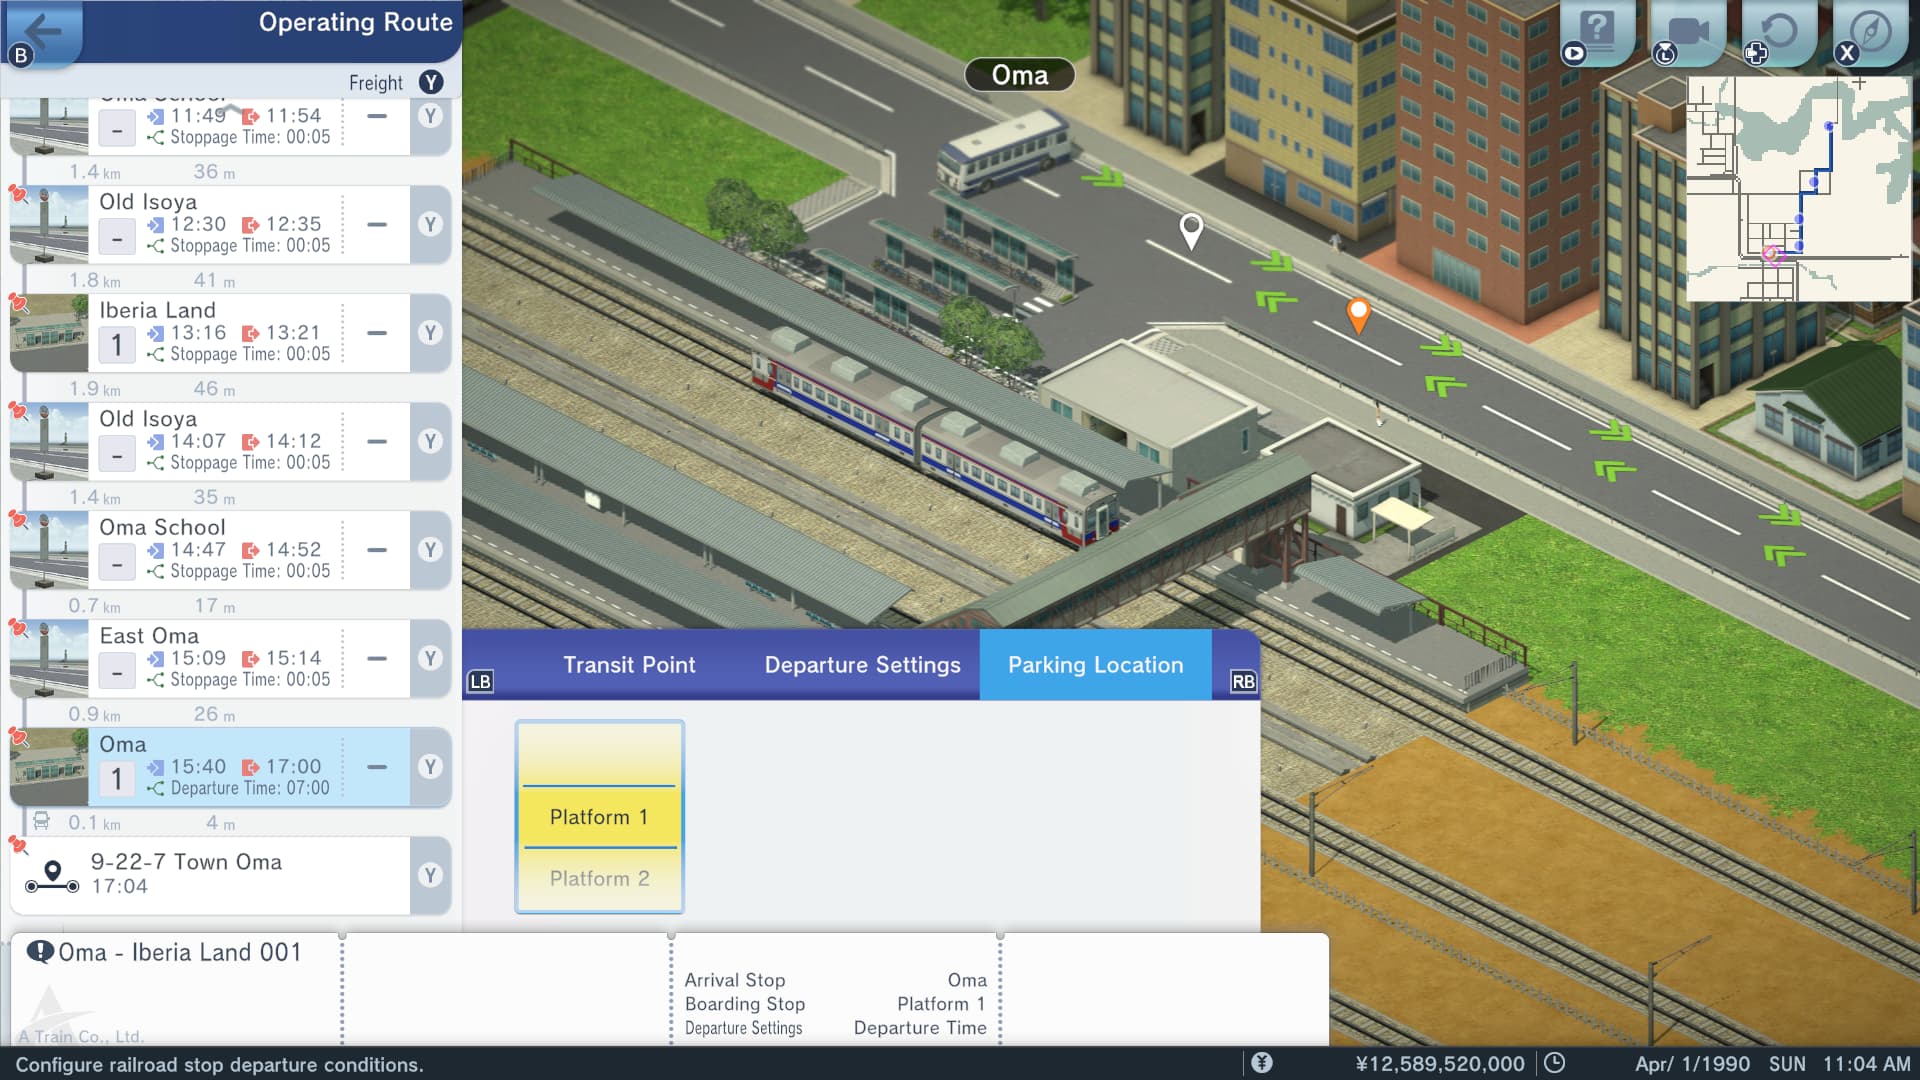
For now we’re just going to park our buses overnight at the Oma bus stop. Subsequently, we’ll assign each of our three buses their own platform, with Platform 1 being assigned to our first bus. With three platforms at each end of the route we can currently handle up to six active bus services between Oma and Iberia Land.
Should somehow we need more than this in the future we may tackle how to utilise vehicle depots to increase the number of buses an individual platform can handle.
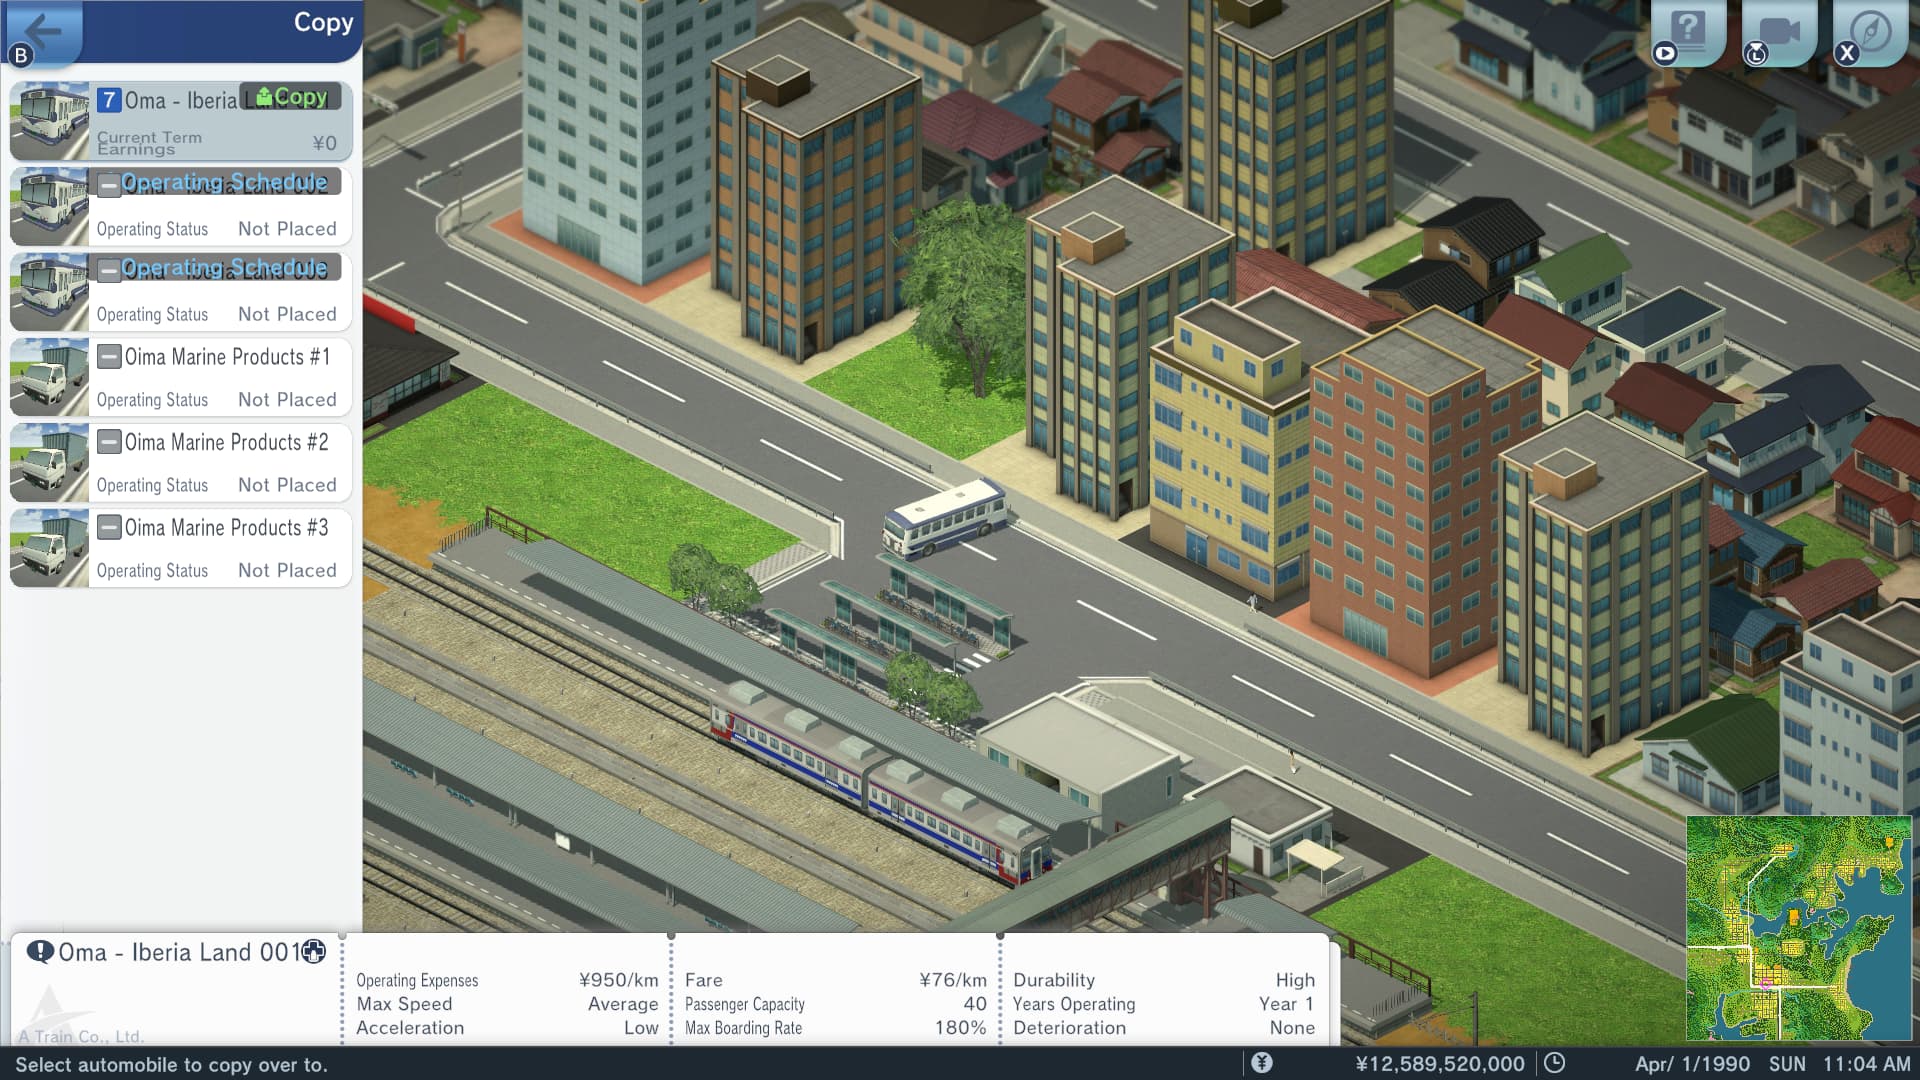
Utilising the Copy function again, we will copy across the operating schedule settings of Oma - Iberia Land 001 to our other two buses.
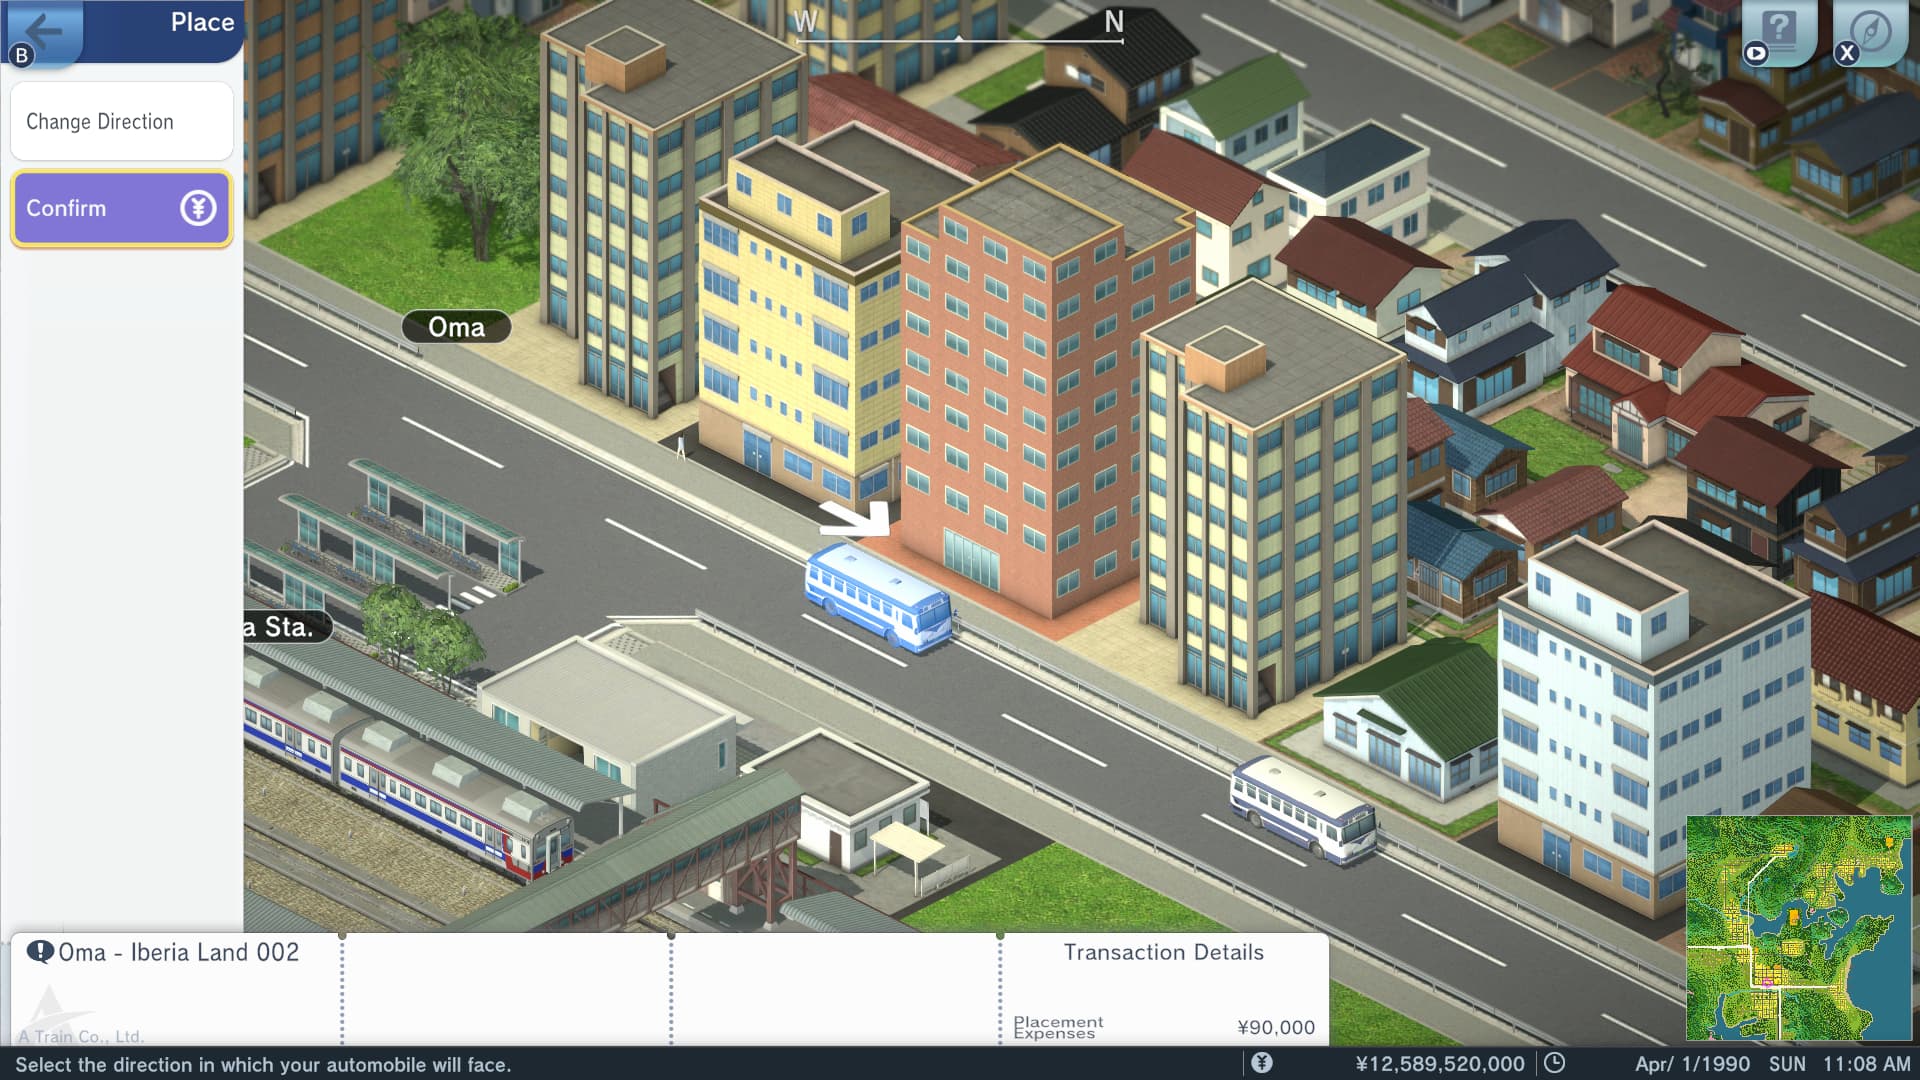
Afterwards, we will let time progress a few minutes so that we can place down Oma - Iberia Land 002 in the same spot and direction that Oma - Iberia Land 001 was. Repeating the same step for our third bus, Oma - Iberia Land 003.
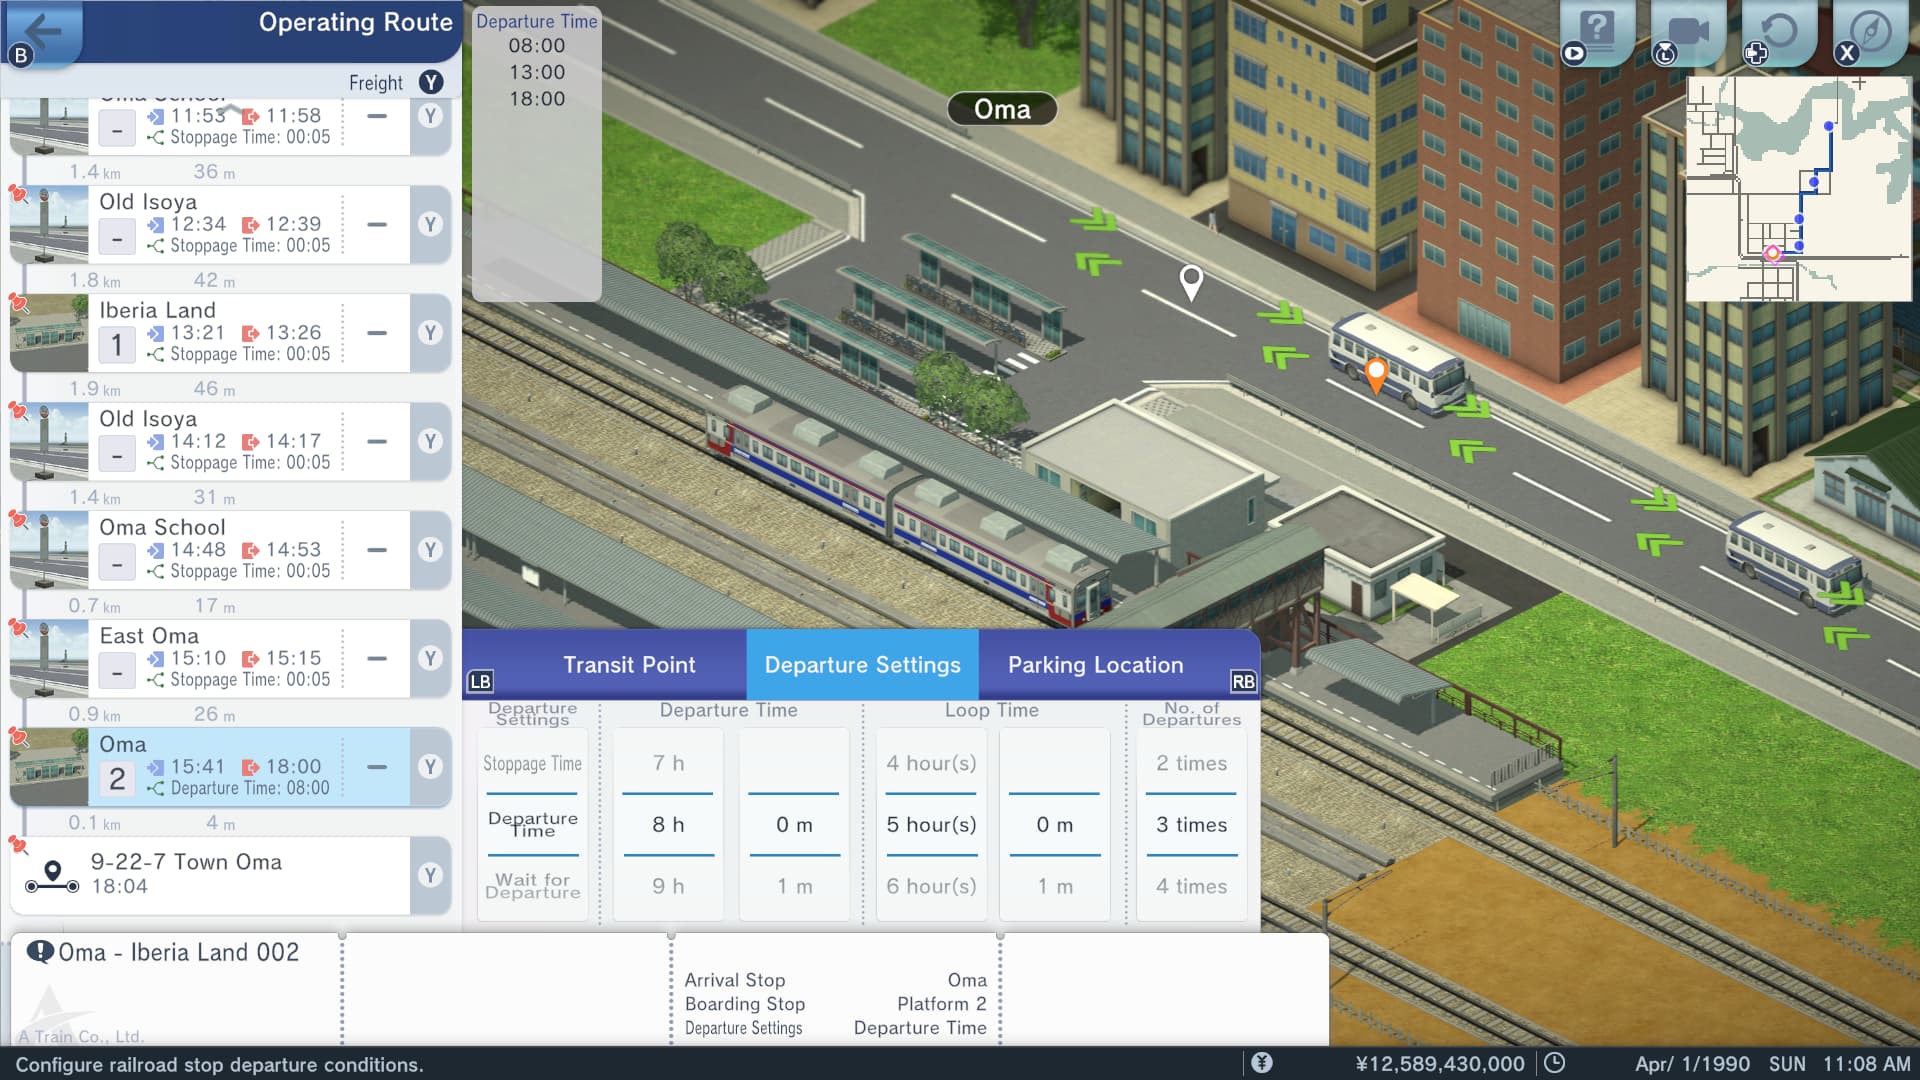
Our plan is to space the bus departures out by an hour. Thus, Oma - Iberia Land 002 and Oma - Iberia Land 003 are adjusted to depart from Oma at 8:00am and 9:00am respectively.
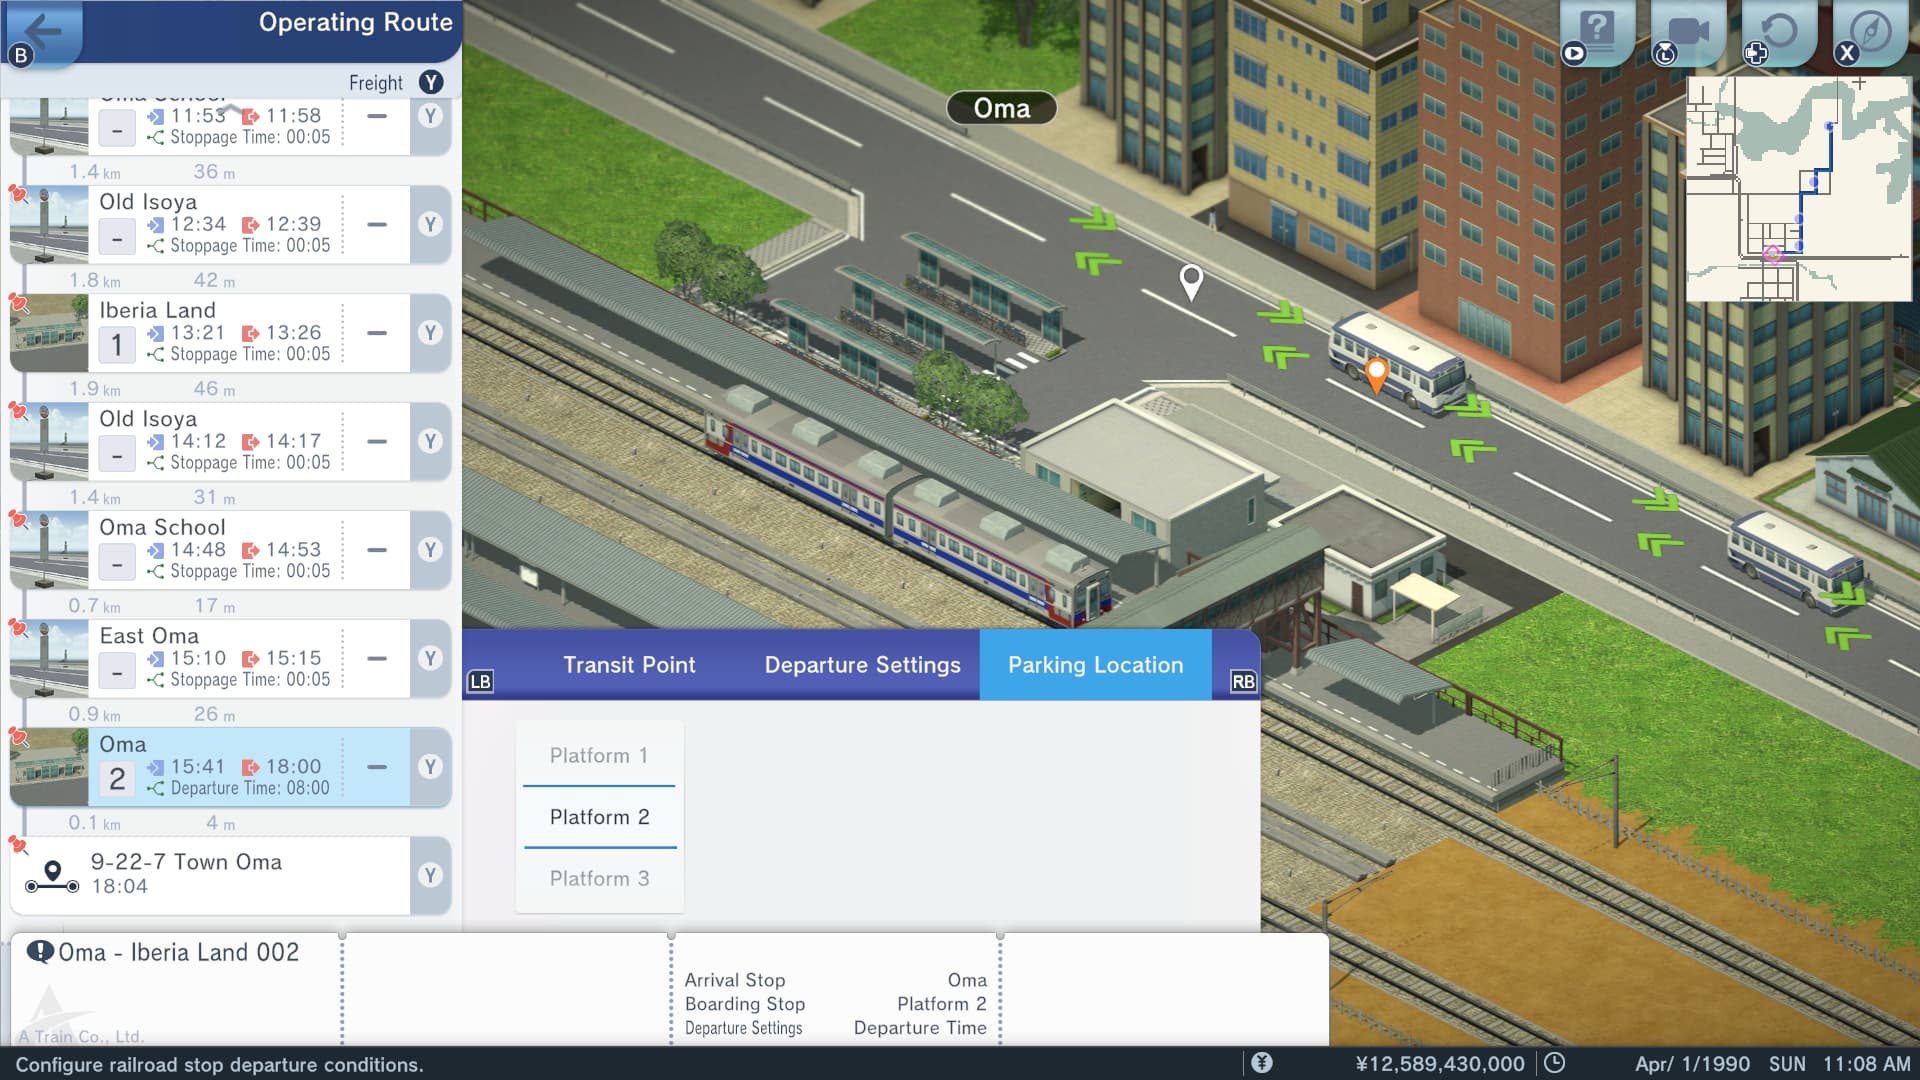
Whilst we are in there fiddling with the departure time setting let us not forget to adjust the parking location setting either. Oma - Iberia Land 002 is assigned Platform 2 as its home and Oma - Iberia Land 003 is given Platform 3.

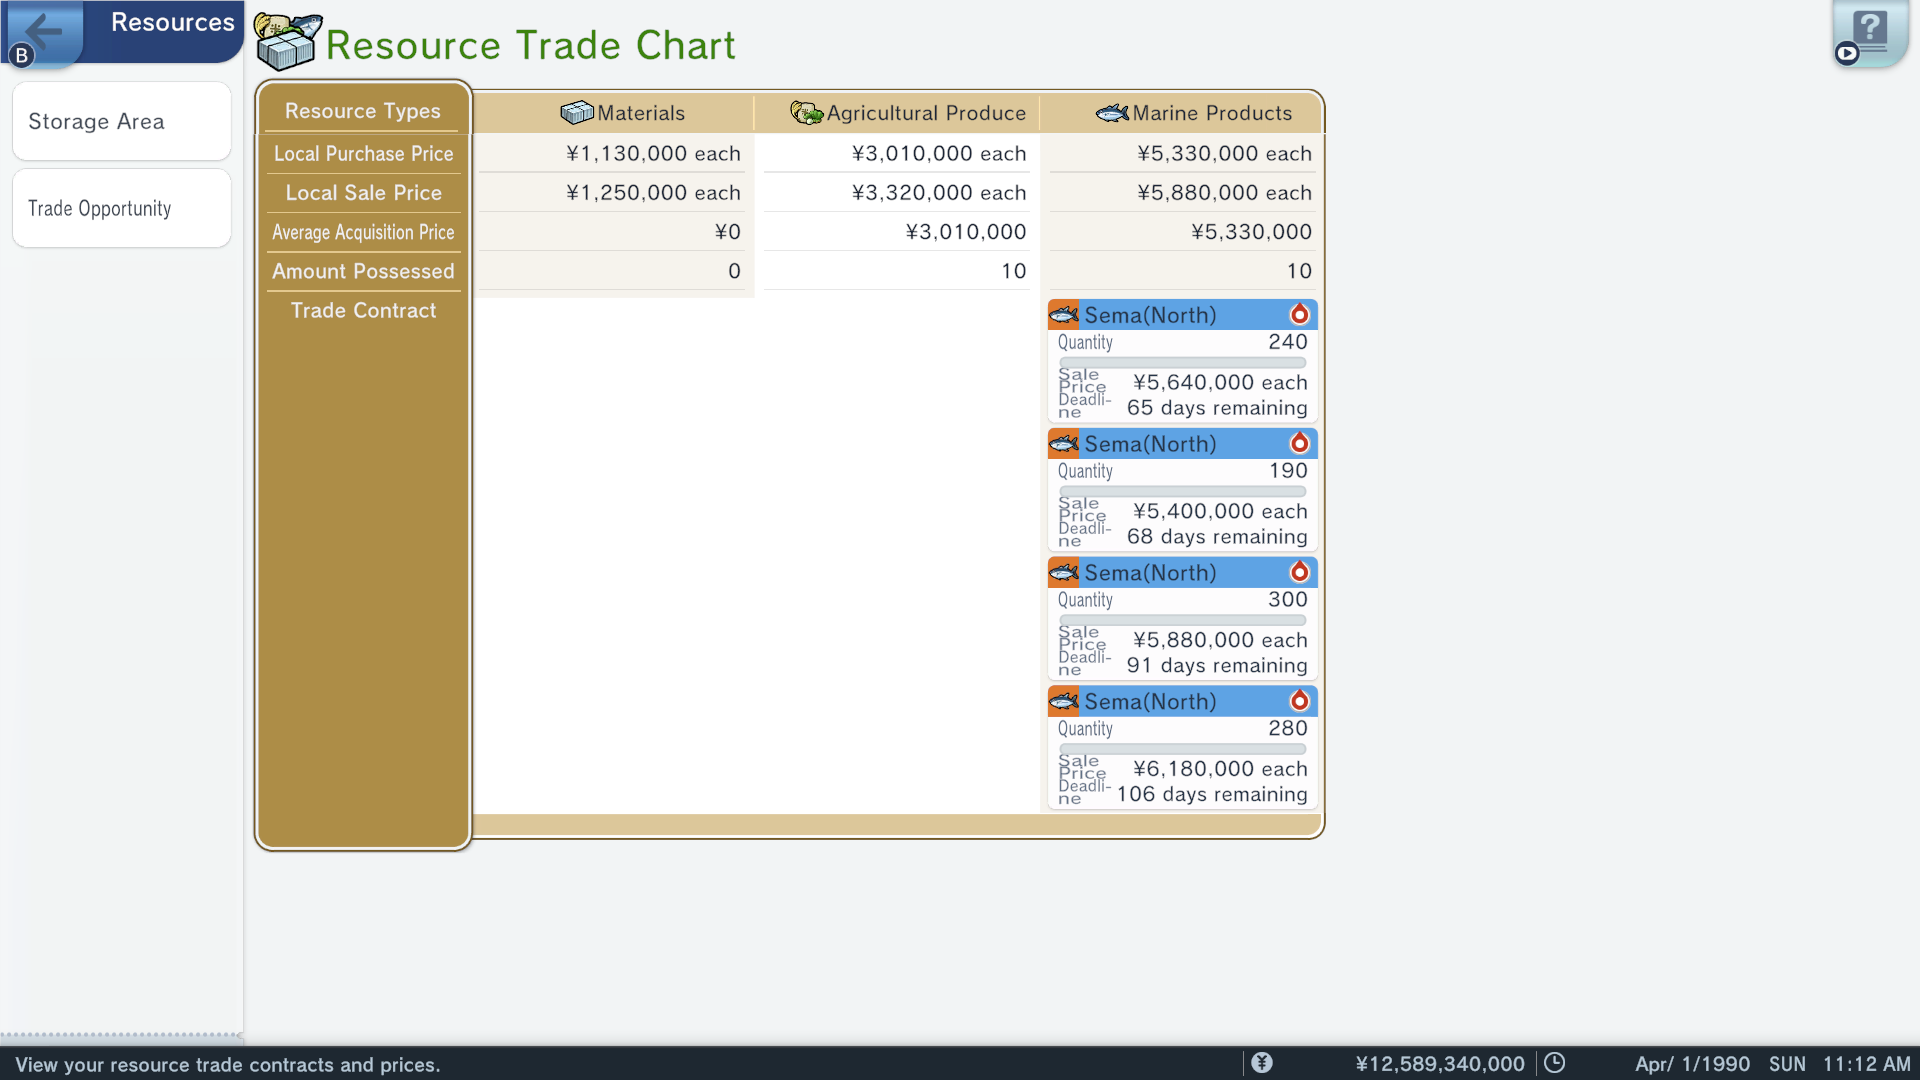
Opening up the Resources menu we are going to take note of the average acquisition price for agricultural produce and marine products. Then we are going to proceed into the Trade Opportunity menu and assess the various trade contracts currently on offer.
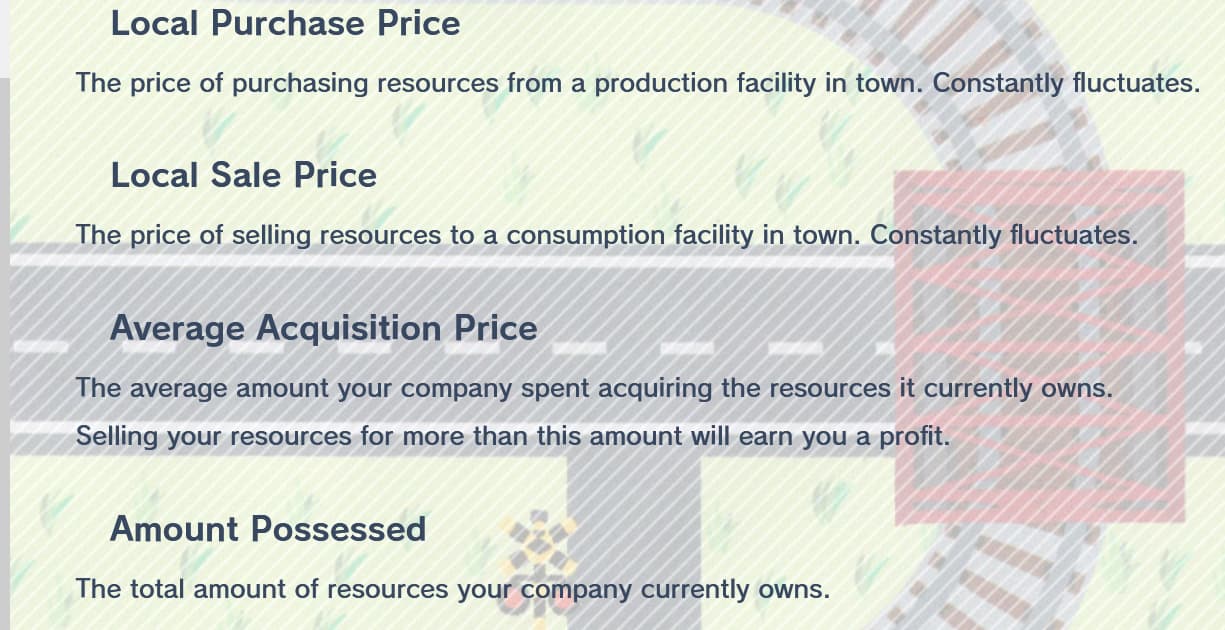
The various category belong each resource type are explained as such by the game’s manual. Local purchase price is the current cost of purchasing one unit of that resource type. Local sale price is the current revenue for selling one unit of that resource type. Amount possessed is pretty straight forwards and measures how many units of the associated resource type we currently have in storage facilities. Finally, the average acquisition price gives us an average for how much it cost our company to acquire the amount of resources currently in our possession.
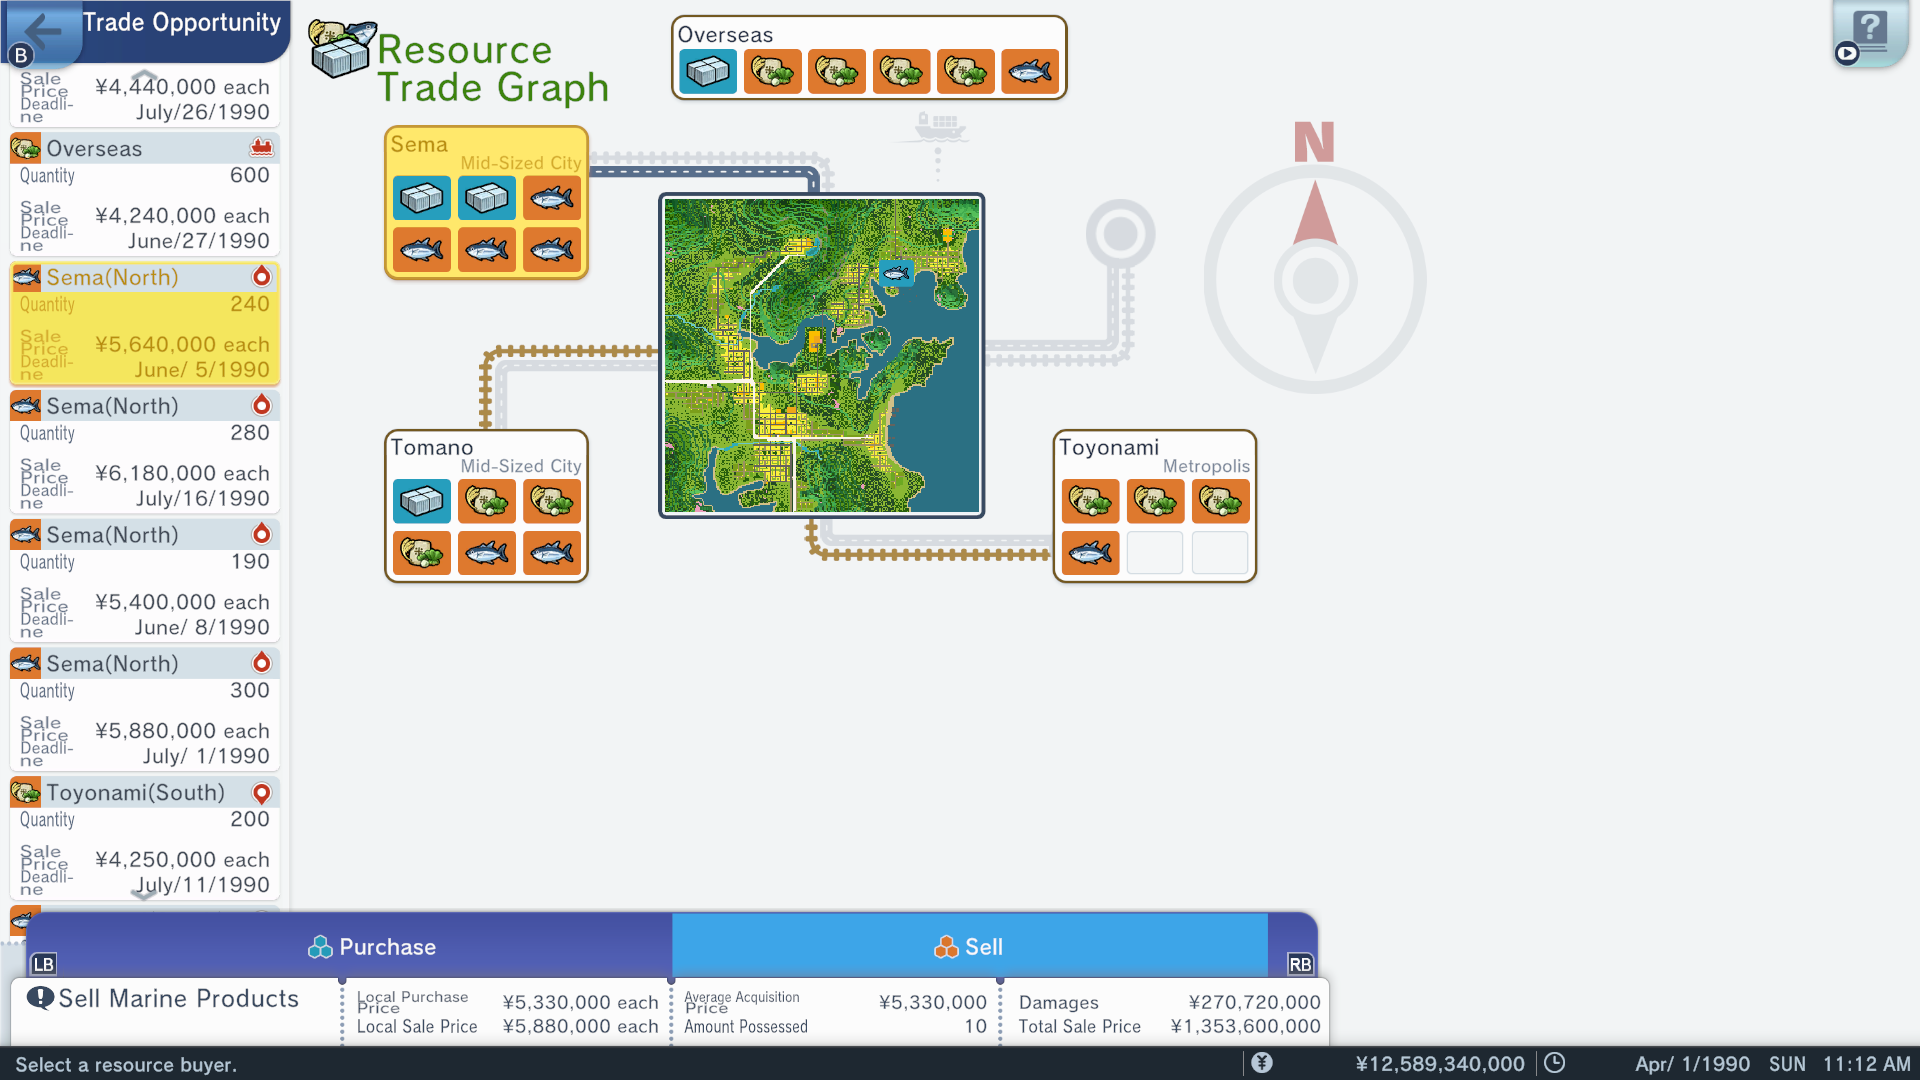
Of interest to our company today are the trade contracts of Sema, who are seeking to purchase large quantities of marine products currently. While some of Sema’s trade contracts offer better sale prices than others, all of the Sema trade contracts are currently above both the current and average acquisition price listed for marine products.
When acquiring multiple trade contracts there is a specific order you may want to follow. Trade contracts for the same destination and resource type will be fulfilled in a specific order. In those cases the trade contract at the top of the pile will be given priority. Trade contracts are sorted in order of most recently acquired. Thus, when acquiring trade contracts in order of ‘least days to completion’ to ‘most days to completion’, the trick is to acquire the trade contract with the most days remaining first and work backwards from there.
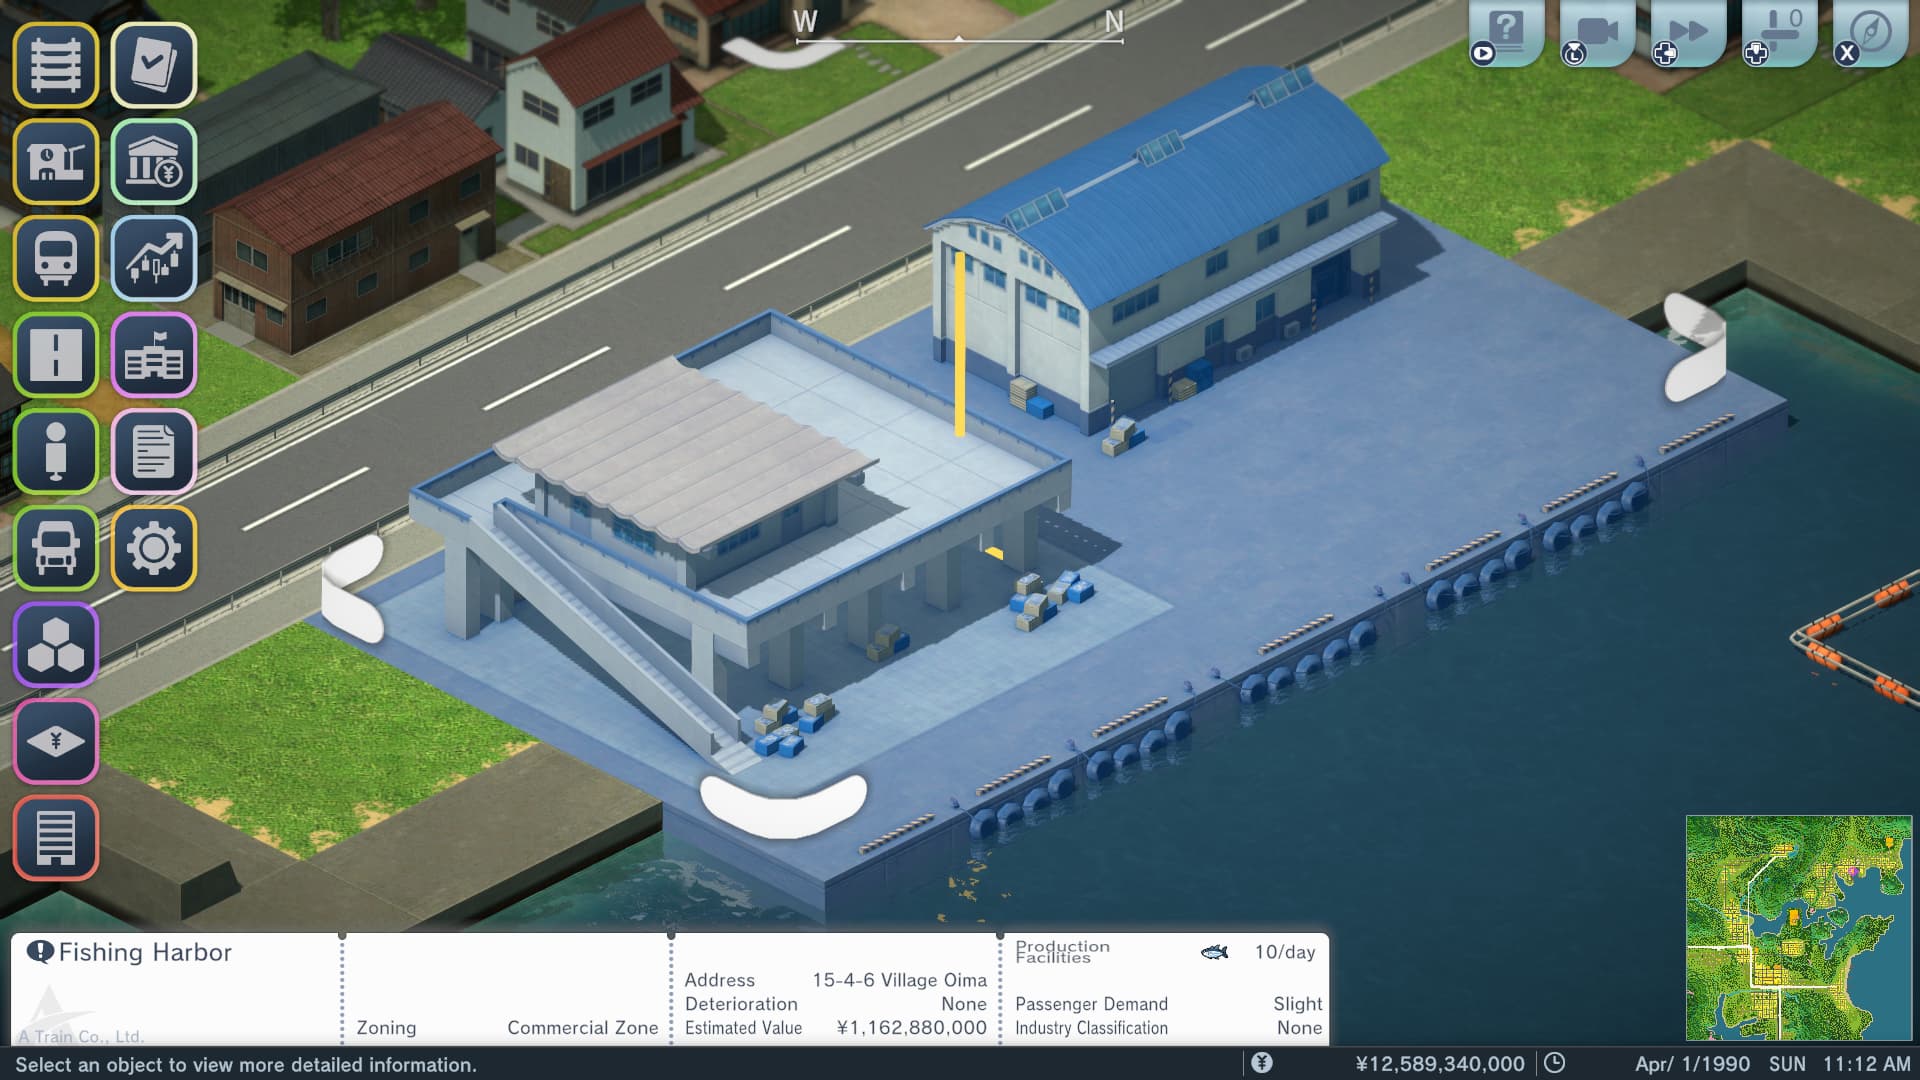
A fishing harbor in A-Train: All Aboard! Tourism will typically consistently produce 10 unit loads of marine products per day during the year. Thus, up to 10 units of these marine products will be available for purchase by our nearby storage facilities, typically occurring at 10:00am each day.
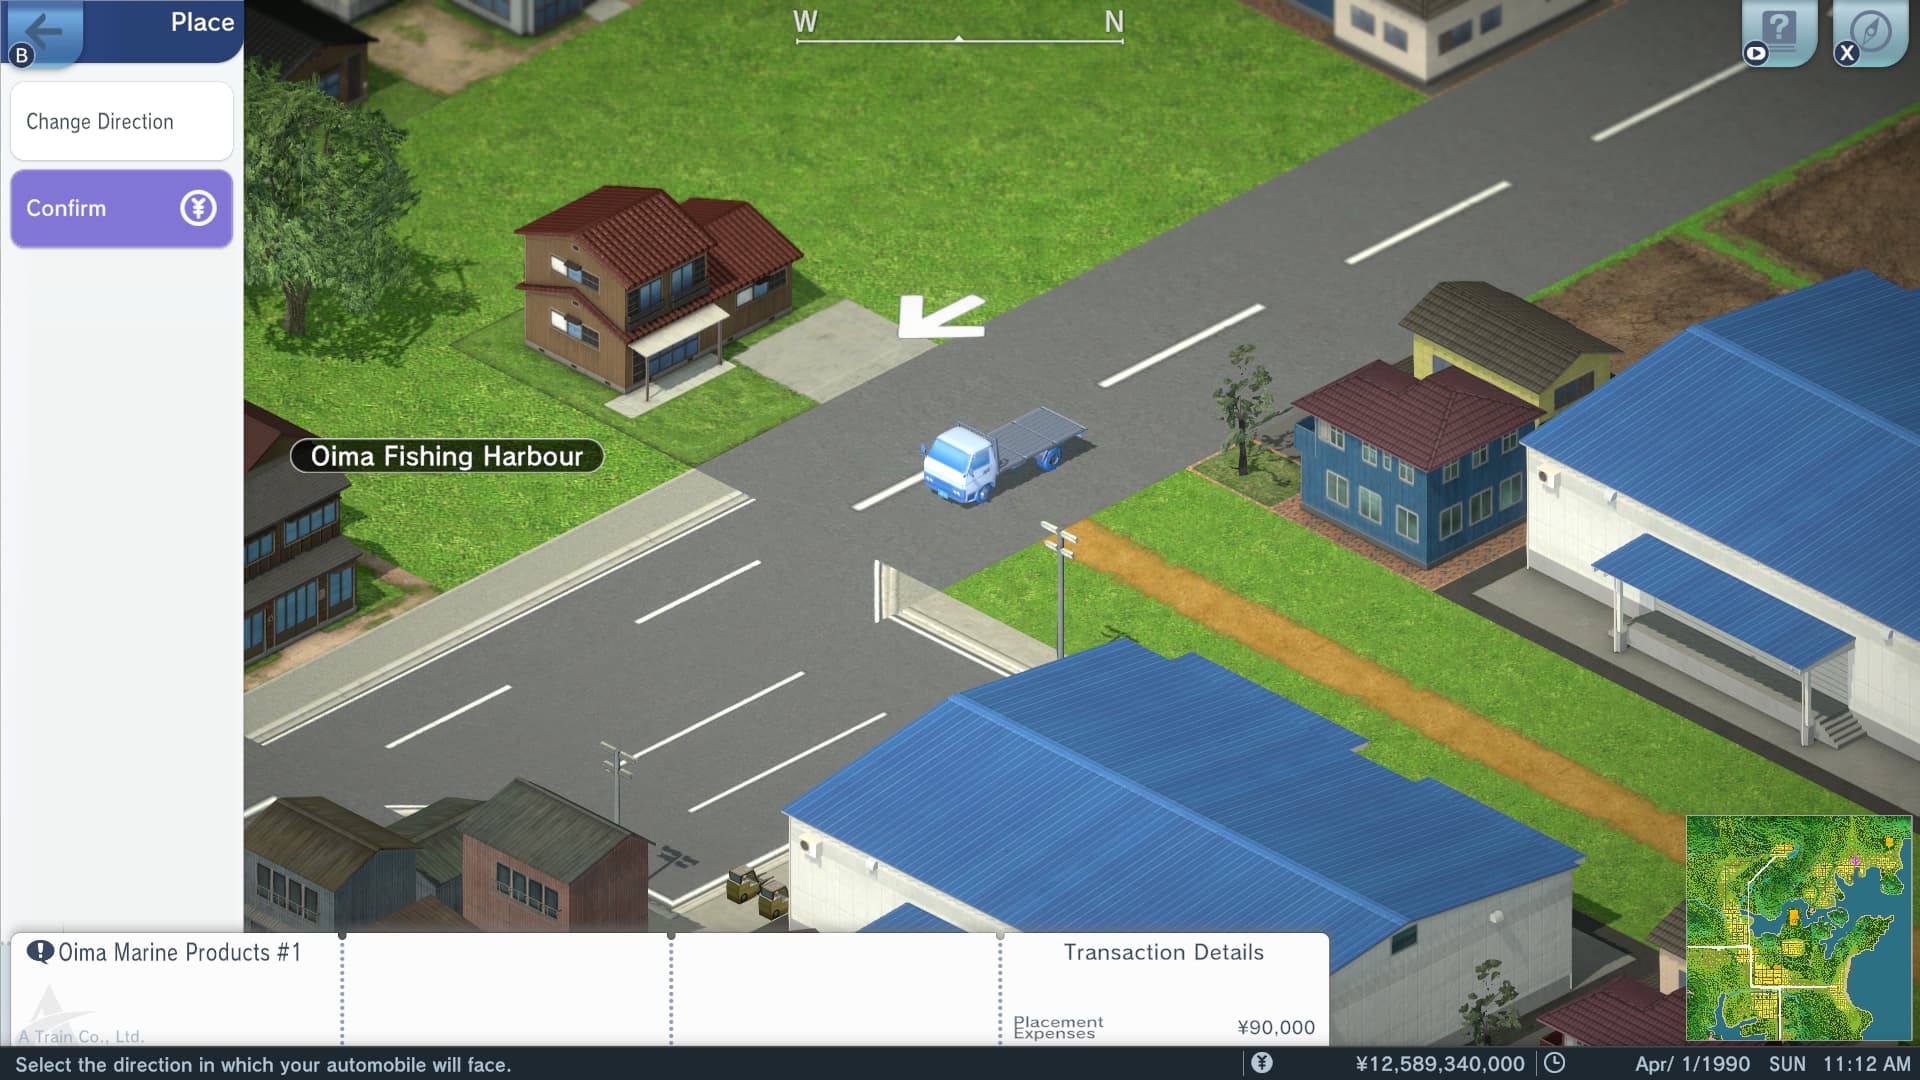
Now, we will move onto placing and scheduling the lorries that will be responsible for transporting all these marine products from Oima harbor to the mid-sized city of Sema. In this case, we are just going to plop down all three of our lorries one behind the other.
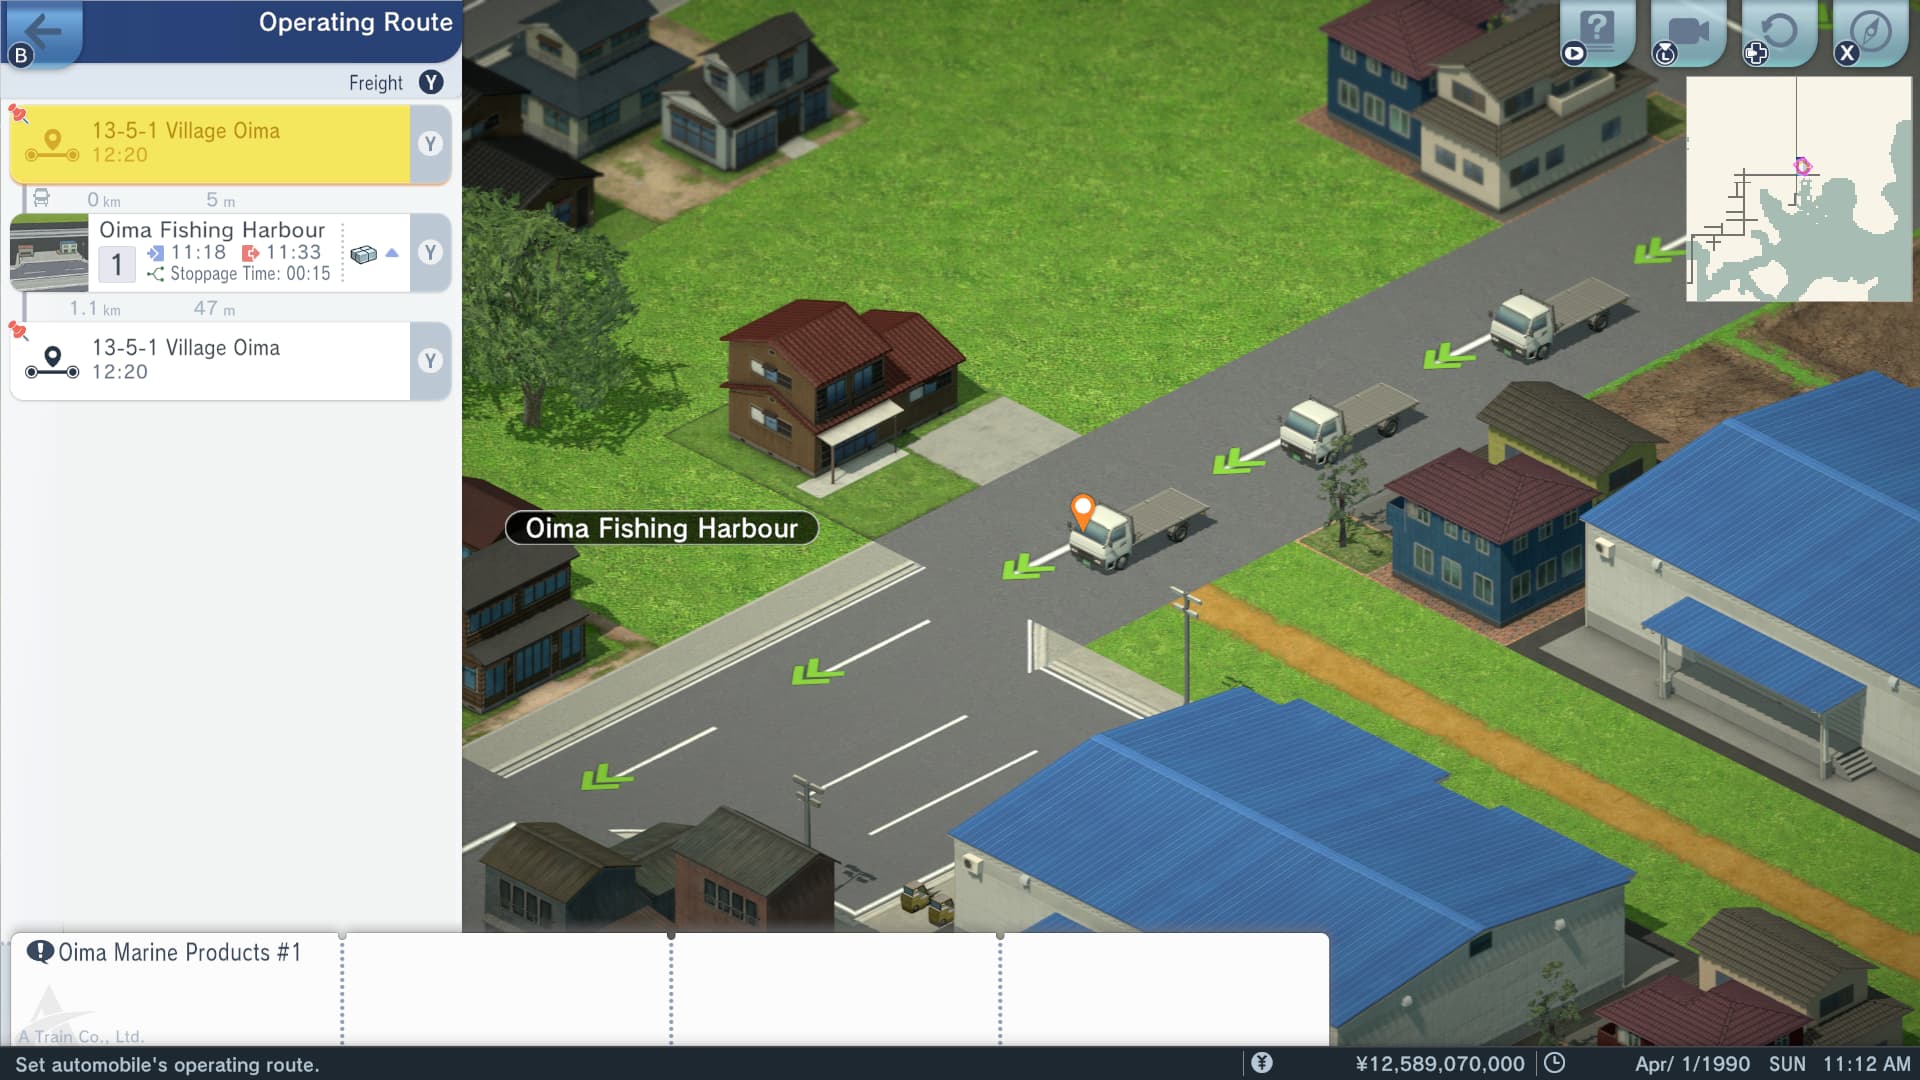
Now that we have placed all of our three lorries, it’s time to get on with giving them an appropriate operating schedule. Scheduling lorries is very similar to scheduling buses, with one or two minor differences since we’re dealing with freight rather than passengers.
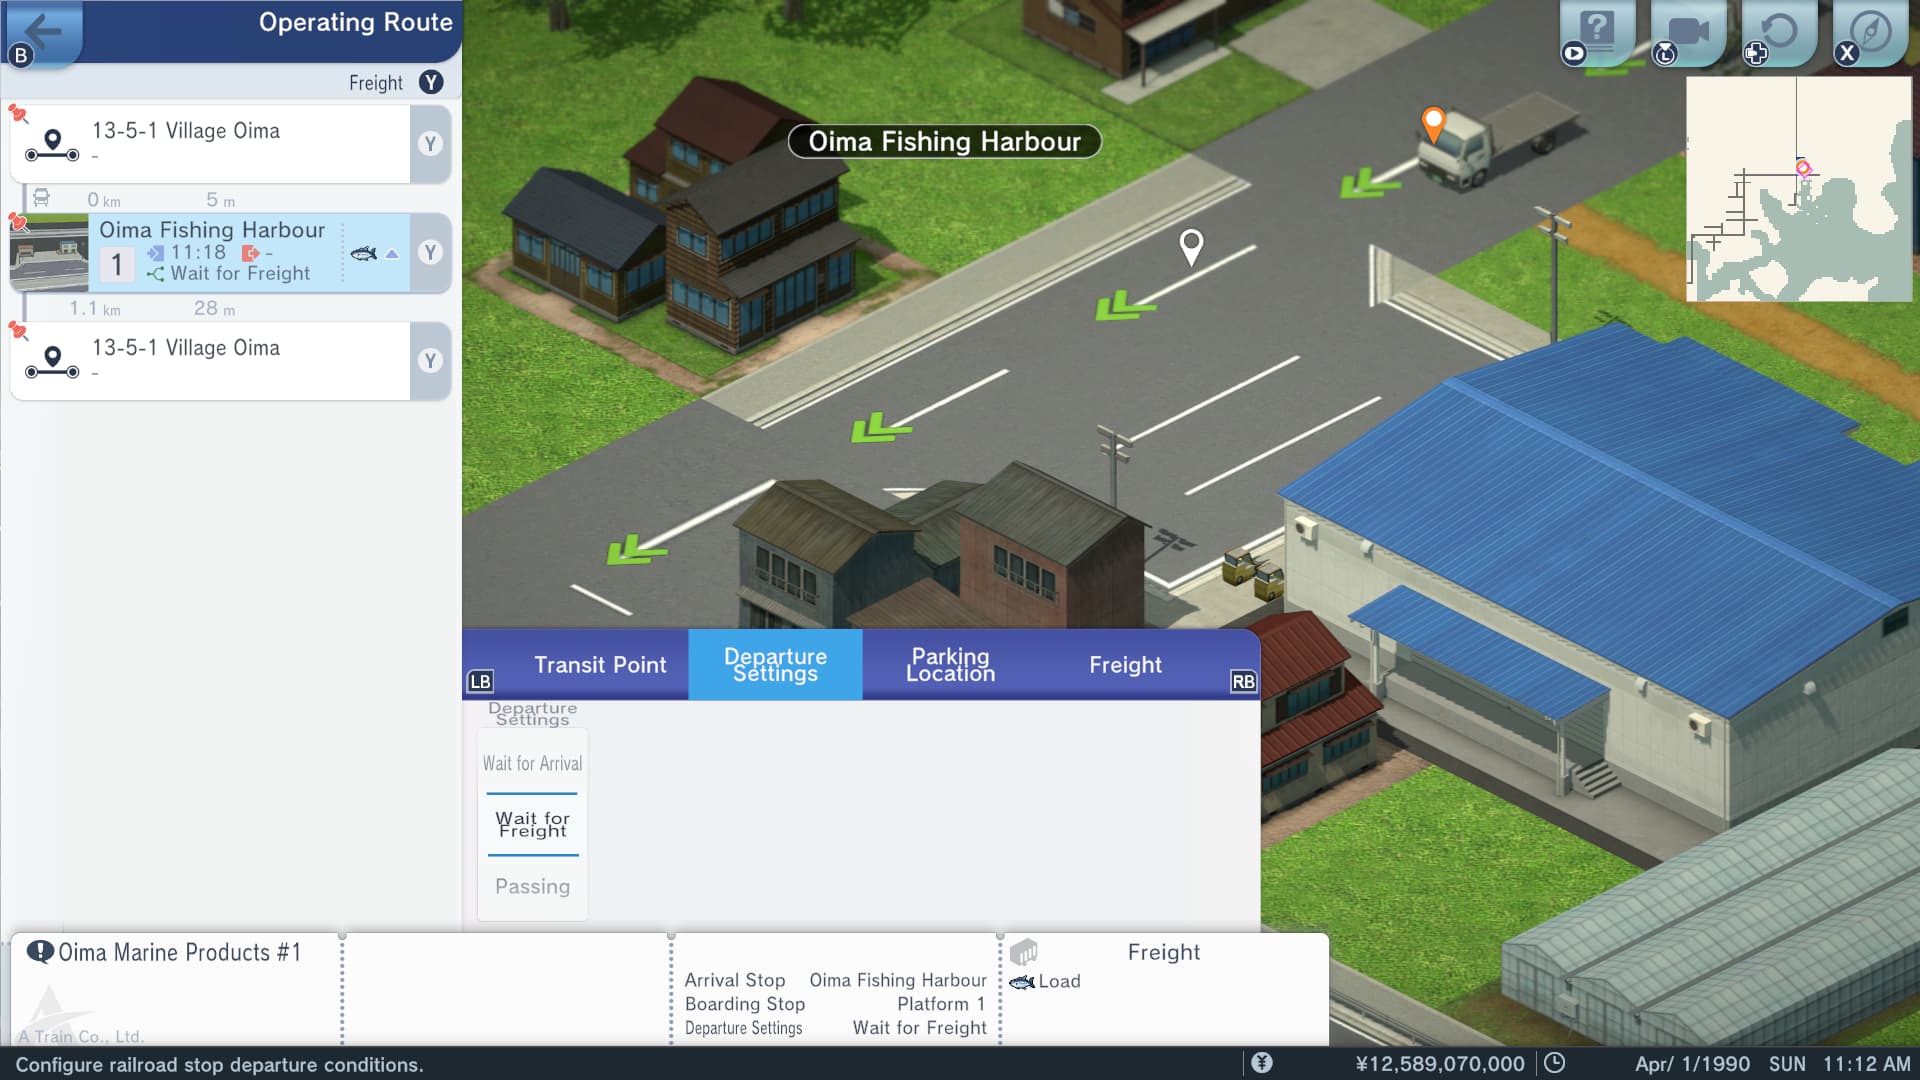
Using the same steps we did earlier for our bus, we’ll add Oima Fishing Harbor as an explicit destination on our lorries’ route. For departure settings, since we’re assigning each lorry its own parking bay (platform), we will use the ‘Wait for Freight’ option. This means that our lorries will wait until they have a full load, of one resource unit, before departing.
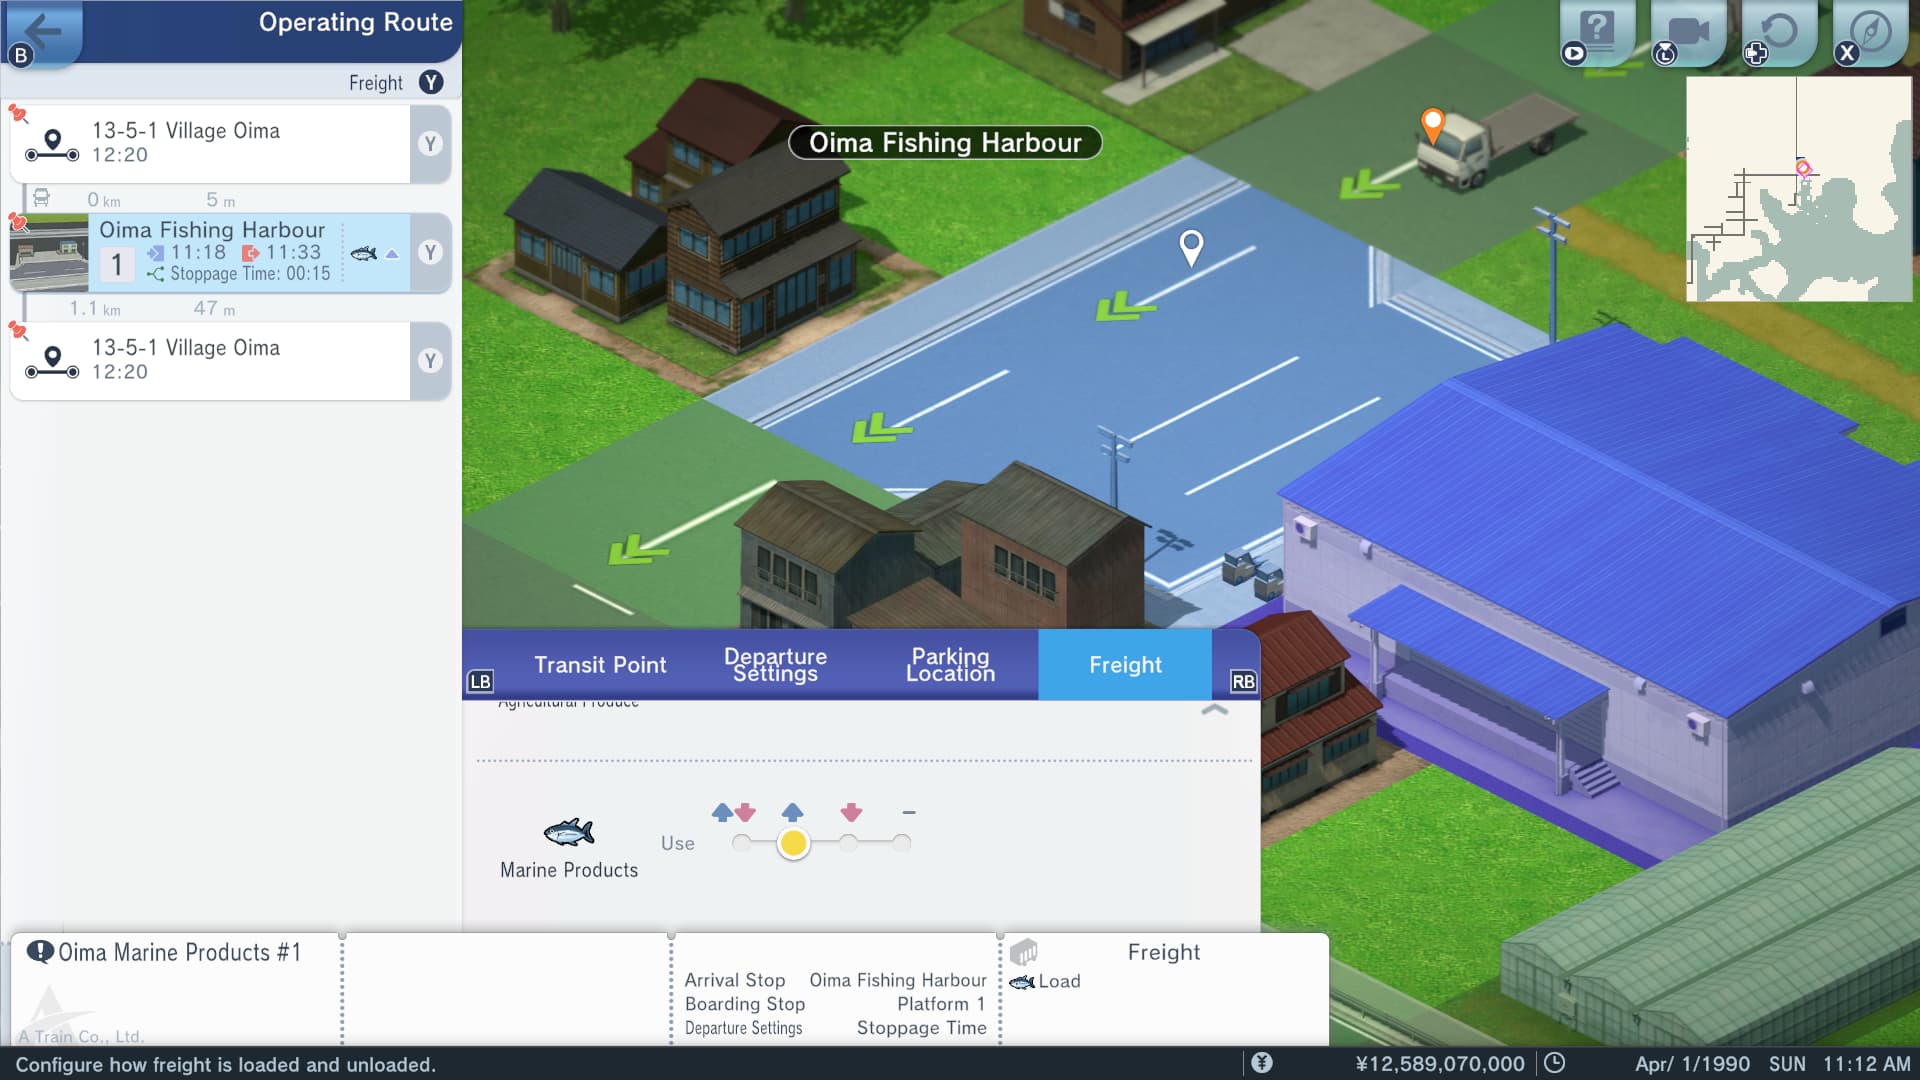
Then under the freight tab we’re going to adjust the settings to ensure that our lorries load marine products at Oima Fishing Harbour.
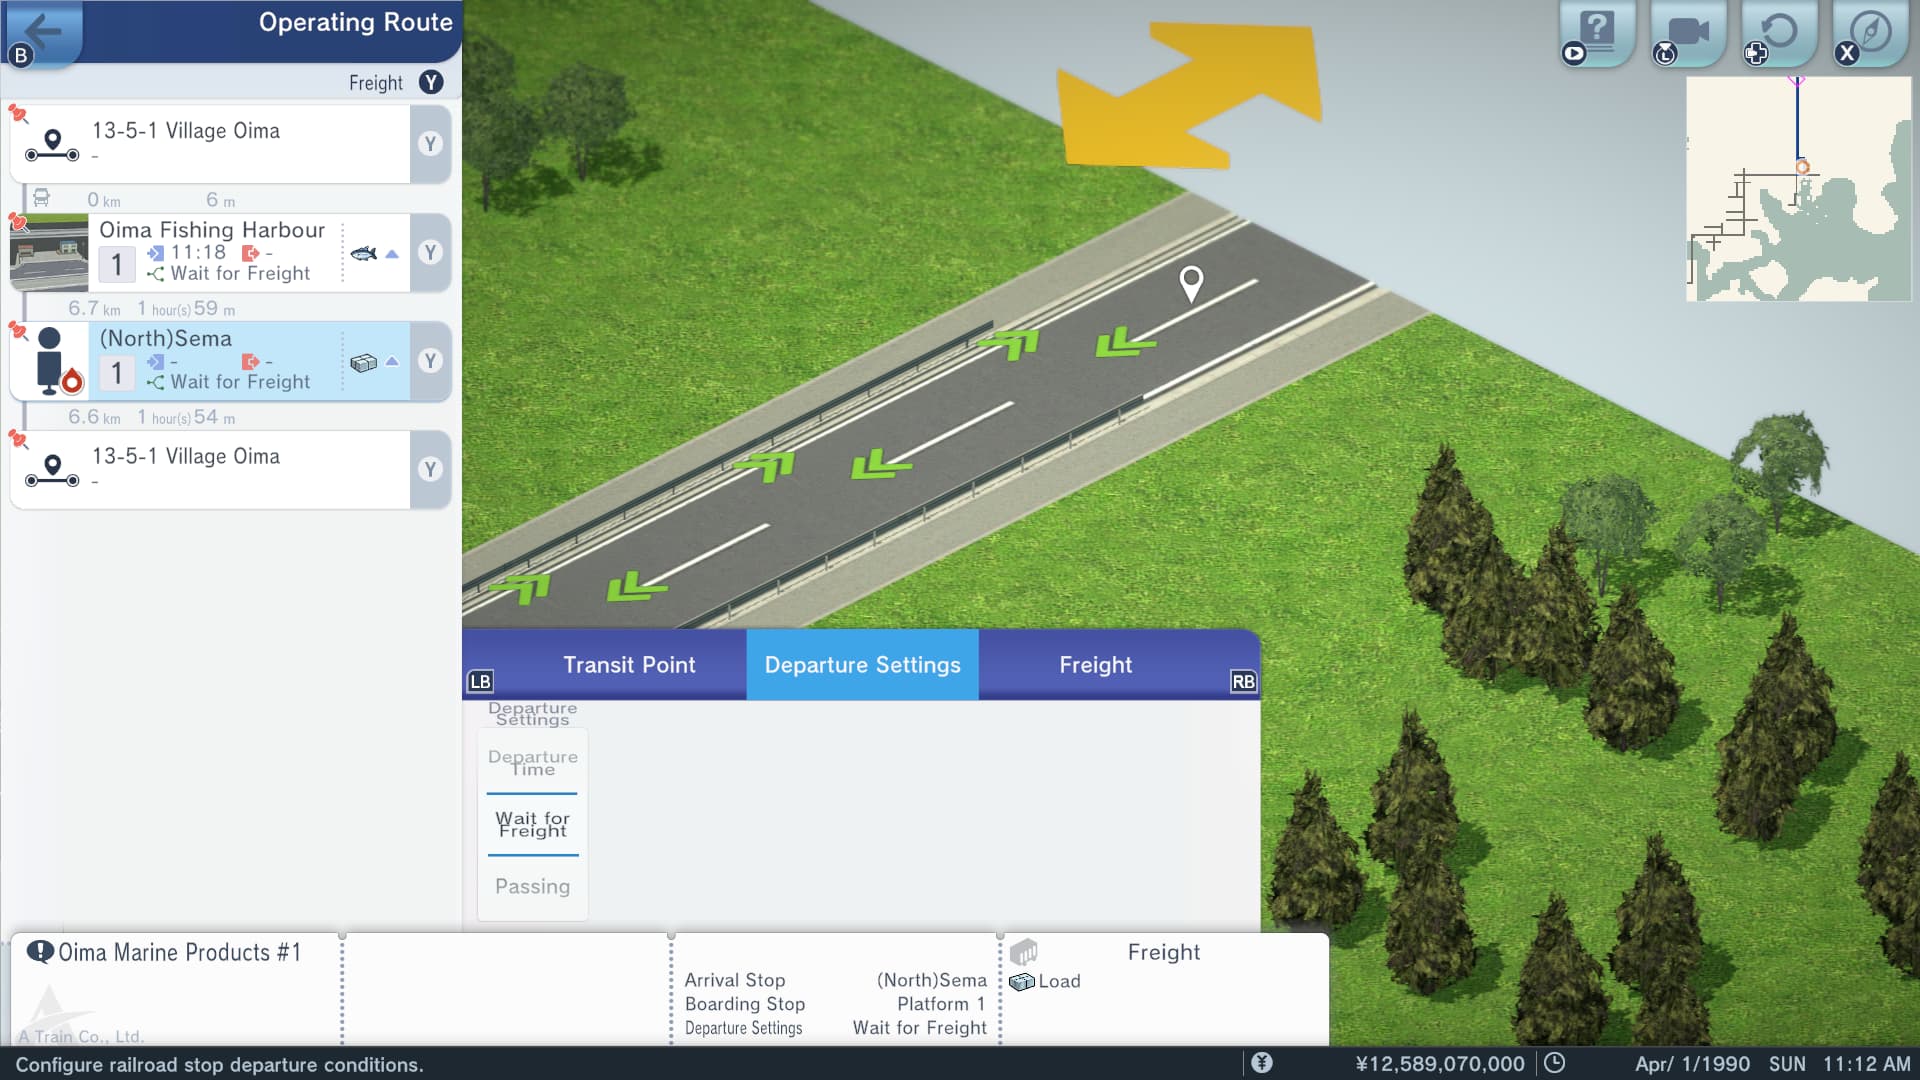
Next, we’ll add Sema as an explicit destination for our lorry’s route. Using the same steps that we should all be familiar with by now. Subsequently, we will use the ‘Wait for Freight’ depature setting again. In this instance, this setting will mean that our lorries will wait in Sema until they can unload their one unit load of marine products. This can be a helpful tool when dealing with resource trading via trade contracts, as our lorries will wait in Sema during any periods where we don’t have any active trade contracts. Thus, eliminating any risk of our drivers aimlessly driving around in circles and accruing unnecessary operational expenses.
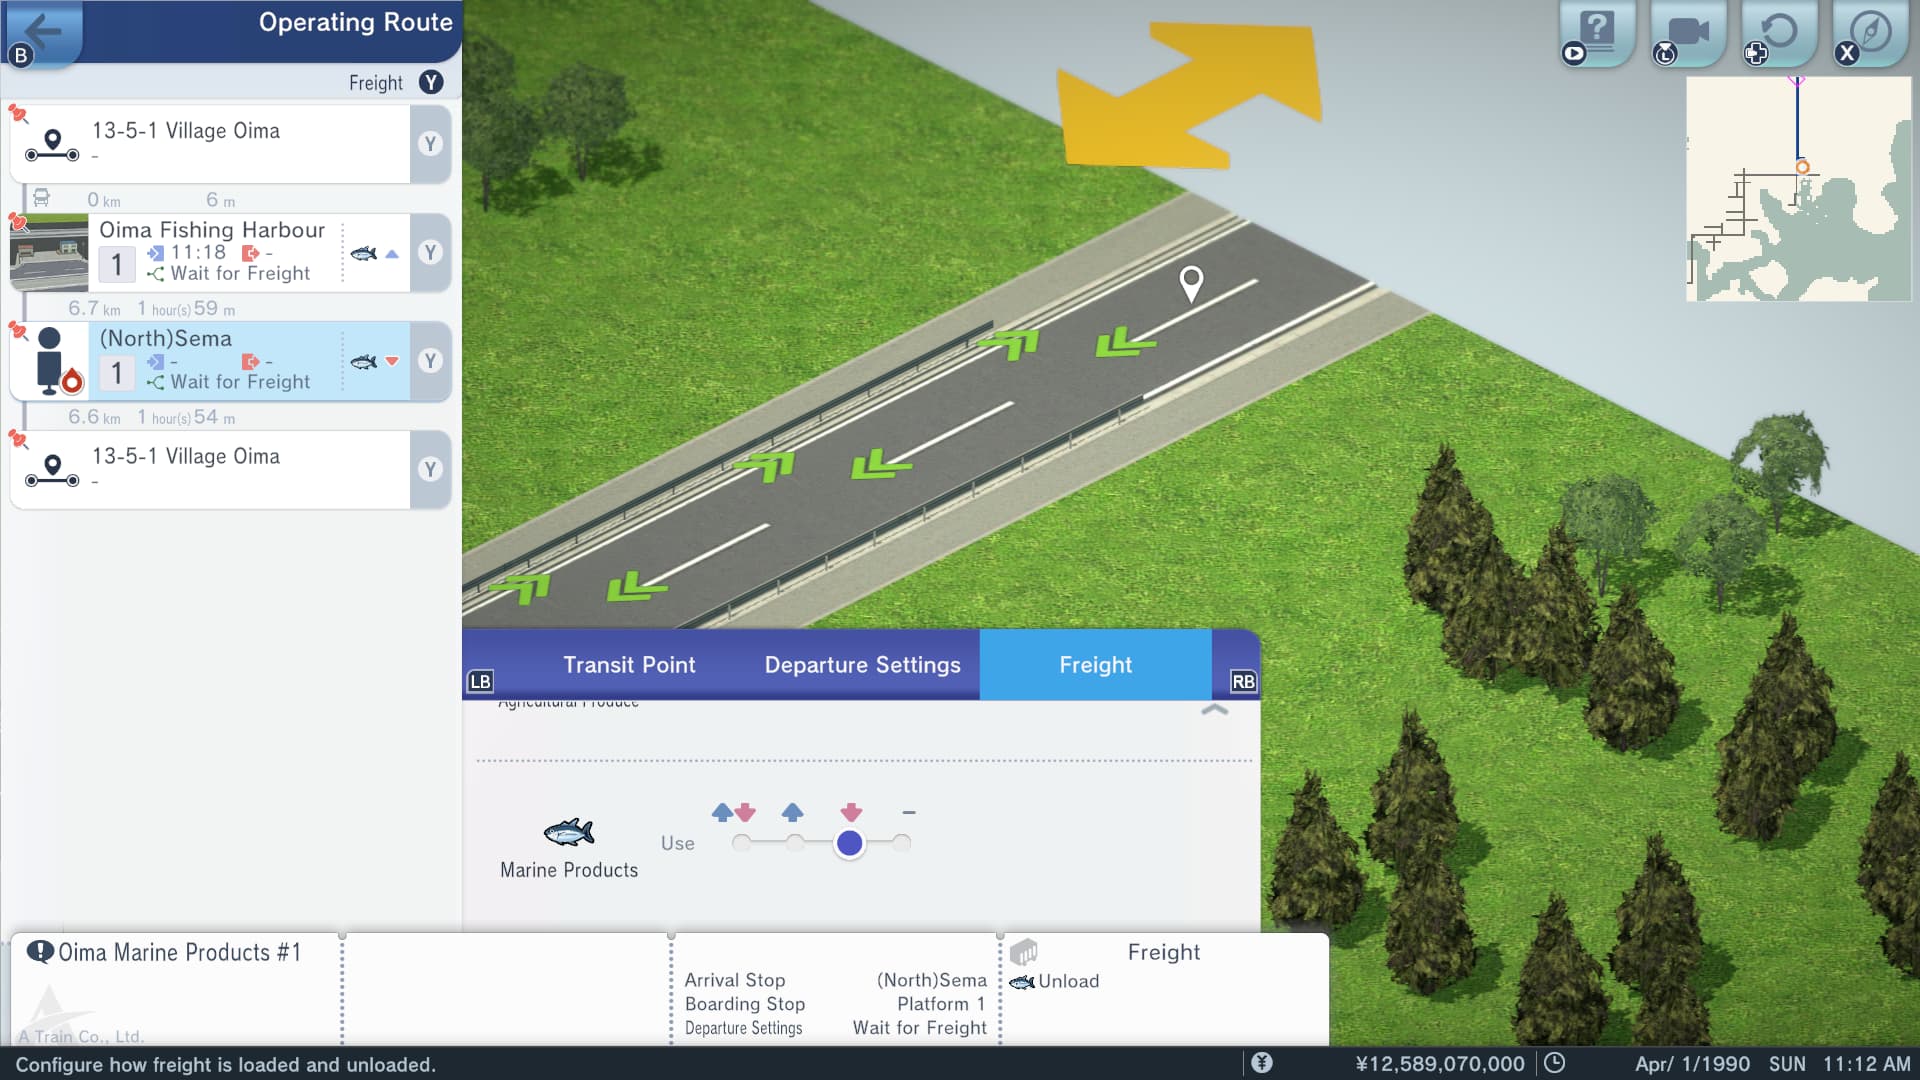
Afterwards, we’ll set our lorries to unload their marine products in Sema.
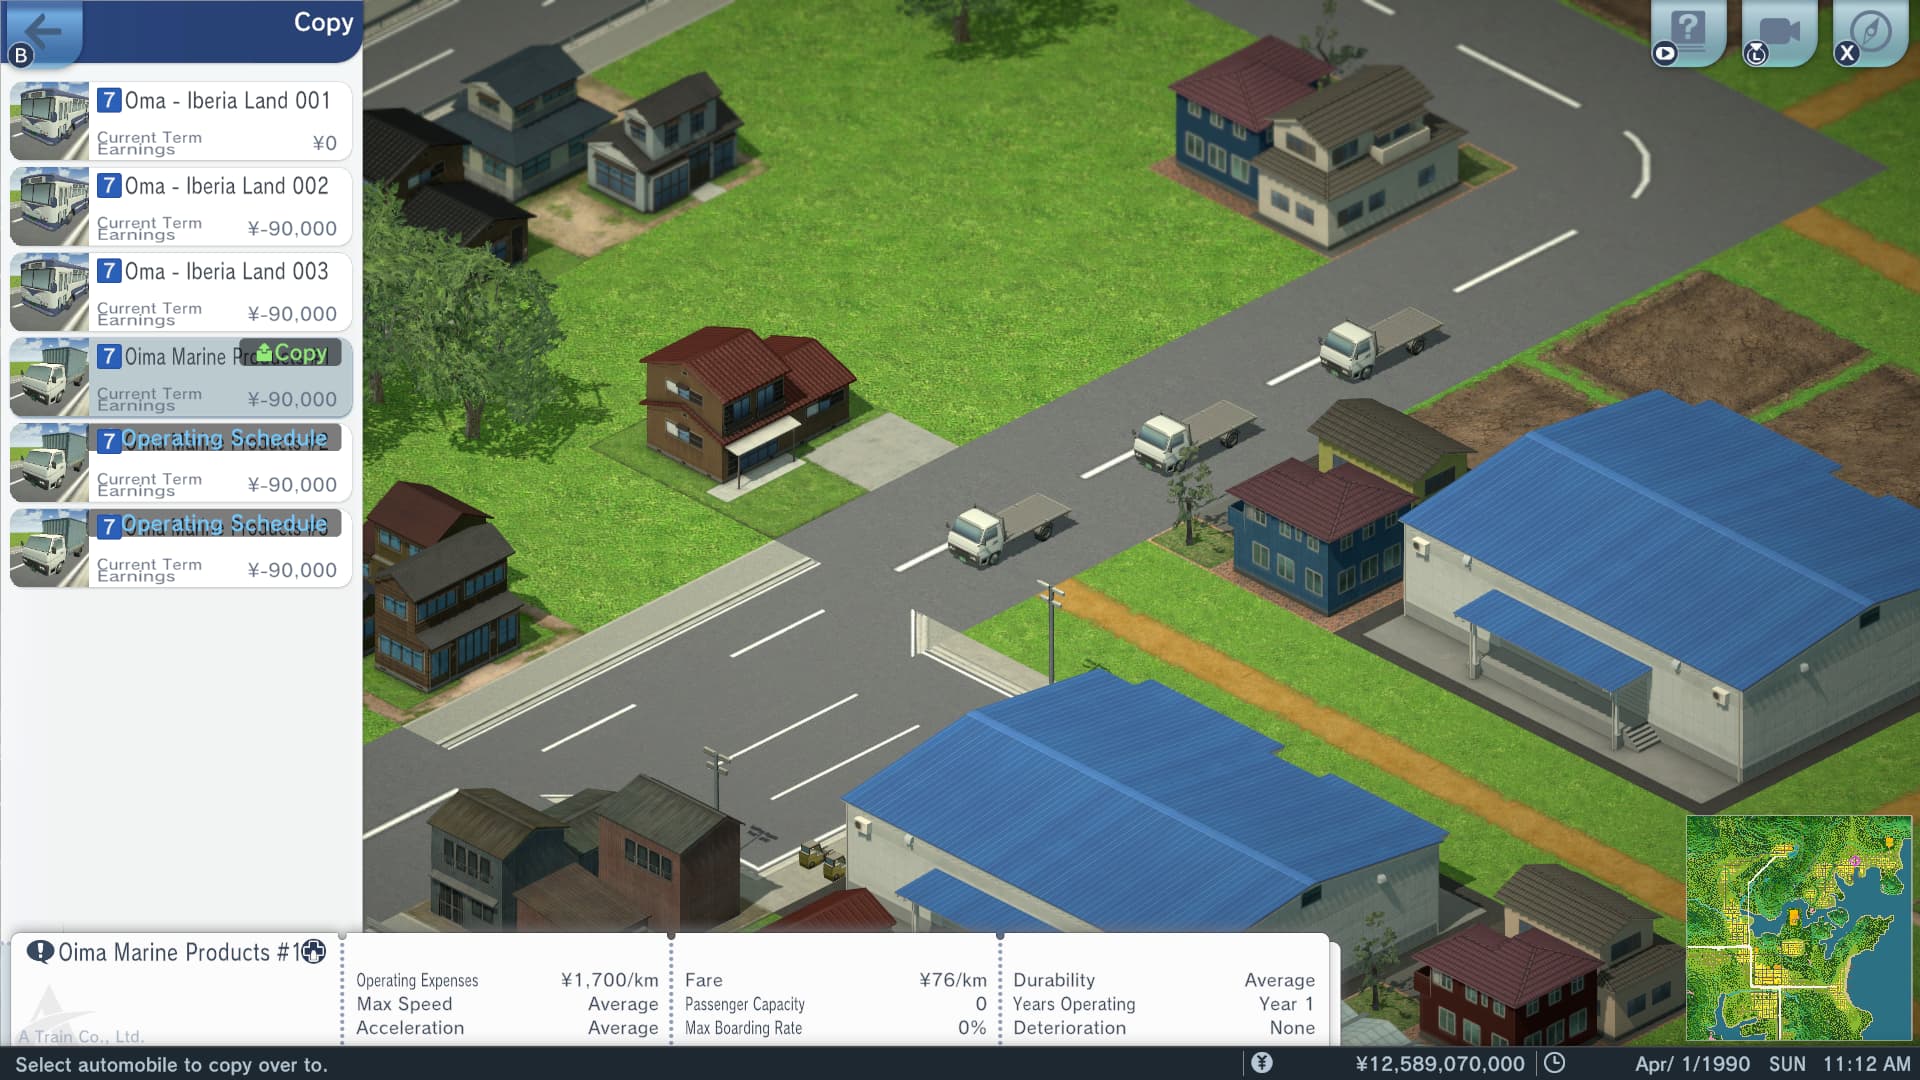
Then comes time for our old friend the Copy function to make yet another helpful return. Since our lorries have the possibility of waiting around for cargo, we’re going to give them each a different parking location setting. We’ll assign Platform 1 to the first lorry, Platform 2 to the second lorry, and Platform 3 to the third and last lorry.

And hey presto!.. We now have an active freight route between the Oima fishery and Sema established and operational. We can see that our marine products warehouse acquired 10 units of marine products from the nearby fishery earlier in the day and our lorries have begun loading them for transportation to Sema.
With a round trip taking just over four hours, a single lorry can transport up to five units within a 24-hour period. Consequently, we should have no issues transporting ten units of marine products to Sema each day. Company staff forecast this should be sufficient throughput to meet the deadlines of the four trade contracts we entered into with Sema.
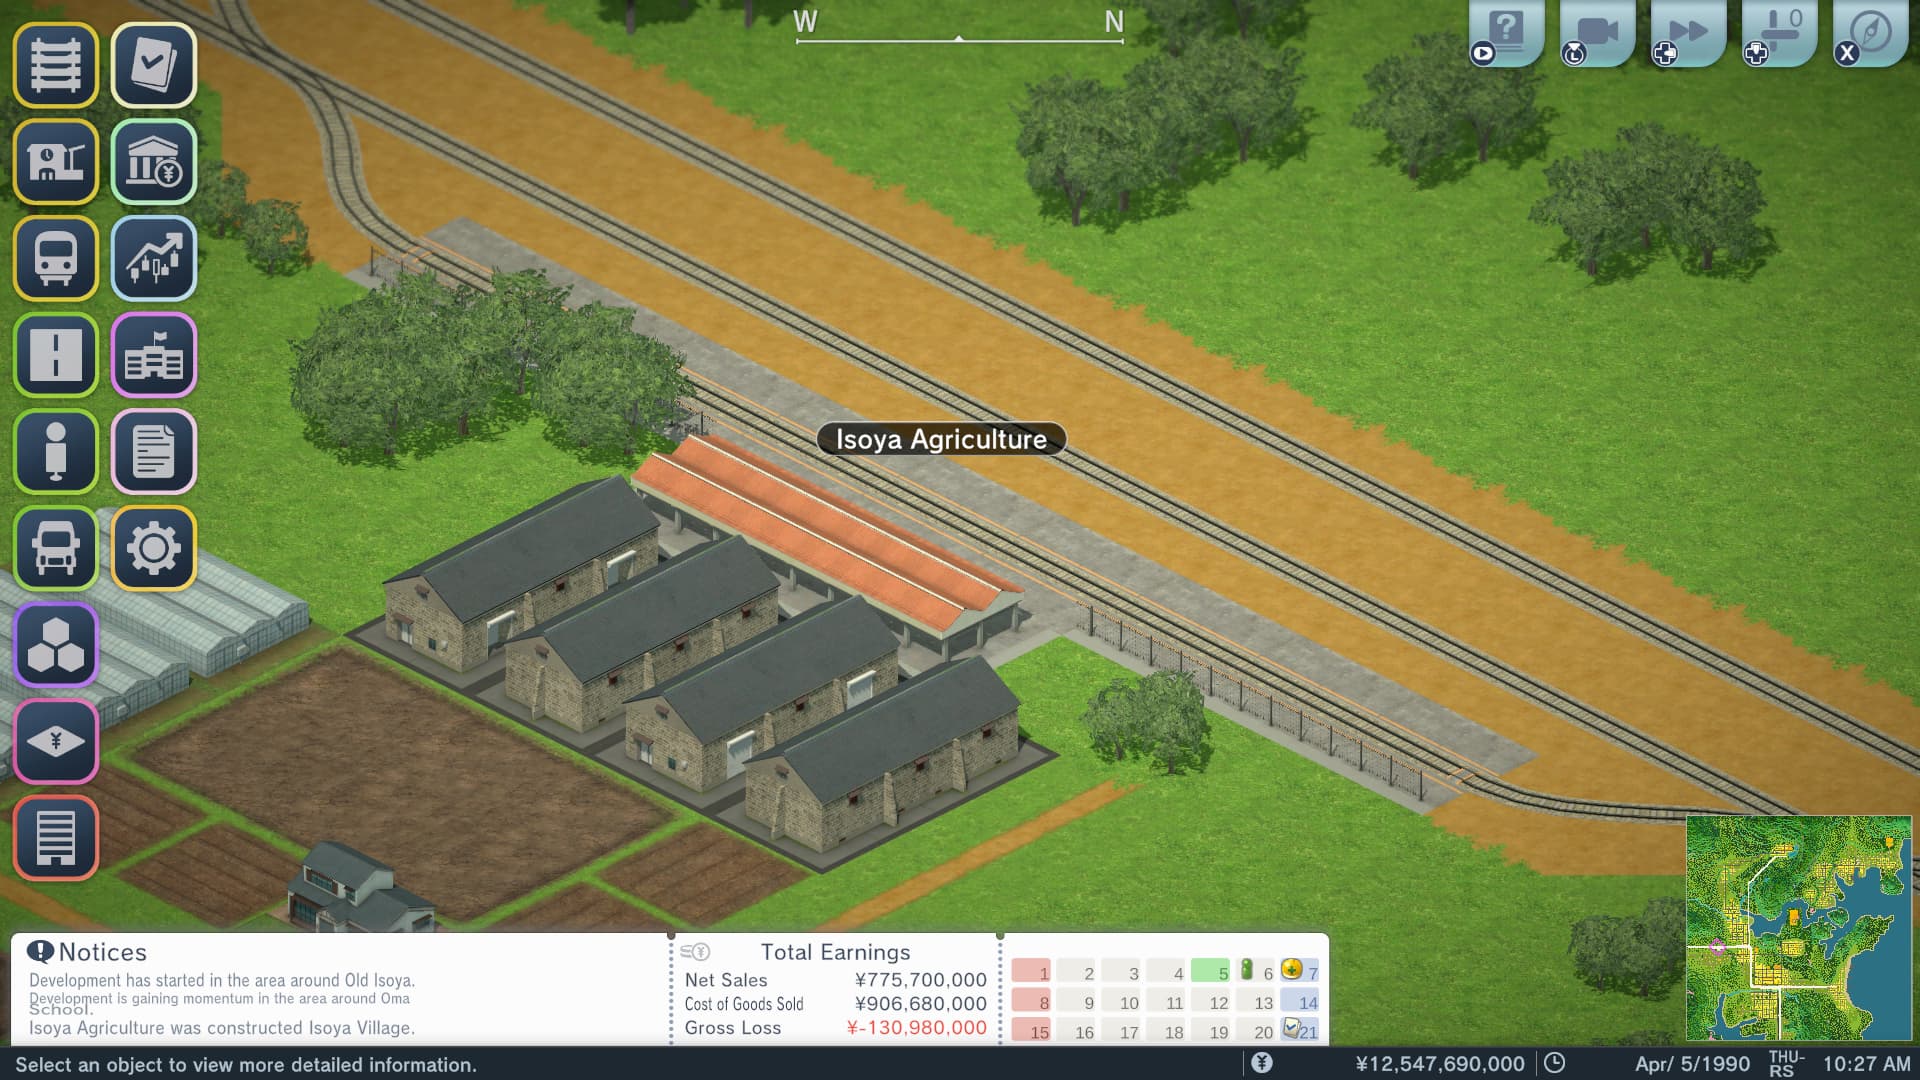
Our last action for today’s entry in Let’s Play of the City of Hopes & Dreams is to let the simulation progress until the Isoya Agriculture freight station completes construction on Apr/05/1990. Construction crews finish building the freight station around 10:27am, allowing our company to press ahead with more of its business plans. However, sadly, that shall have to wait for another day…
All the staff at A Train Co., Ltd., hope you can join us next time as we continue our business journey through the City of Hopes and Dreams scenario. Next time we’ll get involved in trading resources with Tomano and Toyonami, finish construction on our passenger stations, press the remainder of our rolling stock into operation, and possibly much more if there is sufficient time.
Until we next meet aboard the A-Train, we leave you with this artwork of company secretary Ayaka Matsushima presenting everyone a gift for Valentine’s Day. And we hope you a safe and prosperous journey!