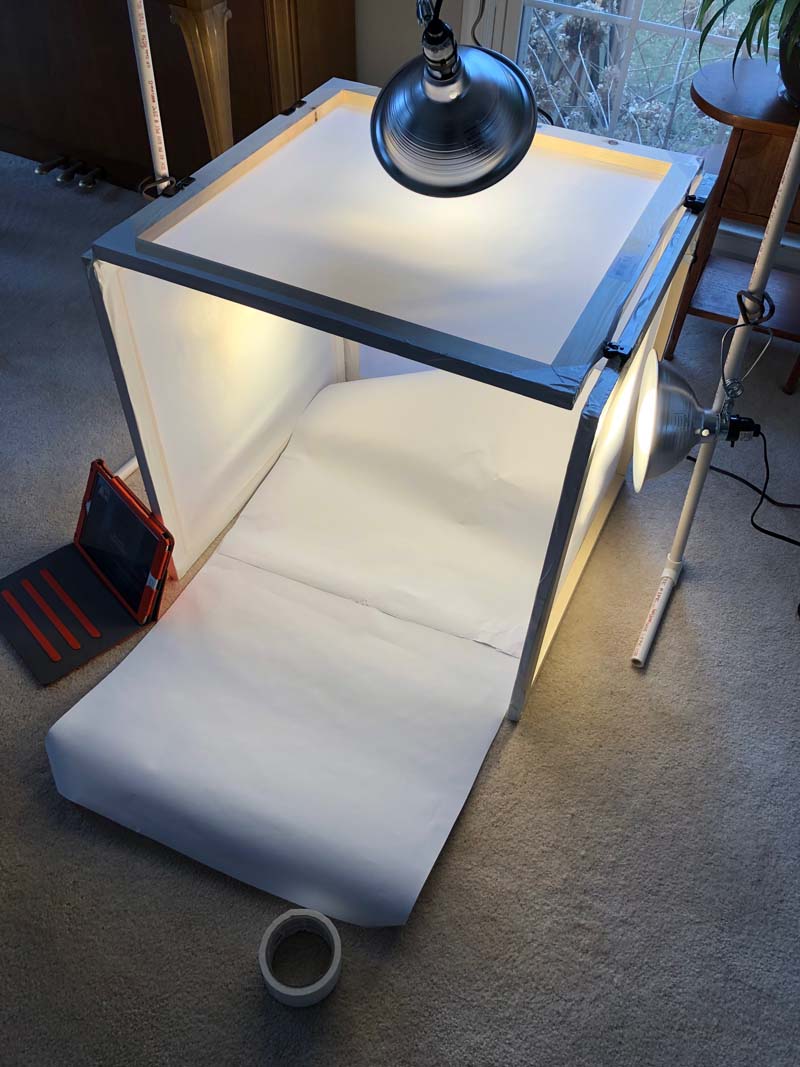
First, here’s a light-box I built to help with photography. My wife is thinking about selling some of her leatherworking on Etsy or whatever, and I figured that snapping pictures on the workbench wasn’t going to go too far.
It was a fun little woodworking jaunt. It’s hinged so that it collapses down into a 2 x 12 x 12 stack, on the assumption that we won’t have it set up all the time.
The PVC light-stand is not going to cut the mustard long-term, plus I need brighter lights. But that’s a project for another day.
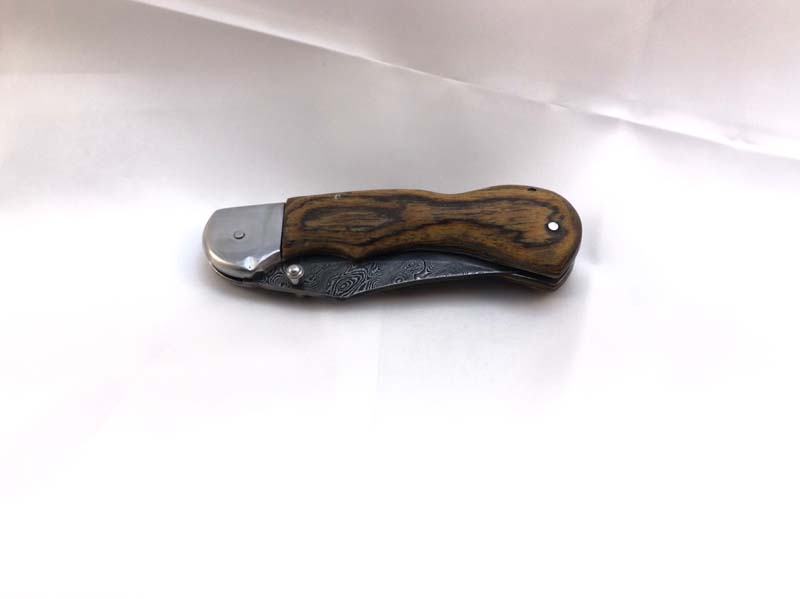
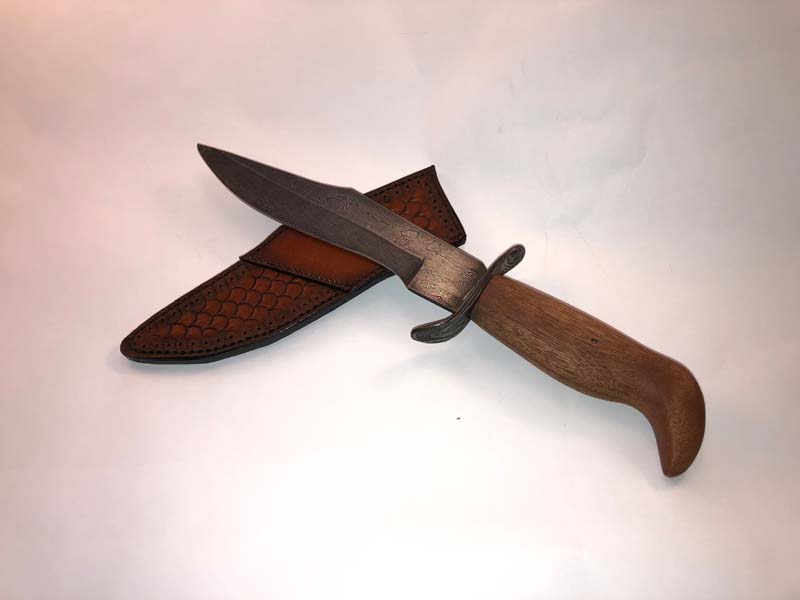
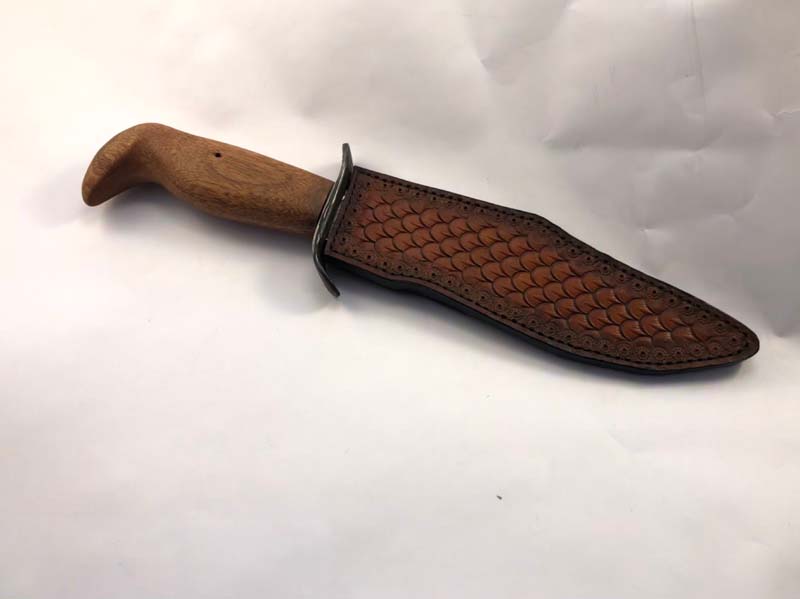
This is a little knife kit that I got from Rockler Woodworking. The kit comes with a blade and all the metal parts; you’re supposed to buy some wood from them to make a custom handle. It’s about $25 after shipping.
I got some Bocote scales that really polished up nicely, but more importantly I took some Damascus steel that I had made for a previous project and tried to recreate the blade. It works nicely and looks OK, but there are a lot of things wrong with it:
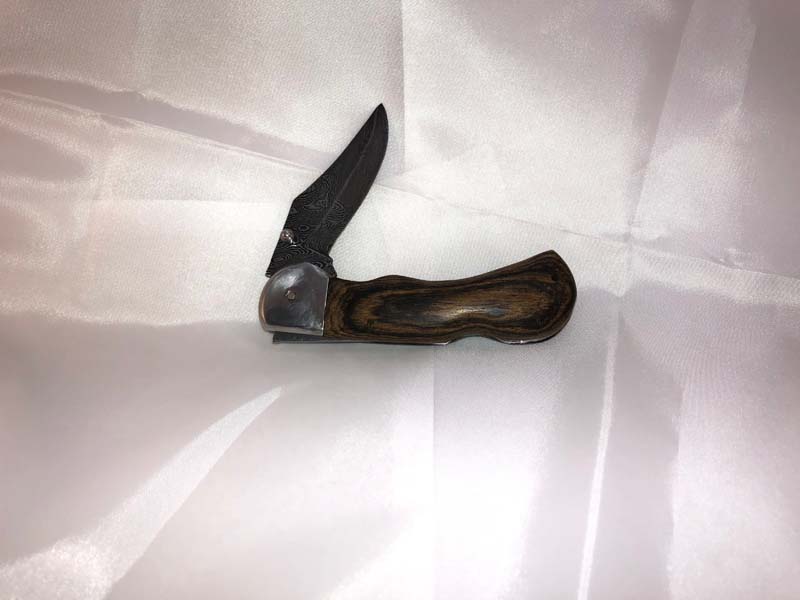
The blade opens, locks, and closes properly and it feels nice and sturdy, but I didn’t file down the bottom of the knife to the proper dimensions, so the mechanism sticks up about a 32nd of an inch… just enough to be noticeable but not enough to be hideous.
I drilled holes through the scales (the wood parts) for the included steel pins to stick through… but they are not actually long enough to hit both sides. That means that there are empty holes on both sides. Ugly.
I got impatient and started to grind the blade after quenching instead of taking it home and tempering it in the oven to take out some of the brittleness. This is not a big deal unless one of your grinding belts snaps and the blade flies out of your hand, hits the concrete and snaps about an eighth of an inch off the tip, requiring you to re-profile the whole blade. But the odds of that happening are really slim. Ha ha.
While sanding down the wood, I took a couple nicks out of the bolster (the silver metal part). You can see one in the top pic.
And finally, I don’t like the nice patterned Damascus next to the plain silver of the bolster. I think the bolster ought to be Damascus too. But to do that I would basically have to machine my own handle out of two pieces of sheet metal and tack-weld on two identical pieces of Damascus, then drill identical holes in both halves. The work necessary to do that is daunting. I think I’ll start Wednesday night.
This turned out to be a fun project, though the more time that goes by the less happy I am with the “fit and finish” on the handle and guard. Every project is a learning experience.
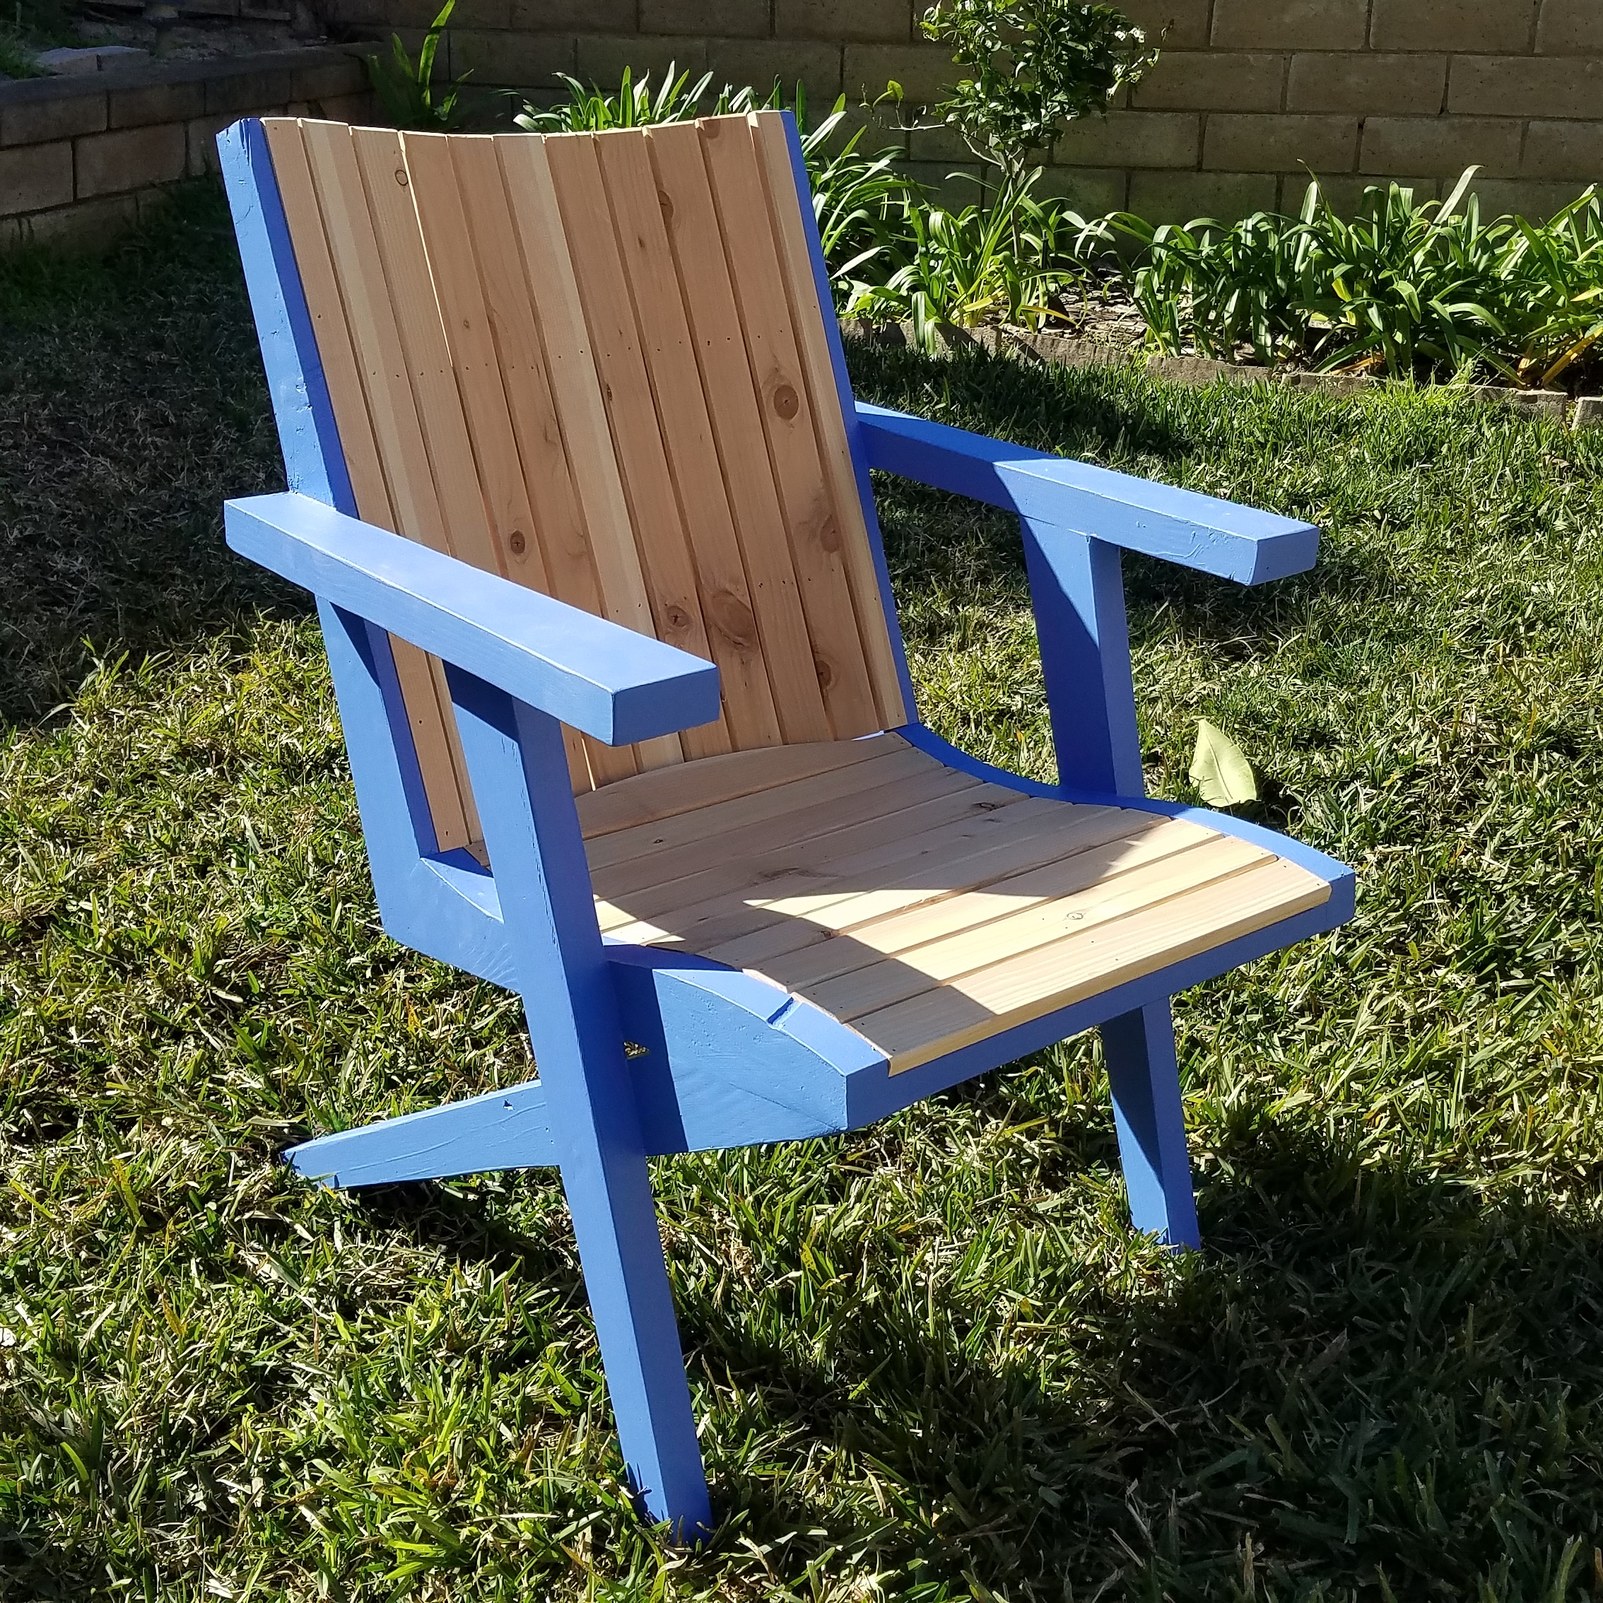
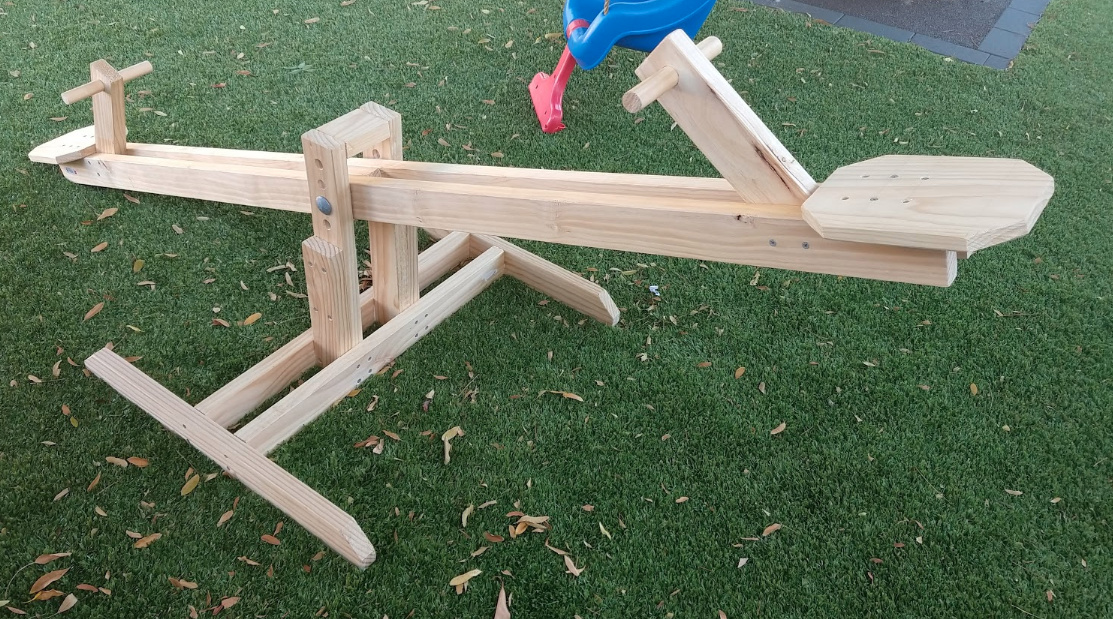
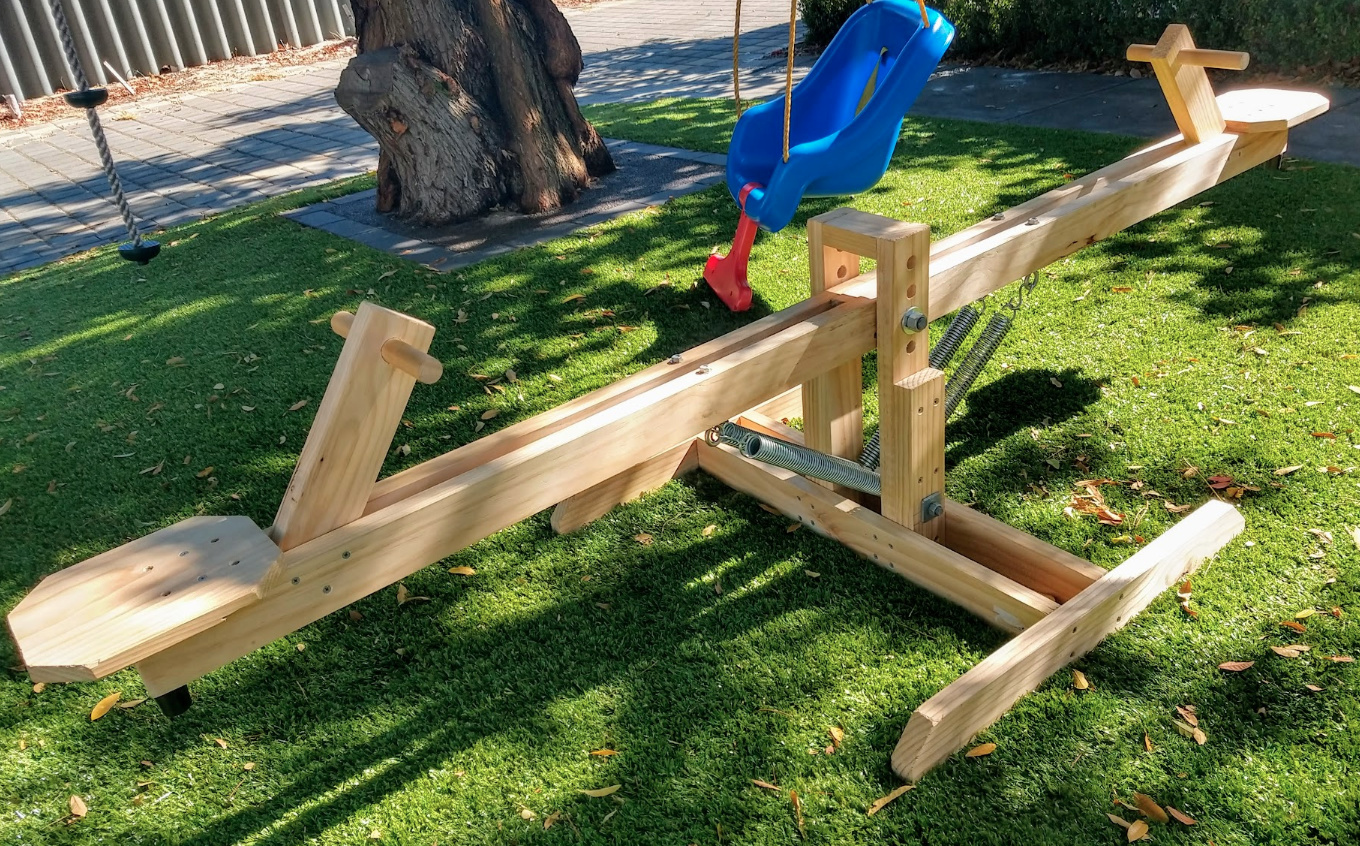
Everything is just screwed together with deck screws. I plugged them so you can’t see them. The slats I just nailed so they would be easy to replace when the get worn out.
I have a pair of andirandack chairs I made that were similarly screwed together and they are finally starting to fall apart after 20 years. I like this design because they are easier to get in and out of. The chairs aren’t the only thing starting to fall apart after 20 years.
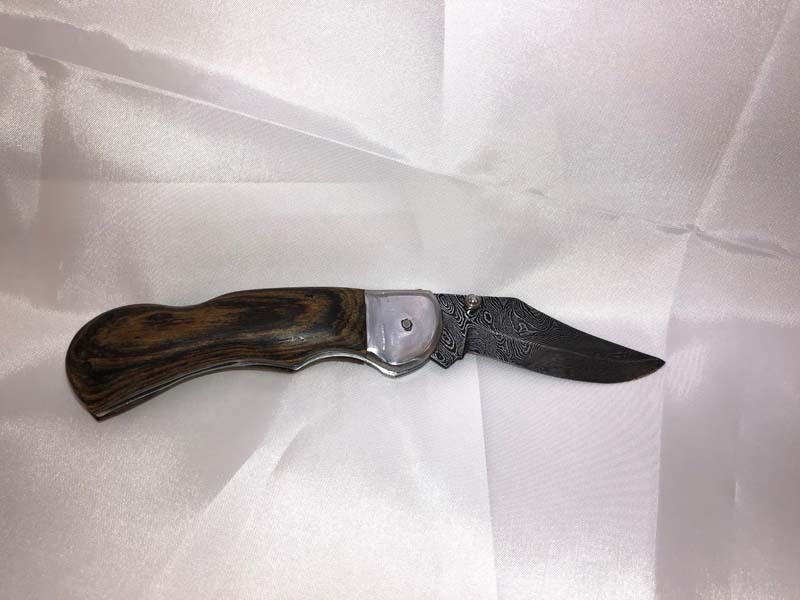
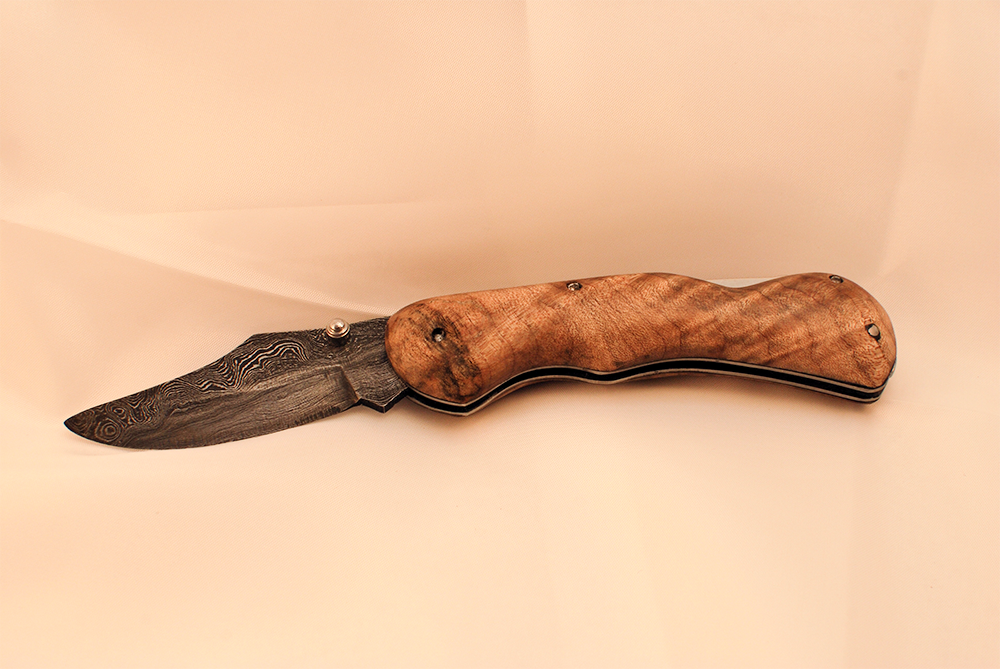
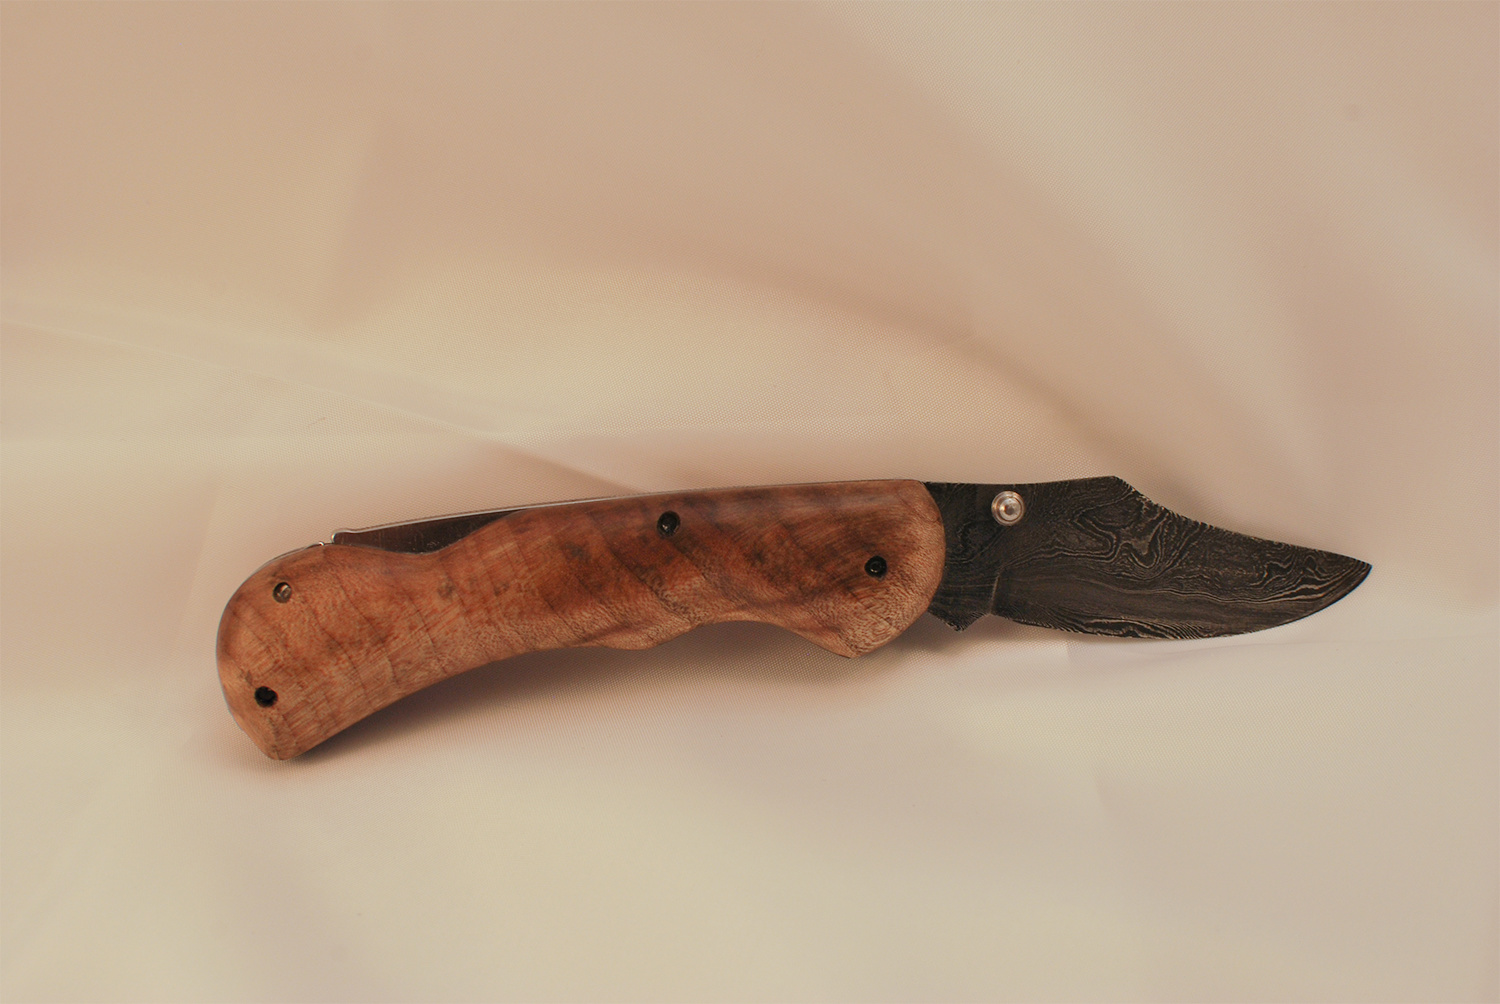
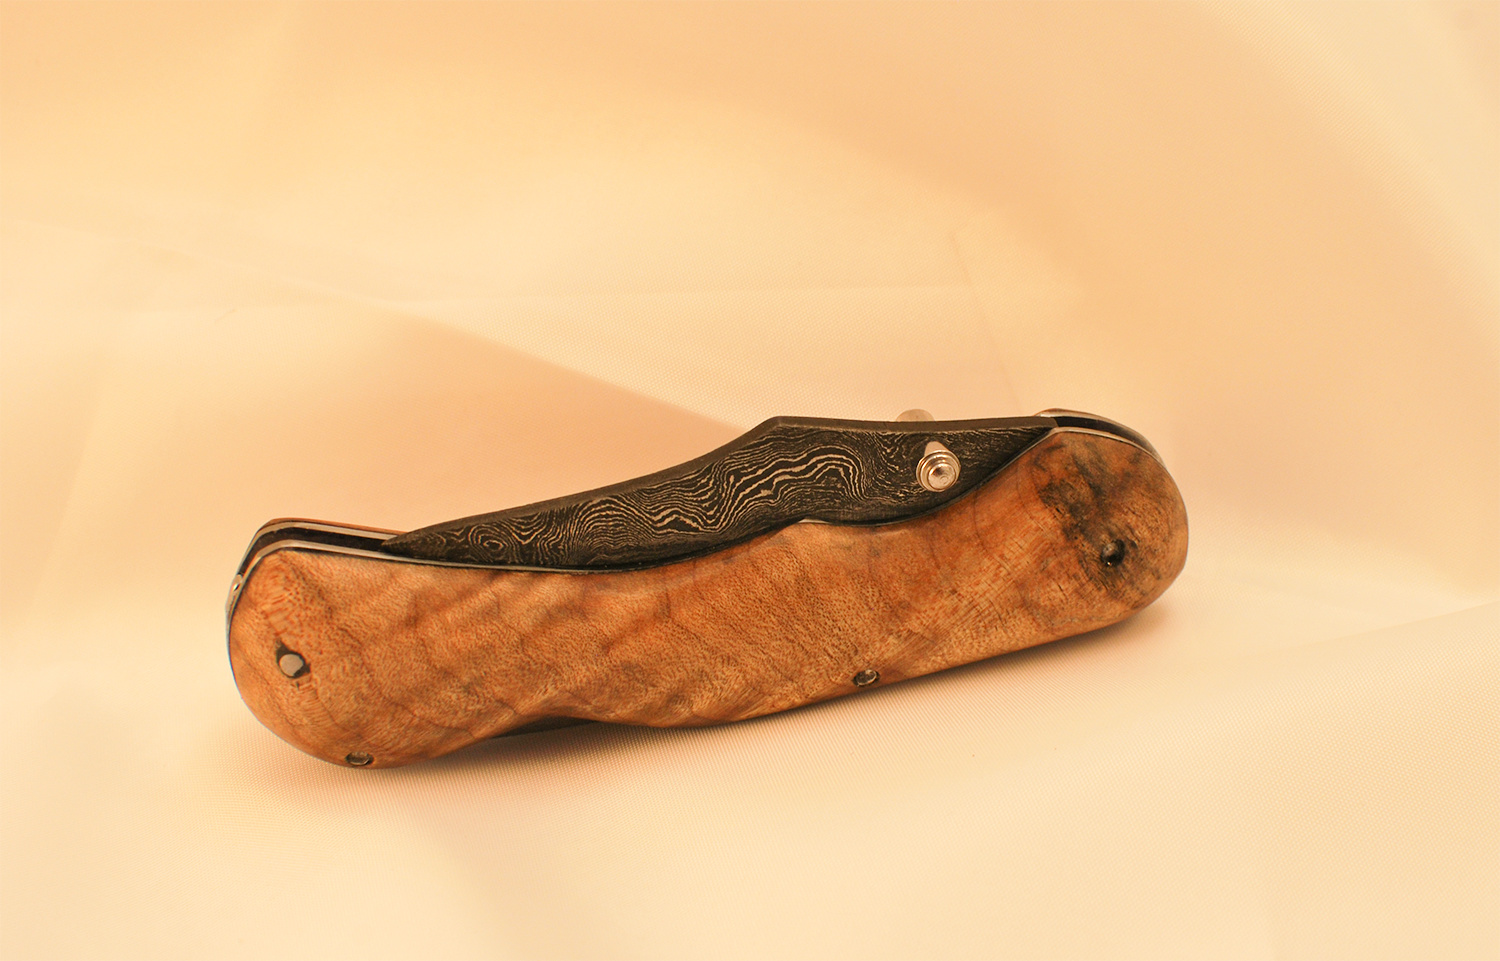
Earlier I posted up a folding knife I was making for my dad’s birthday, but noted that I wasn’t too happy with it and was going to re-do the thing. Here’s the re-do:
Like the first one, this is converted from a kit I bought from Rockler Woodworking, but on this one the only original parts are the internal mechanisms – I replaced the blade, the frame, and the bolsters. I wish I would have replaced the pins too, since they do not quite go all the way through and I think the half-filled holes look messy.
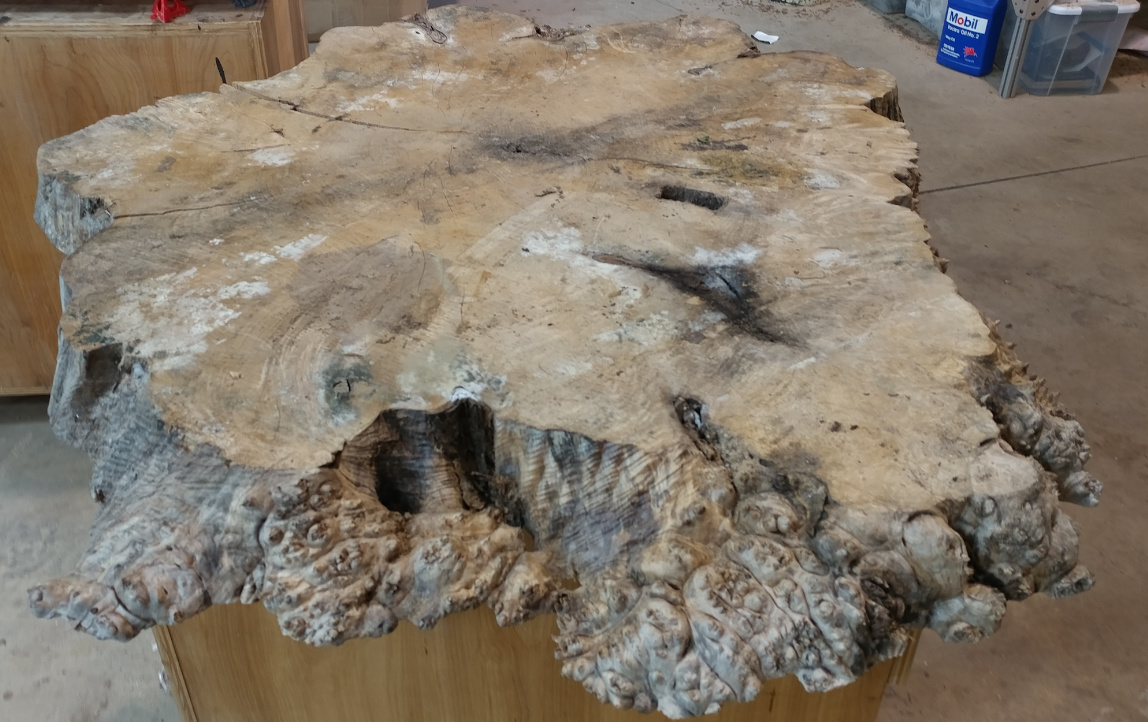
The wood is a maple burl that @Tman generously send me a couple weeks back, and the photos don’t do it justice. Even these little slices are gorgeous, but I’m looking forward to doing some bigger handles that show off the pattern and spalting more.
Since burl is kind of brittle and maple isn’t the strongest wood on the world, I ended up “stabilizing” the wood. Now, I didn’t know what that meant last month, but now I’m a… well, not an “expert”, but more than a clueless schnook. Maybe an “exschnork.” I feel informed enough to spout off words like “spalting” and “resin” with no irony whatsoever, and that’s a good thing.
Anyway, stabilizing wood involves submerging it in a resin and plopping it in a vacuum chamber for a few hours, then soaking it overnight, and finally baking it in an oven for a handful of hours. So now I own a vacuum pot and pump, and I picked up a $10 toaster oven from the secondhand store whose temperature dial is not even remotely accurate (luckily I have no shortage of thermocouples). In the end you have a piece of wood that is impregnated with hardened resin that can stand up to a lot more abuse, and which polishes up really nicely.
I didn’t use a bag in this case: The stabilizing resin doesn’t cure at room temperature, and once mixed with the activator the resin remains liquid and “good” for like three months. It can be easily washed out of the vacuum chamber with soap and water (after you’ve poured all the unused stuff back in the container).
Here’s the cheapo kit I got from Amazon:
Once you remove the resin-soaked wood from the pot, you do need to wrap it in something before you bake it (at 210 F), because as the wood heats some resin will seep out. I used foil wrap, and I didn’t spray anything on it – it did stick to the resin that seeped out, but most of it peeled away fine.
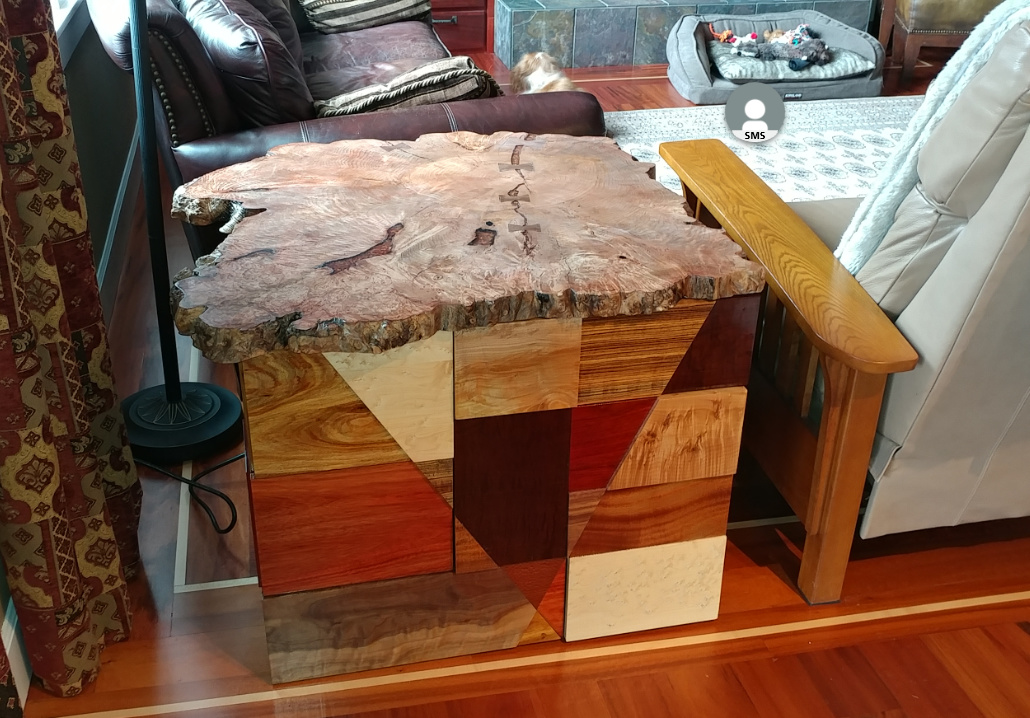
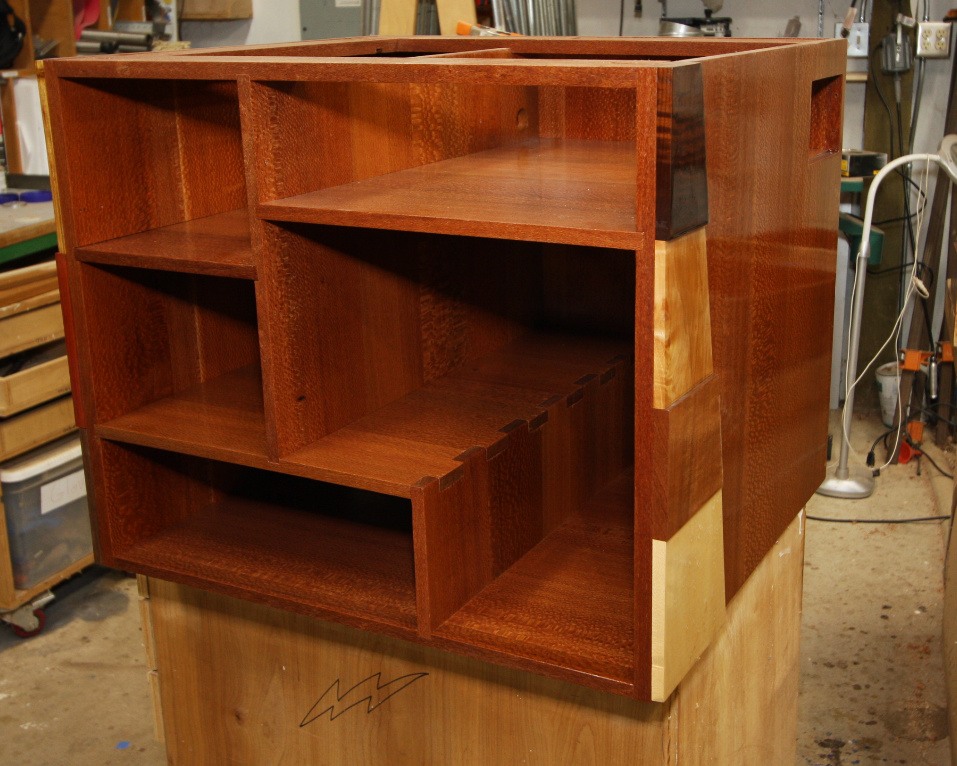
So my latest piece for a client was delivered today. She wanted an end table with a lot of different types of wood. It took about 4 design sessions to close in on the design.
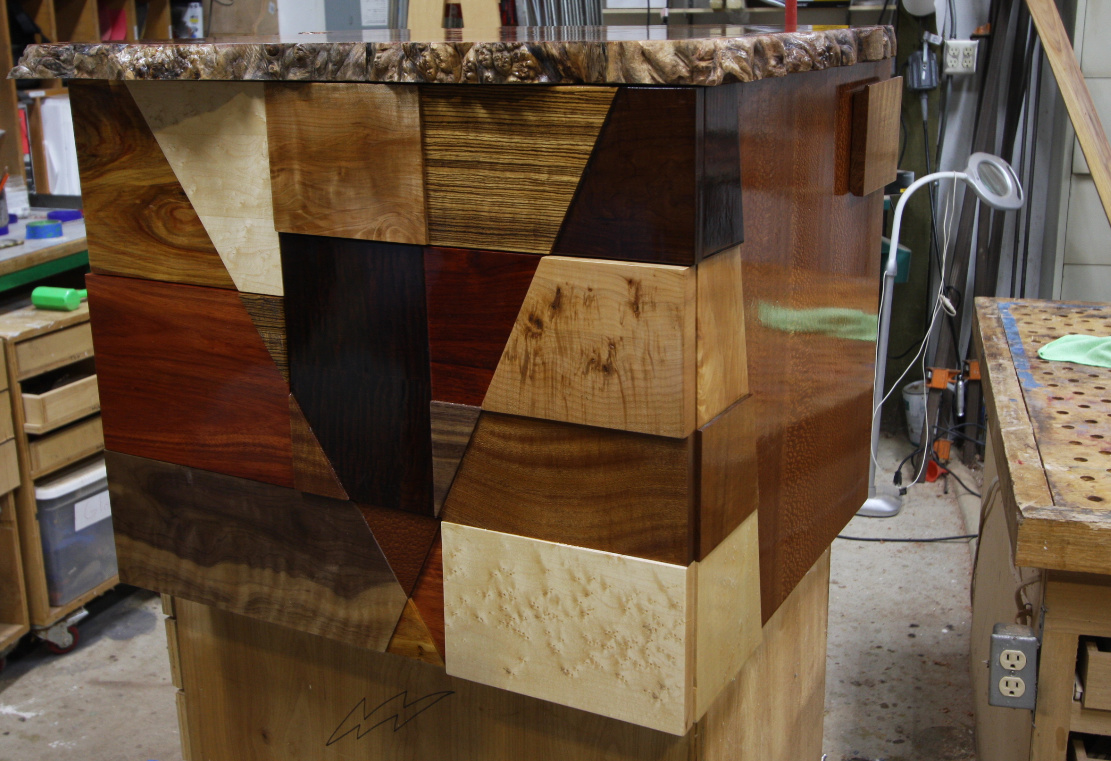
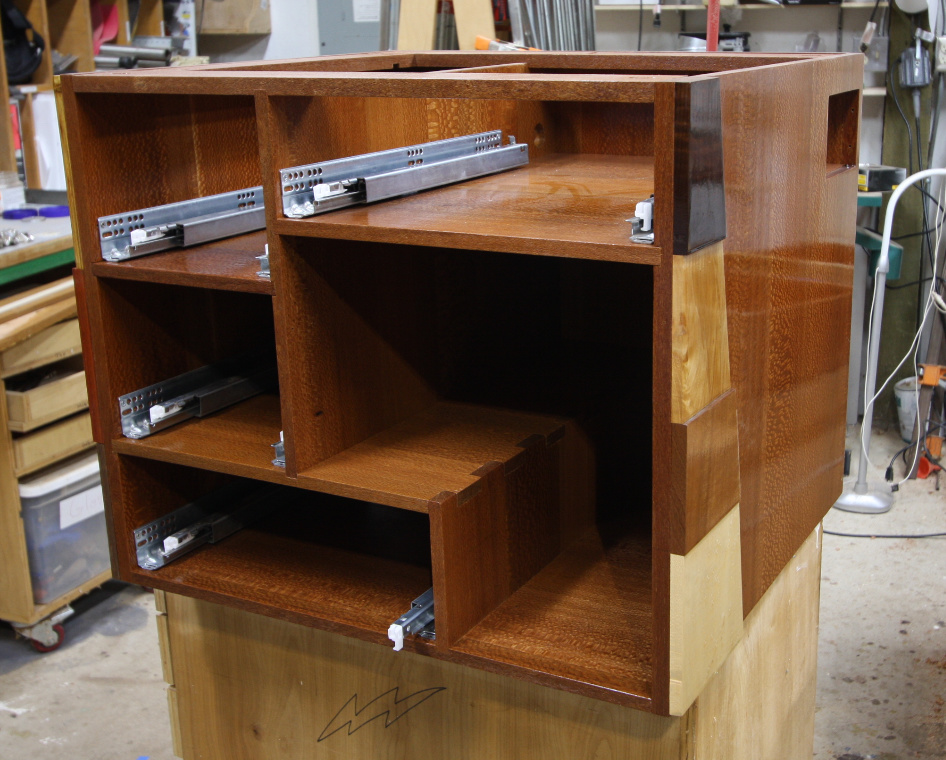
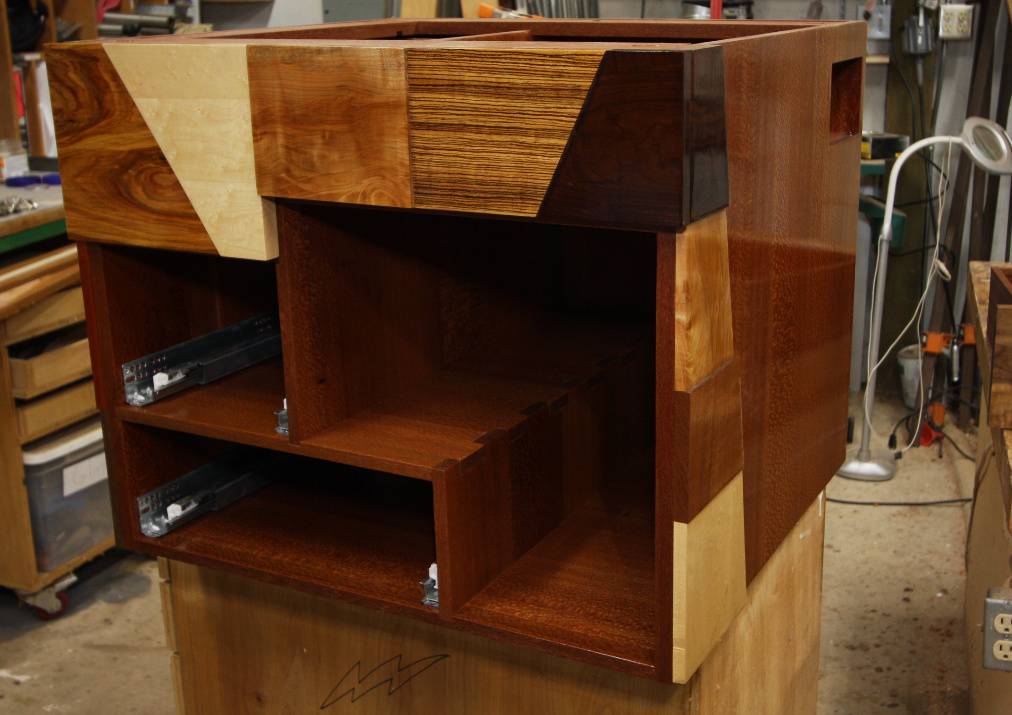
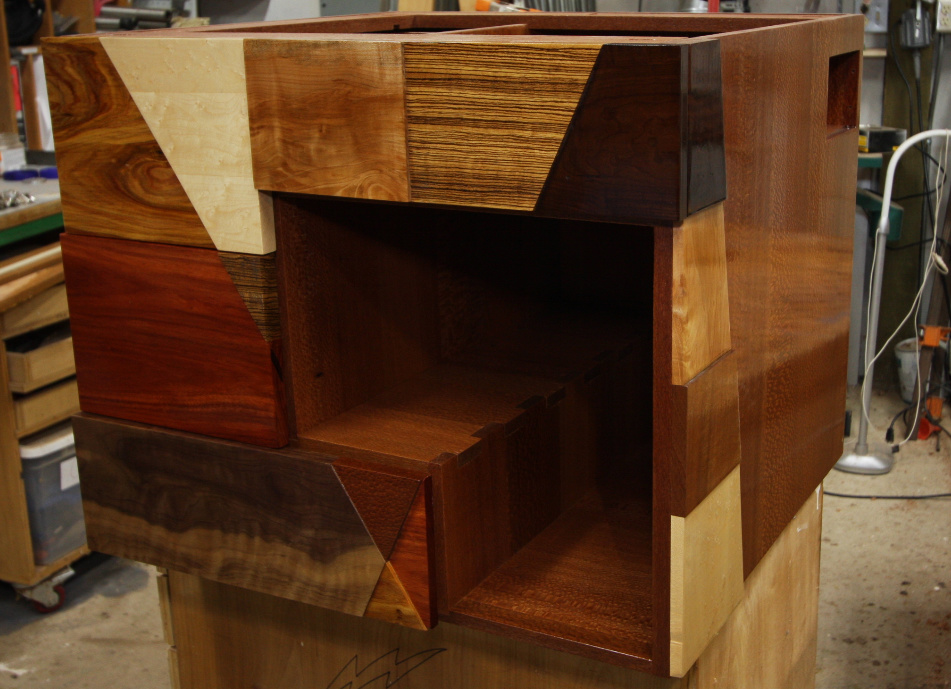
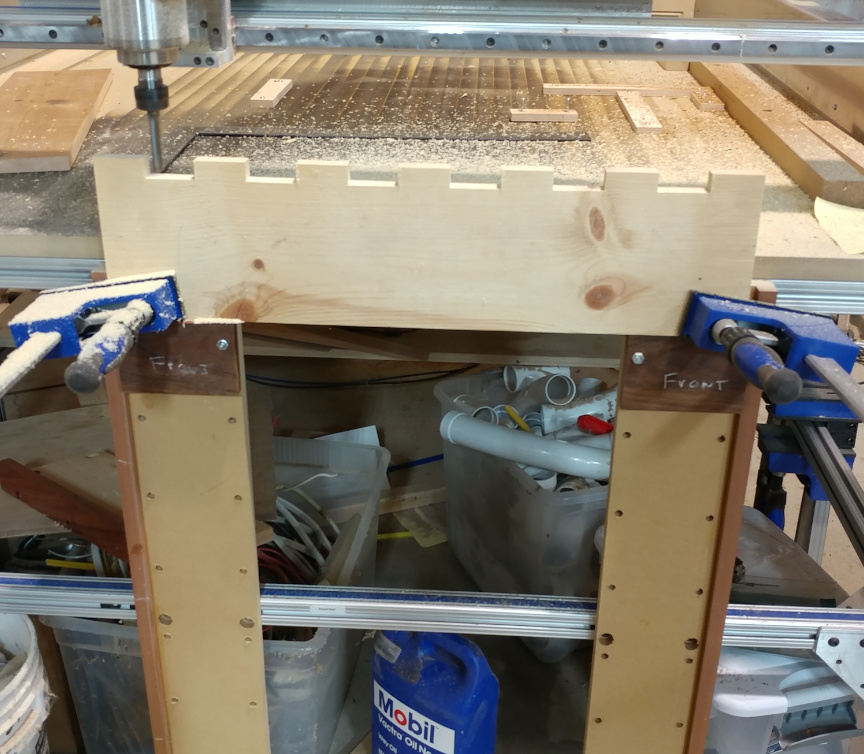
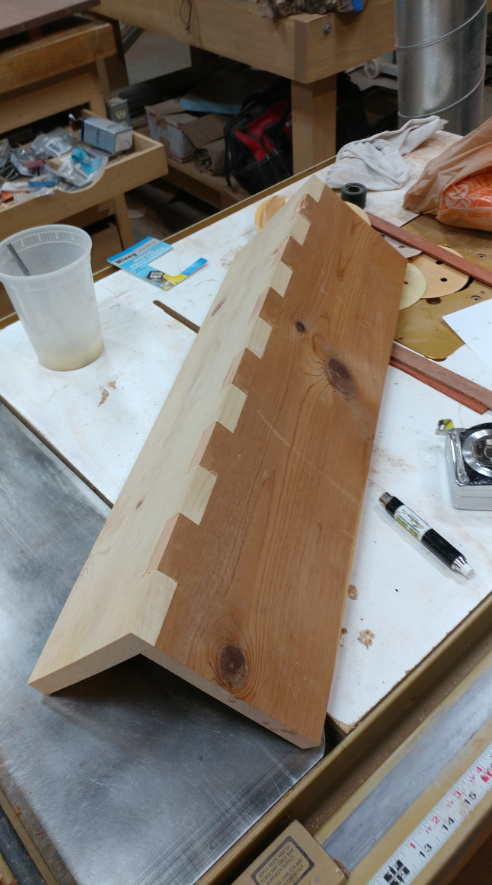
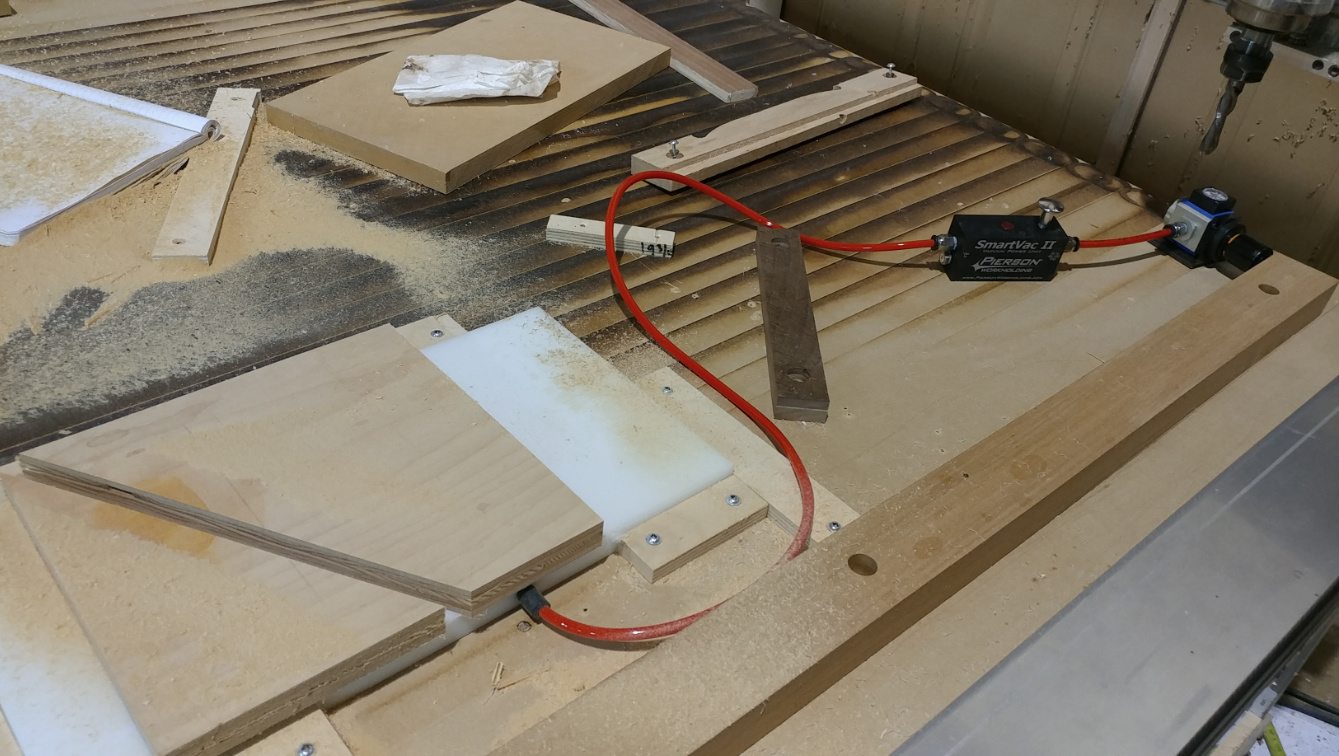
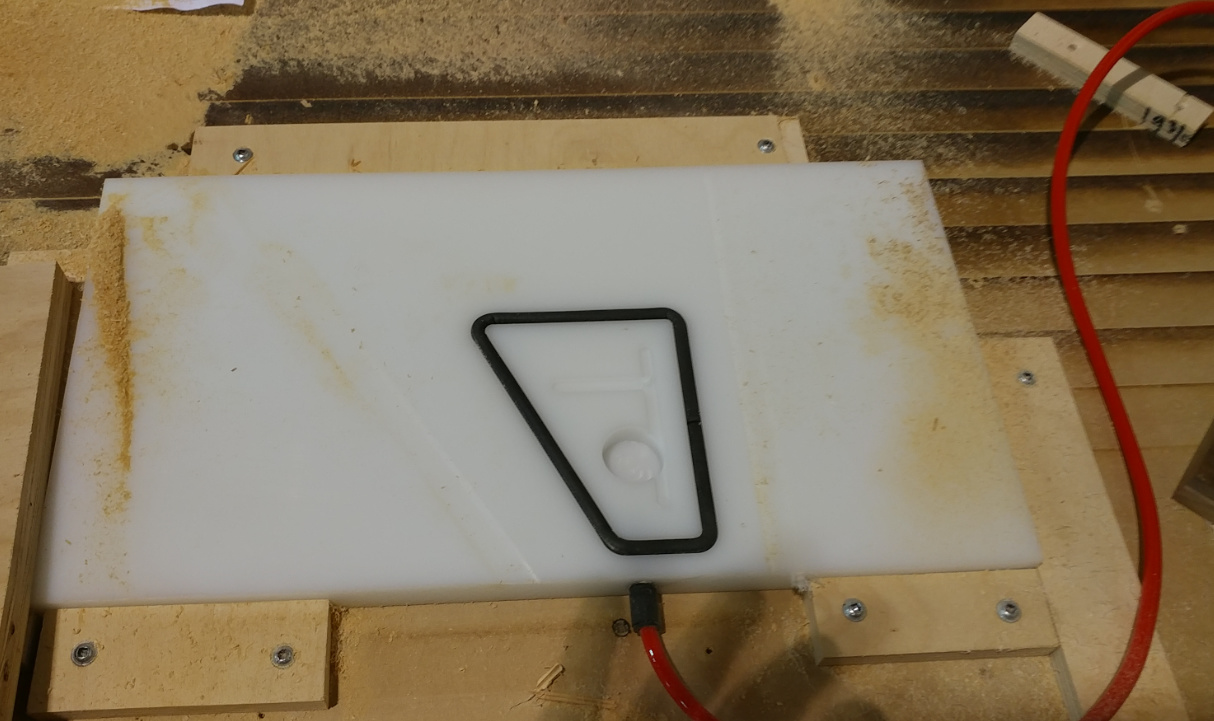
I typically try to incorporate one or two things that push me as a woodworker. I overdid it on this one and I can now safely say this kicked my ass. It took about 3 months to build - my billed hours were 57 but I easily had 200 into this because of all the learning I got to do. I had to learn vacuum hold down system, build a bunch of jigs - TWICE because the first pass was simply not good enough. Then I created a vertical jig for my CNC to do finger joints - but ended up using it for a ton of stuff. I used push to open slides - really nice Salice slides, but they require a very specific dimensions and cutout - down to 1/32. Overall I did over 60 CNC designs (CAD and CAM). I incorporated an outlet with 2 usb ports on sink drawer hinges that come out 45 degrees, along with push to open cord storage that I had to make a custom grommet out of lacewood to match the casework.
Putting it together took 3 days. Put a piece on. Wait for glue to dry…put another piece on. For 28 pieces.
The biggest hassle was that I had never really worked “full time” over the winter in my shop. As i heat only with a wood stove, the daily ritual was going out in the morning, firing up the wood stove and waiting 2 hours for it to get to 50 degrees so I could start working. I’ve already burned 3 cord of wood so far this winter.
I’m pleased and my client was ecstatic. She loves it.
what a great job! I like how the springs are protected and keep little fingers & clothing from getting in them. Did you come up with this on your own or did you follow plans?