I got greedy and subdued 2 dragons in the same fight. but the 2nd got knocked out before I finished the map and that counts as a KO.
I need to replay that map and only recruit enemies I can heal right away.
but your enemies aren’t growing in power either, so I still don’t understand this complaint?
Don’t forget, by the end of the game you’re guys are in the 40’s and there won’t be a level cap any longer. The game, in many ways, starts in chapter 4 and beyond the campaign, that’s where the training wheels come off. Enjoy the ride!
Ironically that’s the best part of the level cap - the dungeons (like the Wildwood) are HOW you grow in power without gaining levels - rare recipes, powerful spells and equipment not yet sold in shops, that sort of thing. It used to be going to get that stuff outleveled you from the main story content, making it a laughable joke. NOW you can actually enjoy the dungeon experience as intended while still being challenged by the main story.
For starters, it’s jarring after consistently gaining levels prior. It seemed I’d often gain about two levels per battle after the cap increases, then a bit less in the ones after. It’s odd to go from that—watching the numbers go up—to not without much reason beyond poor pacing/poor design regarding the game’s leveling curve. Again, it’s fine to handle leveling in this way—I prefer a slower curve—but it needs to be handled with consistency. That the difficulty hasn’t been increasing either isn’t exactly a point in its favor. I feel like the game and I have been treading water together for the last few hours.
There’s also the matter that missing out on experience now (in story battles, remember) possibly means doing more grindy training battles later, often in locations I’ve been numerous times and am tired of seeing. The point about the Wildwood is a good one but, ideally, the Wildwood could serve both the function of gaining experience and getting the unique items so I don’t have to do both separately, hence why I’m holding off on it. Plus, I reckon I’ll eventually get tired of the Wildwood so don’t want to overdo it. It’s my favorite part of the game and I weirdly don’t remember much about it in previous versions, possibly because of the leveling problem in the older versions that you mentioned.
I will say I know exactly what you are talking about with the area you are in where the level doesn’t change for like half a dozen battles in a row - that’s very odd and I don’t get that either, even going from 19-20 or 19-21 in the middle seems like it would have been fine. I’d be really curious to hear what the developers thought process on that was. But really otherwise there is something (for me) liberating about not having to feel like I’m anything other than right where I am when I’m at that level cap. If anything, I’m worried about the post-game when the level cap is gone and I’m worried about if I can tackle Palace of the Dead battle 37 or whatever, but I’m still at the tail end of Chapter 4 so I don’t really know what that all looks like just yet.
I should add that this isn’t game breaking for me. It’s an annoyance with an aspect of the game I was interested in seeing in action (the level cap). Otherwise, I still really like it.
OK, diving into this one today!
I realize I should wade through the thread to catch some tips, so chastise me for my laziness in not doing so but instead beseeching the knowledgeable to show pity on me and throw me a bone in the form of stand out tips for a beginner to the series either in the form of things you should definitely do or not do.
Not much you can actually do “wrong”, especially in this version. Best bet is to just dive in and have fun. The level caps and progression make this a pretty tightly constricted experience, so it’s hard to be awful or great, you’ll be sort of middle no matter what.
Make sure you have consumables equipped and stocked would be my only semi tip. Just keep your inventory and gear management up to date, the rest is gravy.
Thanks man, good to hear it’s hard to go wrong. Parts of this thread had me a bit worried.
One question about consumables, are they hard to come by? As an example of why I ask I was just playing Pathfinder: Kingmaker and the game is designed such that you can’t really buy all that many health potions. Which is fine because I was playing Paladin and had a cleric. But before I run around downing health potions w/o a care in this one wanted to make sure getting more isn’t constrained (except I guess financially speaking).
No, nothing like that. I like to keep a few hundred of the ones I use frequently in my inventory so I can use them with impunity, since any equipped consumables you use in a battle automatically restock from your item pool. Super convenient.
I’m at the same spot at the beginning of chapter 3 but am doing a run through the Wildwood with some of my underleveled units. Last couple battles have been my beast tamer, a cleric, a griffon, a cyclops, and four dragons. Been fun mixing up the team composition like that.
Normally in games such as this I really like all my units having zones of control, but I really like how only some classes get it in this game. It makes those units special. The magic point system also works nicely and the auto skill that replenishes them if really useful when combined with the boon that makes it trigger more frequently. I really miss that skill on the units that don’t have it.
I also like the level cap because I don’t have to worry whether I’m the right level. I just keep playing and the game keeps me right where I should be. There could be a little more pushback though, as I’m usually in good shape when the end of the mission rolls around. There have been 2 where I was in trouble.
I just got to the start of chapter 3 as well. Only have one dragon, one recruited hawkman, and no griffins, Going for no in capacitation made recruiting harder.
Hopefully I’ll get more flying units on my next trip to the woods.
Not that I am particularly knowledgeable about this game, the more expert might need to correct me here and there. But here’s some stuff for the first chapter or so:
-
The game breaks you in very gently. Early battles, you control only Denam and you can win without doing much of anything. The game then adds all kinds stuff, including various character classes, gradually.
-
But first problem for me, and for a lot of people apparently, is seeing which units are on which side. The solution is to use the HP bars. HP bars can be toggled at any point in battle – on PC you call up the menu with a right click. You can use that toggle for team HP bars, elemental HP bars, or no HP bars.
-
The next big problem is interpreting all that info on the unit page. But you can use the question mark icon in the upper right to get everything explained. Practically everything that you’d want to know is explained this way.
-
Also the Warren Report, which gives up-to-date news plus works like a manual. Plus, in the “Talk” section, actually opens up areas of the game as time goes along.
-
There are three different attack types (four if you consider finishers separate.) Melee, ranged, and magical. Melee and ranged often invite counter-attacks.
-
Friendly fire is a thing here.
-
Ranged attacks have a longer range than advertised. You can always check the unit’s actual ability to hit a target by clicking the target and checking the blue arc. Sometimes it can be surprising what ranged and magical attacks can and cannot hit.
-
Finishers, skills, and status effects soon turn out to dominate the game.
-
Each unit levels up on its own, sharing in the EXP from the battle, but this is capped at the union level, which increases gradually but is never allowed to become overpowering. However, unit weapon skills also level up, somewhat more slowly, and these are what grant skills and finishers. If you decide to grind, this will be the purpose – to keep weapon skills all the way to the union cap, not just the unit level.
-
Grinding is done through training battles, available in most locations. No drops, no money, no risk of death.
-
Aside from weapon skills, there are other support skills, auto skills, and action skills. Support skills like weapons skills are always in effect – ie. the knight’s rampart skill creating a zone of control. Auto skills kick in intermittently at the start of a unit’s turn.
-
The usefulness of many skills is obvious, but maybe not the auto skills that include 100% accuracy. After all, at least as far as I have progressed, accuracy is very high anyway. However, whenever an auto skill activates, granting you 100% accuracy (often along with some other bonus) that means that any special effects from that attack are also guaranteed. So, for example, if you have a weapon that poisons or stuns, the poison or stun is guaranteed. And that is huge.
-
As you level up, you also gain action skills, and the way the interface works, it is sometimes easy to forget these, but they are your bread and butter. For example, my terror knight has an action skill “fearful impact” which not only guarantees a weapon hit, but also guarantees the status effect “frighten.” But whereas auto skills fire at random, these action skills are more under your control: they are purchased with MP.
-
Each status effect does something literal, but they also make that unit far more vulnerable to attack. It seems to cancel armor. This is the key to dealing with tough opponents. Many battles look tough if you think you have to kill everyone, but usually all that is required is to kill the boss, and once status effects become available, that’s the way to go. (Early on, you can apply poison with spells, but early in chapter 2 you get to craft items, which opens up lots of status effects.)
-
Action skills, finishers, and magic spells all use the same resource: MP. You start battle with zero and gain some each turn. There are skills and items that that increase the gain. However, the this item (magic leaf) is one that you cannot purchase in unlimited quantities.
-
Don’t overlook consumable items. You can equip each unit with up to four, and these can heal, apply status effects, cure status effects, and protect against various attacks.
-
Once you understand the basics, scouting becomes extremely useful. Prior to most battles, you are given the opportunity to scout out the battlefield and opponents. Partly a matter of mobility and height advantages. But also the details as to the class, skills, levels, and finishers available to enemies. This should tip you off as to what units to bring to battle, how to equip them, which spells and skills to activate. Many battles reputed to be tough turn out to be quite manageable if you simply bring the right counters.
-
In general, I would not obsess over the elements, but in a tough battle I always scout out the element of the boss and try to bring units that can attack – especially magically attack – with the proper element against that. Also, magic dealers will usually perform better when using spells that match their element.
-
The impact of hit points falling to zero:
-
- Your units will be incapacitated, and a counter will be set to 3. (The incapacitated unit still occupies the tile and blocks line of sight.) You then have three battle rounds to get a unit with a blessing stone (an item) adjacent, to revive the unit. Otherwise, it is permadeath.
-
- Enemies simply die.
-
- Undead set a counter to 3, and will rise again unless exorcised with a spell or item.
-
Turn order and frequency is determined by RT (recovery time) and weight. Each unit has a basic recovery time, with low RT being one of the most important aspects of a great unit. You always want to be careful about the RT and weight cost of more advanced weapons and equipment. Is the benefit worth slower recovery time?
-
You can always hire basic unit types at the store, and you soon gain the ability to change unit class. However, you often do better to recruit during battle. But this is quite a fussy undertaking. You have to get an enemy unit’s HP down very low, generally below 10%. And then you have to have the right friendly unit with the right recuitment skill approach the unit. And the odds of success are not usually all that high. However, the benefits can be well worth it. This is how you can get dragons and gryphons and so on. Not to mention flying versions of the more mundane classes, which can be a pretty big deal. Just beware: your newly recruited unit has very low HP and better be moved to safety immediately.
Well said, a lot of points I’d kind of forgotten/taken for granted at this point.
@easytarget I imagine many of these bullet points are a little confusing, so play for a few hours, you can’t make any wrong choices in the first half a dozen battles in the game or anything, and then come back here and read these tips a second time when they should click a bit better for you.
A couple of minor addendums:
On controller this is clicking in on the Right Stick.
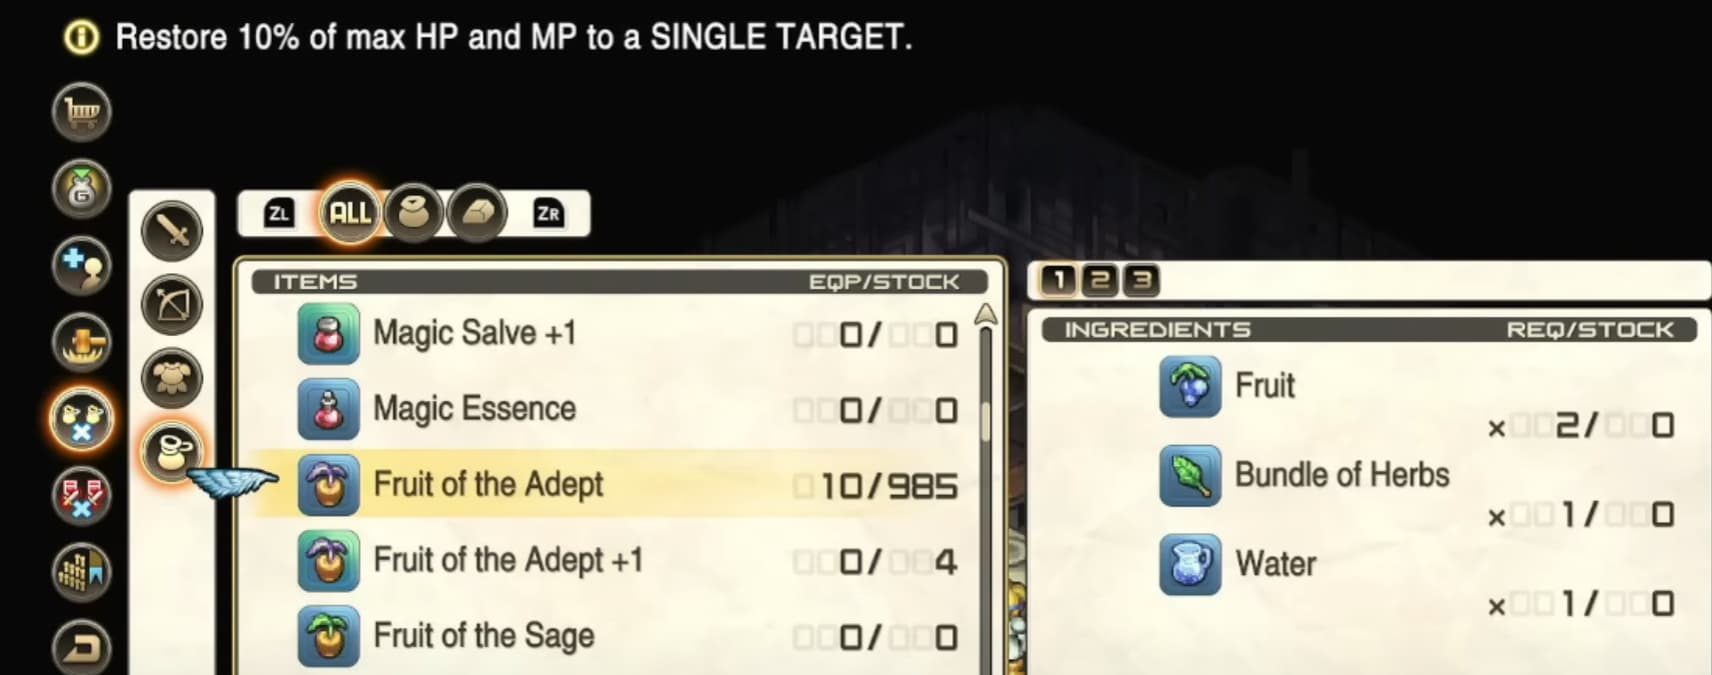
Also, for the group, I found there IS an MP item you can craft that I’d missed - Fruit of the Adpet restores 10% HP and MP, which isn’t a ton but it’s a free 100hp and 36mp at the end of chapter 4, so I’ve started giving this to many of my units with powerful spells and finishers.
Magic spells seem to respect the range limit - you can’t get more range thanks to height/gravity with Magic like you can physical bullets such as bolts, arrows, or… er, bullets. You CAN game the Direct type spells that have a minimum range (you can’t usually hit an adjacent target with a ranged spell) by targetting something behind the targt you want to hit - the spell (or missile) will strike your adjacent actual target that way.
My one piece of advice is to be level 8 before fighting Nybeth – that dude can kick your ass.
Still early for me. I have a few melee skills for 40 MP that are powerful. Archers suck until you get the 50 MP skill. The best magic spells I’ve found are sleep and stinking cloud (poison). Direct damage is weak.
Hopefully it opens up later, battles are an attritional slog.
Archers benefit a lot from the physical buff cards. Up high they can pick on enemy casters from really far away too. But they certainly aren’t universally powerful against all targets.
Thanks for going to the trouble to knock this out for me, I much appreciate it as I didn’t want to get 10 hours in and discover it was all ultimately going to go sideways (something I’ve been known to do in CRPGs regularly).
Got it, I’ll get through some of the game and circle back.
Another important thing is don’t be afraid to use the Chariot Tarot to rewind time and redo some turns. From what I’ve seen the only downside to that is missing out on some titles?
I use it a lot for recruiting skills as the percentages are always so low. Also for turns where I just did something dumb.
Yeah, I use this a lot myself, it’s one of my favorite things! There are some objectives later that require you not use it for what looks like solid rewards but I have yet to successfully pull that off haha!