Trolling Gandalf -- A LoTR:LCG AAR

Trolling Gandalf – A LoTR:LCG AAR

“I am looking for someone to share in an adventure that I am arranging, and it’s very difficult to find anyone.”

–Gandalf, An Unexpected Party, The Hobbit


What follows is an AAR of a solo game of Lord of the Rings: The Card Game.


image

What is a Living Card Game? This is from the blog Table Top Geeks:

Living Card Games from Fantasy Flight Games are a (relatively) new style of card game that draws heavily from Collectible Card Games (CCGs) in many ways. The main difference between an LCG and a CCG is that when you buy a pack of LCG cards you know exactly what you are getting. You are purchasing a full set of cards. Otherwise LCGs still rely heavily on deck building and other familiar mechanics for any CCG players. The best part about this is it means you will spend far less on an LCG and will be able to have all of the cards without any luck involved.

How Does LoTR:LCG work? The rules book is 25 pages long but that does not mean its complex; rather, it means the rules book is thorough and full of examples. Actually the game is relatively simple once you get the hang of it. An overview, from the rules book:

In each game of The Lord of the Rings: The Card Game, players begin by choosing a scenario, and then work together in an attempt to complete it. A scenario is completed by successfully moving through all stages of the quest deck. During a scenario, the encounter deck aims to harm the heroes and to raise each player’s threat level. A player is eliminated from the game if all of his heroes are destroyed, or if his threat level reaches 50. If all players are eliminated from the game, the players have lost. If at least one player survives and completes the final stage of the quest deck, all players
are victorious.

Threat level is key. You have to get through all stages of the quest before your heroes die, or before you hit a 50 threat level.

If you want to learn by watching, here are FFG’s tutorials. and here are Rodney Smith/Watch It Played’s tutorials.


While you don’t need to know the rules to follow this AAR, knowing the phases of each round helps. They are:

**The seven phases are, in order:**

  1. Resource – Draw a new card for your hand, add resource tokens (cash) to heroes
  2. Planning– Spend resource tokens to add Allies and Attachments to your questing party
  3. Quest– Commit certain members of your party to advancing in the quest
  4. Travel– Advance to a new location if possible
  5. Encounter– Members of your party who are not committed to quest may engage with enemies and creatures
  6. Combat– Resolve combat from engaged creatures and enemies
  7. Refresh– Advance threat level, ready members of your party who have survived

The base game comes with four preconstructed decks and three adventures. In addition, there are already numerous expansions and fan-made adventures.

There is a widespread belief that you need to buy expansions, or a second copy of the base game, in order to construct a decent deck. That may be true, but I found on Boardgame Geek a fan-made deck using just one copy of the base game that is fairly decent. This AAR uses that deck.

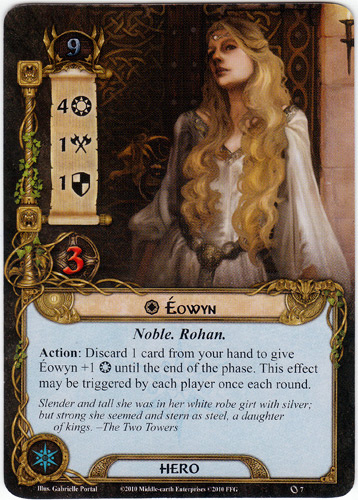
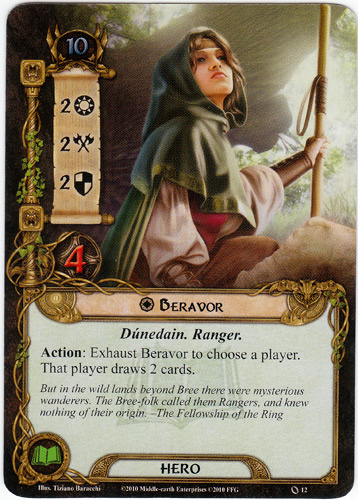
In LoTR:TCG, each player has one deck, and each deck includes three heroes, whose questing and battling are aided by allies. (Gandalf is not a hero, but an ally). In this deck, my heroes are Theodred, Eowyn and Beravor.

image
image
image


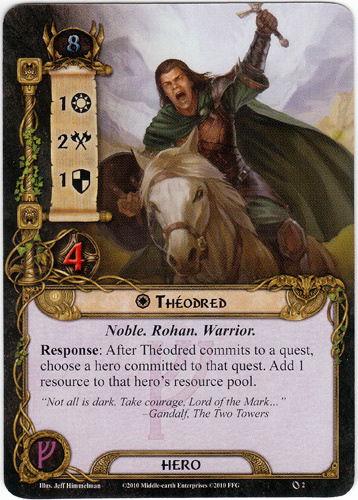
The brave trio are traveling a Journey Down the Anduin that is both dangerous and untested. They know it will challenge them, and they hope to enlist the aid of allies along the way. Only then will they have a chance at success, indeed, even of survival.

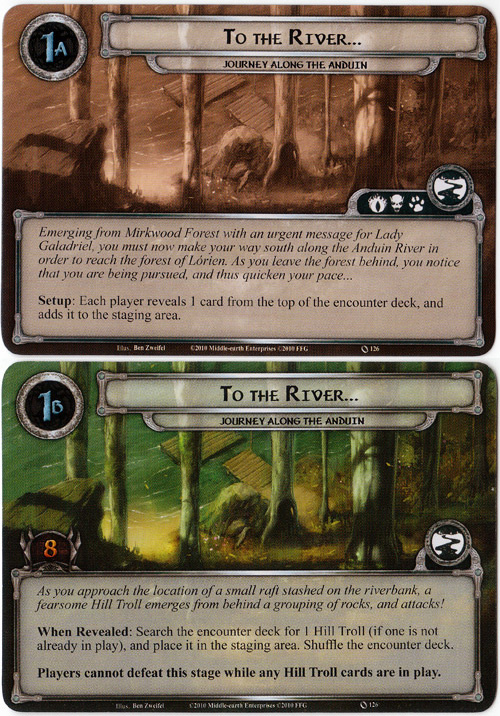
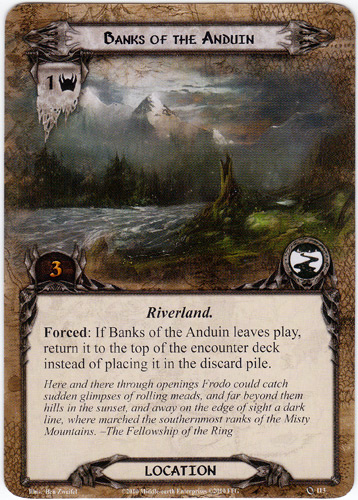
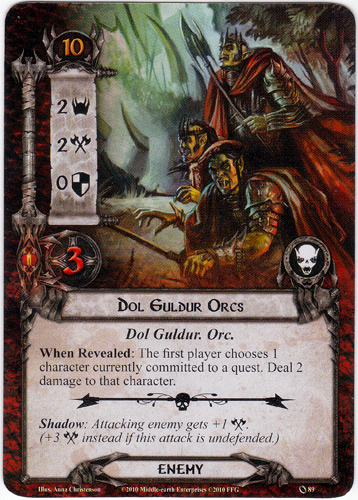
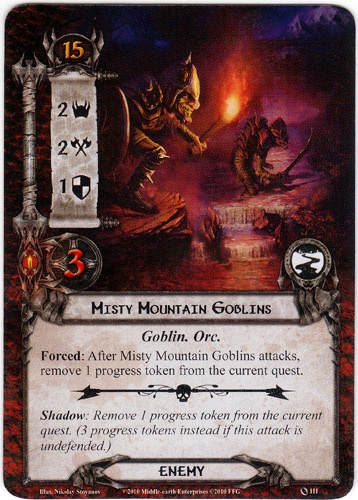
Emerging from Mirkwood Forest with an urgent message for Lady Gladeriel, you must now make your way south along the Anduin River in order to reach the forest of Lorien, As you leave the forest behind, you notice that you are being pursued, and this quicken you pace.

As you approach the location of a small raft stashed on the riverbank, a fearsome Hill Troll emerges from behind a grouping of rock, and attacks!

This is the second of three quests that comes withe core game. It is considered to be the most difficult. As you’ll note from the card above, the initial set-up for this quest requires you to place one mean ass Troll in the staging area.

image

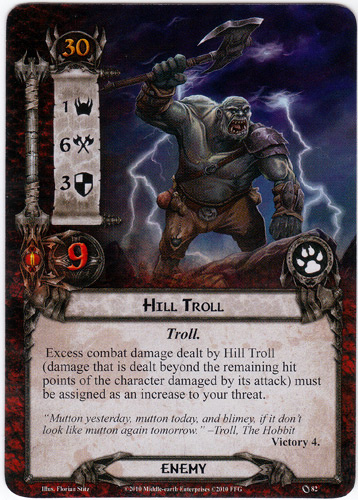
The troll is in the staging area only, which means our intrepid party does not need to battle it. However the troll will automatically engage (fight) the party when the threat level of the player reaches the top number on the card – in this case, 30. (We can, optionally choose to engage sooner, but if the threat is 30, the troll does battle. The starting threat level is the total willpower of our three heroes (also the topmost number on their cards), in this case 27. As the threat increases by one each turn, that means we have only three turns before the troll moves out of the staging area to do battle.

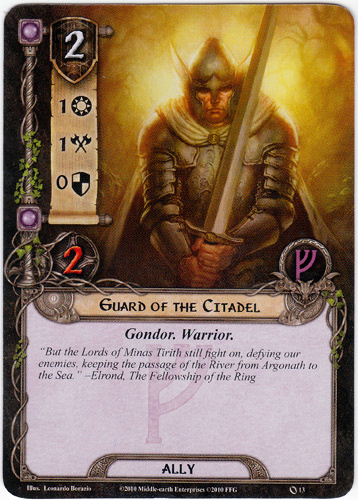
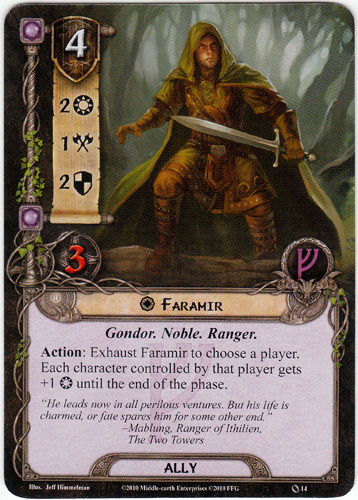
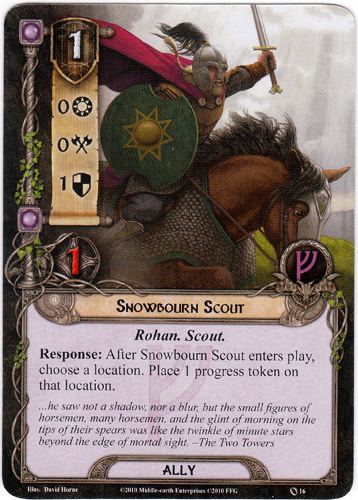
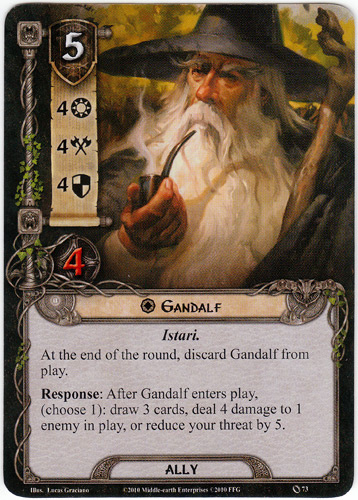
Our initial deal of six cards yields three potential allies, Gandalf (pictured above) along with Erabor Hammership and Miner of the Iron Hills. The top number is their cost to summon:

image

image

My initial deal yields one attachment card – an item to buff your heroes or allies – the Steward of Gondor:

image

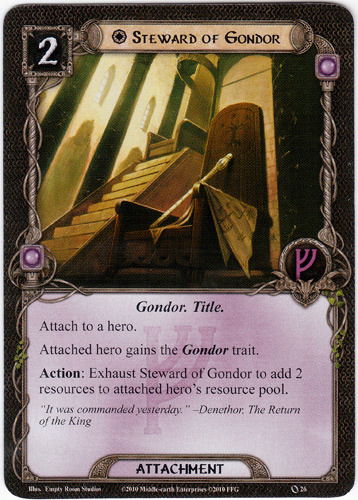
This attachment is a money-making machine: tap it once a turn to add two resources to the owner’s purse.

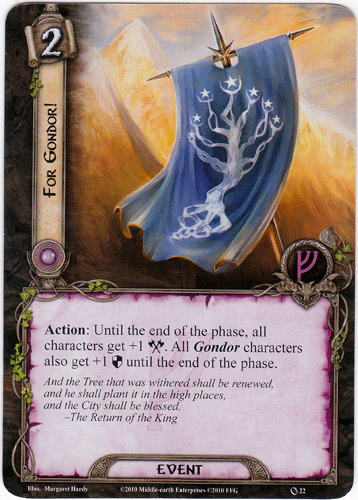
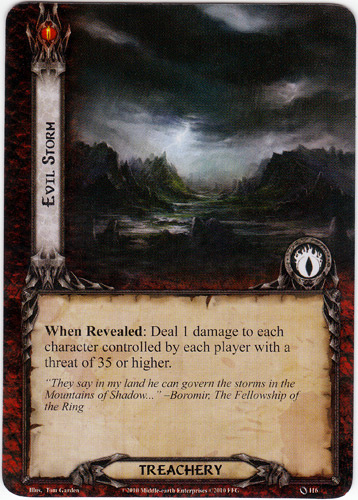
The remaining two cards in the initial deal are events, which can be played at virtually any time, if you have sufficient resources. The two we receive are: For Gondor! and Hasty Stroke. We’ll discuss those when we are able to play them. For now, though, on to our adventure!

I’m not seeing the pictures. Anyone else having a problem?

Nor am I. Sorry. Very weird. Will find an alternate site for the images.

Image links need to be https or they won’t work.

(stealthy tag)

Thanks, that is the problem. I fixed the first post by pasting in the images. Are the images too large?

Day One: Take Me to the River

“But in the wild lands beyond Bree there were mysterious wanderers, The Bree-folk called them Rangers, and know nothing of their origin.” -The Fellowship of The Ring


We launch our Journey Down the Anduin by setting the initial threat level – which is the total of the willpower of the three heroes, Eowyn, Theodred and Beravor.

THREAT LEVEL: 27

Staging Area: In addition to the Hill Troll, whose appearance in the staging area is part of this scenario’s setup, we also draw a card from the Encounter Deck to go in the staging area as part of setup. Only locations or enemies go into the staging area; the third type of Encounter Deck card, a treachery, does not. And that, in fact is what we draw:

image

Treacheries usually have an immediate effect when revealed. This one has two effects, but both are moot. The first, “Each location in the staging area gets +1 threat until the end of the phase” is moot because it was drawn as part of set-up. The second, “Then, each player with a threat of 35 or higher chooses and discards 1 cards from his hand” is moot because I, the only player, have a threat level of 27. So the card is discarded without impact on our nascent journey.

Resource Phase – Each of the three heroes receives one resource token. However, this scenario is considered the most difficult, and I have decided to play this using Fantasy Flight’s Easy Mode, which was created in response to complaints from players that the game was simply too hard solo. In easy mode, each hero receives an additional resource token at the start of the game, and a couple of the most difficult Encounter cards are removed before the start. So a little tweaking, and our heroes start with two resource each, rather than one.

The second part of the Resource Phase is to draw a card, and in this case, Luck looks kindly on us, as we draw the single most powerful card in the game: none other than the kindly wizard, Gandalf, who goes in to our hand.

Note: the Core Set has four copies of Gandalf, and it is perfectly legal to include more than one in a constructed deck. In this case, the deck I am using uses three copies. As I was dealt a Gandalf at the start of the game, I now have two of the three in my hand. They will both be held for more advantageous opportunities later.


Planning Phase: The Planning Phase allows you to spend resources to summon allies and attachments from your hand. You can also use resources to play one-shots called Events, but these can be played in any phase, not just Planning. If you think you’ll need to play an Event later in the turn, best to save some resources so you can afford to pay the card’s cost.

However, it is imperative to summon an ally in this initial turn. It is too soon to summon either of the Gandalf cards. In our hand are two other allies, the Miner of the Iron Hills and Erebor Hammersmith.

image
image

Here I spend Berevor’s two resources to summon the Miner, who will basically serve as cannon fodder.

Why Berevor? This is an important rule:

In order for a player to play a card from his hand (or
to activate certain card effects), he must pay for it by
spending resource tokens from the resource pool of a
hero who has a resource icon that matches the card’s
sphere of influence. This is called a resource match.
Resources that are spent to pay for cards or card effects
are taken from their hero’s resource pool and placed in
the general token bank.

So in this instance, the Miner is of the Lore sphere, so I must spend two resources belonging to a hero from that sphere – in this case, Beravor, – to summon.

Next, I spend two resources from Theodred (Leadership sphere) to summon a great attachment, Steward of Gondor:

image

The Steward is basically a license to print money. For every turn in which I exhaust the card, I get two extra resource tokens for that hero. Now – just because I used Theodred to summon the Steward, doesn’t mean I have to attach it to him; it can go on another hero or ally. But in this case, I do in fact attach it to Theodred. These means I will have extra resource tokens of the Leadership Sphere each turn, and I know there are some good cards to come that requires precisely that.

The Steward’s power is an Action, which I can do at any time, as in right now! Right after it is summoned, I exhaust it and place two resource tokens on Beravor. “Wait!” you shout, “shouldn’t they go on Theodred, who controls the attachment?” Yes, you are correct. I screwed up. It is easy to make mistakes in this game.

But, onward. I then spend Beravor’s two NEW resource tokens to summon the other ally in my hand, Erebor Hammersmith. Thus I end the Planning Phase with two allies joining the party, and a very important attachment now thoroughly attached.


Quest Phase This brings us to the single most important decision of each turn – how many heroes and allies to commit to questing (trying to advance the quest) and how many to leave behind for possible battle. If you commit too many to the former, bad beasties will get the best of you. If you commit too many to the latter, you basically will be stuck. It’s a friggin’ balancing act, and the decision is, in my view, the heart of the game.

So here we have three heroes and two allies. There are no enemies in the engagement area, and the only enemy in the staging area, the Hill Troll, has a threat level of 30 – that means it will not automatically move forward to engage until my threat level hits 30. Another Encounter Deck card will soon come out, and we must prepared for it being another enemy which might automatically engage.

With this in mind, we decide to commit two heroes, Eowyn (Willpower of 4) and Theodred (Willpower of 1) to the quest. The two heroes are ‘exhausted’ when they commit. Do you see Theodred’s response below? Committing him to a quest gives me an additional resource token (which can go on any hero) that I give to Beravor.

image

The next part of the Quest Phase is staging. From the rulebook:

The staging area is a unique element of the game’s
playing field. It represents the potential dangers the
players might face as they progress on their quest.
During the quest phase, enemy and location cards are
revealed from the encounter deck and placed in the
staging area. Cards in the staging area are imminent
threats to the players, including enemies that need to
be defeated and locations that need to be explored.

In short, when you get to staging, you pull a card from the (evil) encounter deck and it could change the threat level of the encounter to which you’ve just committed. In this case, the card I chose is a location card, Banks of Anduin:

image

This adds 1 to the threat level of the current quest, combined with the Hill Troll’s threat level, also 1.

Next we resolve the quest by subtracting the threat level from the heroes’ willpower. Theodred (1) plus Eowyn (4) = 5. Subtracting the threat of 2 gives us (drum roll please) 3!

If the willpower is higher, the players have successfully
quested, and they make progress on the quest. A
number of progress tokens equal to the amount by
which their willpower overcame the threat are placed on the
current quest card.

So three progress tokens go on the current quest card, which is To the River.

We have now notched 3 of the 8 progress tokens we need to move beyond To the River. This brings the Quest Phase of Turn One to a close.

Travel Phase This next phase is simple. I can choose to have the party travel to a location that is in the staging area. By doing so, it removes the threat of that location from the threat total during questing. So now I will have the party travel to Banks of Anduin, which appeared a few moments ago during the staging.

With Banks of Anduin as the current location, I will need to close that out in later turns before I can return to making progress of the main quest. In other words, this is an optional side quest, but advisable because it will make all quests easier.

Encounter Phase The encounter phase, which is the heart of battle in LOTR: LCG, is moot on Turn One. The only visible enemy, Hill Troll, is has an engagement cost of 30, higher than our party’s threat level 27. Thus we are not required to fight the Troll. He stays in the staging area, lurking until we hit 30. We could choose to fight him, but that would be ill-advised. So for now, no combat.

This would normally bring the first turn to an end, but I have one last trick up my sleeve. I decide to exhaust the hero Beravor. You will recall that I exhausted the other two heroes when committing them to the quest, but Beravor is still at the ready. And her special ability:

Exhaust Beravor to choose a player. That player draws 2 cards.

So I draw two extra cards into my hand, and they will both prove helpful: Forest Snare and Hasty Stroke.

image

image

Coming next: day two, and we lay our plans to ensnare the Hill Troll!​

I can see the images now.

Day Two: In Which Our First Battle Occurs

“But the Lords of Minas Tirith still fight on, defying our enemies, keeping the passage of the River from Argonath to the Sea.”
-Elrond to his Council, The Fellowship of The Ring


Day Two dawns with a full party eager to make progress in their quest. Eowyn, Beravor and Theodred (carrying his prized Steward of Gondor) continue to be accompanied by allies Miner of the Iron Hills and Erebor Hammersmith. None have suffered wounds, and Eowyn carries two resources from the previous day. We camped on the current location, Banks of the Anduin.

Above them, in the staging area, looms the Hill Troll, but our threat level (27) is not so high that it will automatically engage the Troll (30) this day. [*Mistake: I should have raised the level to 28 at the end of Day One, but my notes indicate I failed to do so. My bad.]

In our hand are seven cards, including two copies of Gandalf – the most powerful ally – and two copies of Hasty Stroke, an event card that will undoubtedly come in quite handy.

image

Resource Phase First, I draw a new card to my: Guard of the Citadel:

image

Each of the three heroes receives one resource token. Then I exhaust Theodred’s Steward of Gondor attachment, giving him two more resources.

Planning Phase: I spend two of Theodred’s resources to summon the Guard to the party, increasing its number to six. This leaves Beravor with one unused resource, Eowyn with three, and Theodred with one.

Quest Phase As noted on Day One, the most important phase, with the most difficult decisions – is the Quest Phase, deciding which members of the part commit to the quest, and which remain back to do battle. This decision, to me, is the most fascinating and enjoyable part of LoTR:LCG strategy.

This day we decide to commit all three heroes to questing, and all three summoned allies to battle. The heroes’ combined willpower is 7. This will be compared to the threat level of the creatures or locations in the staging area – in this case, the Hill Troll (1) and a card we now draw from the evil encounter deck: Dol Guldur Orcs.

image

But before we calculate the questing outcome – look at the “When Revealed” text – we must deal two damage to one of our heroes. Ouch! It is the player’s choice, and I put the damage on Theodred, whose health slips from 4 to 2.

Now, subtracting our combined willpower of 7 from the combined threat of the troll and orcs (3) gives us four progress tokens. This allows the party to complete the current location, “Banks of the Anduin”:

image

Since Banks requires just three tokens to close, we apply the fourth progress token to the quest itself, “To the River.” Eight tokens will eventually be needed to complete that part of the journey.

The next phase, Travel, is moot as there are no other location cards in the staging area. So then… on to battle:

Encounter Phase There are two enemies in the staging area, the Hill Troll and the just-arrived orcs. The party is required to do battle with the orcs, since the orcs’ threat level of 10 is lower than the party’s, 27. We could choose to also engage the Troll, but that would be foolhardy.

So this battle will be our three allies versus the Orcs, who may get a boost if a card we turn over from the Encounter deck to start the battle has a shadow effect.

Now, to battle. First I declare a defender against the Orcs, who get the first swing. I choose my favorite redshirt, Guard of Citadel.

Next, I turn over a card from the Encounter deck to see if it has a shadow boost for the Orcs. That card, fortunately, is another copy of the location Banks of the Anduin, which has no shadow effect. It is discarded.

Resolving the Orcs’ combat, their attack of 2 is greater than the Guard’s defense of 0, thus dealing two damage, enough to kill the guard. Sorry, guard, but you served your purpose.

Next comes the allies’ attack on the Orcs.
image
image

Their combined attack of 2 goes against the Orc’s defense of 0, and I place two damage tokens on the Orcs. As they have three health, it is not enough to kill them.

Thus ends our first battle. Note that if I had not defended with the Guard, I would have had enough force to kill the Orcs, but since the Orcs go first, all of their undefended damage would have to be applied to a single hero (not ally) and that is too risky, particularly so early.

With Day Two at an end, I refresh the exhausted cards, and raise the threat level to 28.

Onward!

Cool. I experimented with smaller images, but the text seems hard to read. Are the larger ones too large?

I prefer the larger images.

I can’t read the text on the smaller cards - well, I can but with work.

Thanks, I’ll stick with the larger images. More to come!

This is cool. LOTRLCG works pretty well on forums. We got a few games in some years back over on Broken Forum.

It’s hard to find anyone to play it with nowadays…the heavy deckbuilding tends to shoo people away, which is too bad. It’s a great game.

Yup, its a shame folks get scared away. Part of my goal with the AAR is showing that fun can be had with just the core deck. I don’t own anything else.

Day Three: The Hasty Stroke

‘The hasty stroke goes oft astray,’ said Aragorn. ‘We must press our Enemy, and no longer wait upon him for the move.’ - The Return of the King

As the sun rises on the third day of our quest, our intrepid party numbers five: Eowyn, Beravor, Theodryn and their two allies: the Miner and Hammersmith. Theodred holds the mixed distinction: he is the only party member with an attachment, and also the only one with an injury, having suffered two damage at the hands of Dol Guldur Orcs (reveal effect) on the second day.

In my hand are six cards – two copies each of Gandalf, Hasty Stroke, and one each of For Gondor and Forest Snare. These will all come in handy soon enough.

Looming in the distance from the Staging Area, as he has been from the start of our journey, is the fearsome Hill Troll. There is no active location, so our questing, if any, will go toward the primary quest line. The Orcs remain huddled in the encounter area, having also suffered two wounds in the previous day’s fighting.

Resource Phase [On this turn I neglected to draw a new card - dammit!] Adding resource tokens to our heroes leaves Beravor with two, Eowyn with four, and Theo with two. I exhaust Theo’s money-making Steward of Gondor to place two additional resource tokens on the injured hero.

Planning Phase The three heroes huddle and discuss their options. The Troll can be heard snarling in the distance, and Theo’s wounds look a bit too serious for them willing to take more risks. And so, with both those threats in mind, they decide it is time to engage with the Hill Troll, to do battle with the giant beast, before Theo’s injury worsens.

And so it is time to summon Gandalf.

image

Gandalf costs five to summon, but they can be of any sphere of influence. Any hero can contribute. So we spend three tokens from Eowyn and two from Theodryn.

Gandalf’s powers are twofold, as you can see from the card. First, upon summoning, the player is given three very tempting choices: draw three cards, reduce the threat by 5, or deal 4 damage to 1 enemy. In this instance we decide to draw three cards, as that will greatly boost the tactical options at our disposal.

Second are Gandalf’s stats, which are huge in every category, making him a powerful ally in questing or combat. All of this is mitigated by the fact that the great wizard only stays for one turn – he is discarded after that.

Arriving to our hand is the wonderful attachment Unexpected Courage, and two allies: Faramir and Snowbourne Scout.

image image image

Quest Phase For this quest, we commit only Eowyn, with a willpower of 4. The goal here is to hold steady and focus in the combat phase on taking out the Hill Troll.

We draw a location Gladden Fields, from the encounter deck, which has a threat strength of 3. In quest resolution, we come out even:

Hill Troll (1) + Gladden Fields (3) = Eowyn (4)

No advancement, but no damage. This is fine.

Travel Phase We travel to the Gladden Fields.

Onward – to combat!

Encounter Phase Suitably prepared, we decide to summon the Hill Troll. As noted on Day One, the troll has an engagement cost of 30, higher than our party’s threat level 28. Thus we are not required to fight the Troll. So why now? Because in two turns the threat level will likely be 30, and at that point we might have our hands full doing battle with other creatures – and thus spread thin. Best to fight now, while no other evil minions pose threats.

However, let’s not forget that Dol Guldur Orcs, though wounded, also remain for battle from the previous day, when they slew (slayed?) Guard of the Citadel. So we’re fighting two enemies.

Let’s fight!

Hammersmith is given the unenviable task of defending against the Hill Troll, leaving Beravor, Theo and Gandalf to mount the offense.

Revealing the Hill Troll’s shadow card, it is Eastern Crows, which gives the attack +1 offense.

image

Hammersmith, the latest redshirt in our group, has a measly defense of 1, meaning five damage gets through for his bloody death. With the shadow effect, it is six damage. However we decide at this point to use an action: Hasty Stroke – spending a resource from Eowyn, and this cancels that +1 shadow effect.

image

Why burn an important effect to save a single damage point? Because with the Hill Troll, excess damage is added to the threat level. So in this case, our threat would have gone from 28 to 31… but use of Hasty Stroke keeps the increase to 2, for 30.

It was actually a small price to pay for what comes next: three heroes whalloping at the Hill Troll. The goal is to take him out now, once and for all. We will pull out all the stops.

The basic attack would see Beravor (attack of 2), Theodred (2) and, of course, Gandalf (4). The total of 8, versus the Troll’s 3 defense, causes only 5 damage, and the Troll has a whopping 9 health. So we need more. What to do?

This is when the events in a player’s hand come in, uh, handy. In our hand is the wonderful event: For Gondor!

image

That’s right – until the end of phase, all characters get +1 attack! This changes the attack to Beravor (3), Theo (3) and Gandalf (5) = 11, less Troll’s 3 defense leads to eight damage.

Sigh.

It leaves the Troll mortally wounded, with just one health, but not dead. It is disappointing, and even more disappointing to our heroes is the knowledge that Gandalf will not stay with the party. His time with this fellowship is short.

[Note – this failure to fully take out the Troll cannot be blamed on dice – there are none in LoTR:LCG. Truth is, I didn’t fully calculate the math here before committing my team to attackers and defenders. A better choice would have been to include the Miner as an attacker. DGO’s would then have had an undefended attack, increasing the threat level, but that is something we face anyway in the next turn with the Troll. So, in short, I screwed up].

The final portion of combat on Day Three is the Miner defending against Dol Guldur Orcs. The shadow card reveal – Wargs – gives the attacker +1, but that is moot, as even without the buff, the Orcs have enough might to slay the Miner.

Another ally dead, and the Troll still lives. With night upon them, our party creeps off into the woods to assess their wounds and plan another day of battle.

I hadn’t heard of this game, but I’m liking it. Good luck next turn!

Fun thread, thanks for the write-up! My play group loves us some Middle Earth, might have to look into this one.

Day Four: Snared

“We shall have it like a coney in a trap. Then we shall see what kind of thing it is.”
-Unidentified Man of Gondor, The Two Towers

The threat level, which increased two during our battle with the Hill Troll, escalates one notch further to 31 – and then again to 32 because the current location is Gladden Fields, which has an unfortunate ‘forced’ effect:

image

Gandalf, who was so integral to the previous day’s planning, has to be dispatched to the discard pile (he must be discarded at the end of the round in which he is summoned) – although I have one more copy still in hand, and the third copy somewhere in the deck.

Our heroes’ status is as follows: Beravor, with two resource tokens and no damage, Theodryn, no resources and two damage, and Eowyn with no resources and no damage. Our other allies died in the previous day’s battles. The current location, which will need to be closed before we can continue questing, is the Gladden Fields.

And looming still in the encounter area, readying themselves for more battle, are Dol Guldur Orcs and a mortally wounded but still breathing Hill Troll. Our party vows that this day will be the last in which it breathes.

In our hand as the day dawns is the second Gandalf and two other allies – Faramir and the likely redshirt Snowbourn Scout. We also have three events at the ready: another Hasty Stroke, Unexpected Courage, and the wonderful Forest Snare.

image

This is simply one of the best items in the core game.

Resource Phase. We add one resource to each of our three heroes and Theodryn again taps his Steward for an additional two. We draw a great event card, Lore of Imladris:

image

Planning Phase. Theo spends one resource to summon the Snowbourn Scout, whose special power is that we are allowed to add one progress token to the current location, the Gladden Fields. We need only two more to close that location.

Next, Beravor spends three tokens to use her Forest Snare to entrap the Troll! [Note that this could not have been done in the last turn as the Snare can only be used in the Resource Phase, and on Day Three we hadn’t yet engaged the Troll.

Basically, we have found a way to finish the Troll off once and for all, without suffering further damage. It would have attacked first, and you’ll recall that the Troll’s excess damage is applied to the threat level. Thus, snaring him spares us that dangerous attack and allows our fellowship to land a fatal blow.

Quest Phase For this day, we opt not to commit any of our party to questing – all will be devoted to combat. As stated earlier in this AAR, deciding who in your party to commit to questing vs combat is perhaps the single biggest decision you face; you must balance the desire to progress in the quest against the need to keep the evil from encroaching. In this instance, with the Hill Troll ensnared and bleeding out, and no card in the staging area, we choose to focus on fighting.

Even without a single character questing, we must still play out the quest phase. We draw a new encounter card: Misty Mountain Goblins.

image

This is unfortunate. First, the Goblins have a threat level of 2, and as we have no committed to questing, those two points are applied to our party’s threat level, which rises from 32 to 34.

Second, the Goblins have an engagement cost of 15, meaning that they will automatically engage (move forward to do battle) in the encounter phase; we will have no choice but to fight them.

Travel Phase We are still in the Gladden Fields and thus will not travel. Because of the Fields’ forced effect, clearing this location soon is imperative.

Encounter Phase As noted a moment ago, we have no choice but to add the Misty Mountain Goblins to the others with whom we are to battle: the Hill Troll and Dol Guldur Orcs. So, on the fourth day of this journey, our party now faces the most enemies.

This, of course, makes our decision to ensnare the Troll all the more vital, as it means that only two of the enemies, and the weakest two, can attack. Here we make an important tactical decision: we decide we will not attack the Troll, who is hopelessly caught in our trap, because the delay will allow us to focus on the other two enemies.

Next we declare our defenders: the Snowbourn Scout will defend against the Goblins, and our hero Beravor will defend against the Orcs. For the latter battle, we draw a shadow card from the encounter deck: Evil Storm.

image

Fortunately Evil Storm has no Shadow effect, and its treachery power is, in this instance, moot – our threat level is below 35. That leaves the Orcs’ attack (2) versus Beravor’s defense (2) for no damage.

Next Eowyn attacks the Orcs, who are down to one health point. Her attack (1) vs Orcs defense (0) means a point of damage, enough to slay the vial creatures.

It is in the next battle, against the newly-arrived Goblins, that things go horribly astray. We draw the worst of all possible shadow cards, Pursued by Shadow:

image

Ouch. The card’s shadow effect is operative here, not the ‘when revealed’ effect. This means our sole defender, Snowbourn Scout, is sent back to our hand. That means the Goblins’ attack (2) is undefended – and two hits of damage must be applied to one of our three heroes. Because Theodred already has lost two of four hits points, and because Eowyn only has three hit points total, we apply the damage to Beravor.

Theodred then attacks the Goblins and does one measly damage, so the group of creatures survives.

Sigh. The party had begun this turn hopeful that they could slay the Hill Troll and otherwise keep the status quo. Instead, the Troll still lives, the Goblins as well, two of the three heroes have grave wounds, and the threat to our intrepid party is higher than ever.

With that, the party rests by the campfire as the ensared Troll growls in the distance. His demise will have to wait for the morning.

I have the Nightmare versions of these quests. I’ve managed to beat Mirkwood and Anduin but Dol Guldur is proving to be more than I’ve bargained for.

It looks like you are playing “True Solo” using only one deck.
If you make it down the river, Dol Guldur will end you! You will want to play “Two Handed” using two decks if you want any hope of survival.

Good Luck!

This has been an informative and entertaining AAR. I hope you continue doing more of these. Makes me want to dig out my old cards and play.