Ah so your units move with you from mission to mission?
What about the missions?
Ah so your units move with you from mission to mission?
What about the missions?
It’s unlike the Panzer General style of managing individual units etc. The units start over in a new Theater.
At each conference you manage upgrades to your HQ, then there will be a series of missions chained together. After that you have another conference to upgrade your HQ and start a new set of missions. The units within the mission sets are persistent it seems. I’m not sure if they move with their attached HQ. perhaps I’ll start taking detailed notes to confirm this.
Edit: I took notes.
Your units does carry over experience from scenario to scenario. But, you may not carry over all of the units you use, only some units will be carried over. In the first I tested scenario, the 4 highest armor units are carried over… and the remaining armor units became reinforcements I could deploy in the next scenario before the scenario started.
Zacny weighs in. I’ve only dabbled so far, but it seems pretty slick to me. The graphics are a little busier than I’d like. Other than that, very impressive feel to the game.
Hmm that sounds kind of like it would be Panzer General ‘light’ version.
It doesn’t feel like a light version to me. I think the game rules are more appropriate to the scale of the map than Panzer General. There is more of a focus on supply and especially cutting off enemy supply. Units are more appropriate scale (e.g. you have infantry with attached heavy artillery rather than a separate artillery unit that can fire several hexes).
I think there is a bit of a PG feel when you are trying to figure out how to sequence attacks so you can use all of your nearby firepower effectively (especially in Italy where available space is often limited due to mountains).
You don’t have something like infantry in town with arty behind and AT guns and more infantry on the flanks, and AA covering all of them. It’s more like the division in town has an 88 attachment so air attacks are less effective, they will murder the tanks and they are so dug in that infantry attacks are a problem unless you take the time to set up careful setpiece attacks. Then it’s a question of do you have to time to get around them through the surrounding terrain and cut off their supply and wait for them to weaken (and how do you supply your flankers?). Maybe it’s worth playing the naval bombardment card that you wanted to save for later?
As a fan of the original I’ve dabbled in this a bit and while I’m enjoying the game overall, I am struggling a bit on how I’m supposed to quickly assess all the info on the map. The new UI feels a bit busy and I find myself missing the clean look of the original.
Do you get to choose/purchase units for missions?
Not that I’ve seen. At the conference screen you can buy cards with prestige, and some of those (like airborne brigade) are units that you get to deploy again if they survive (I’m not very good at letting para’s survive).
You can also fill out units you get to full strength and buy extra specialist steps for them.
So, I’m loving this so far - the varied tactical options make it more interesting turn-to-turn, and the HQ is a nice additional dynamic.
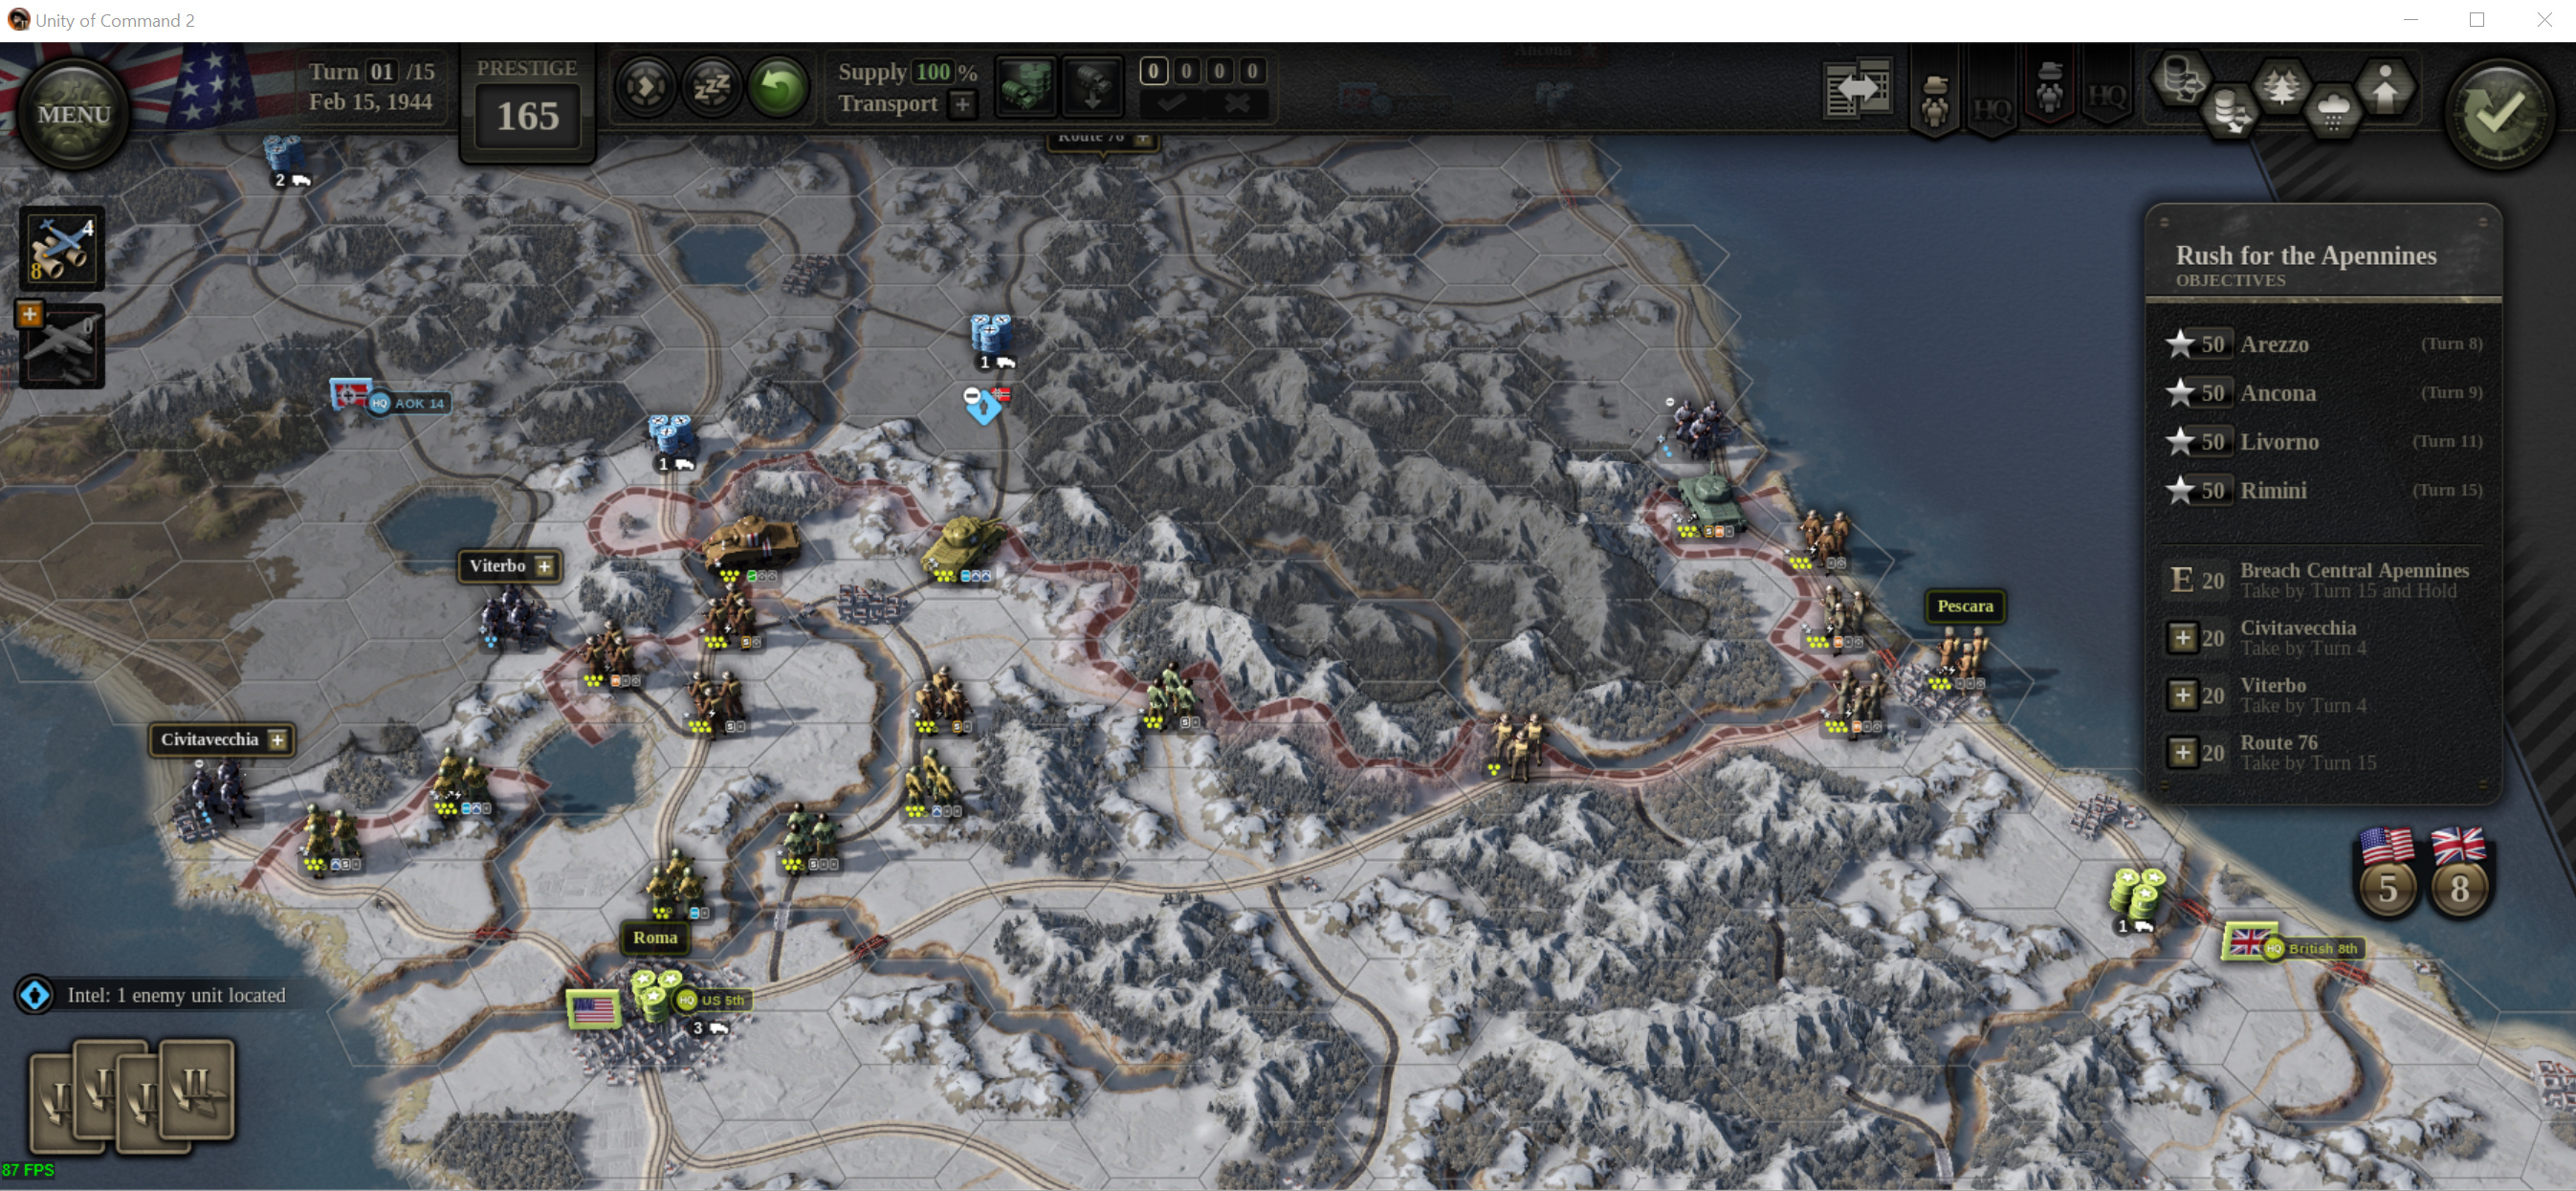
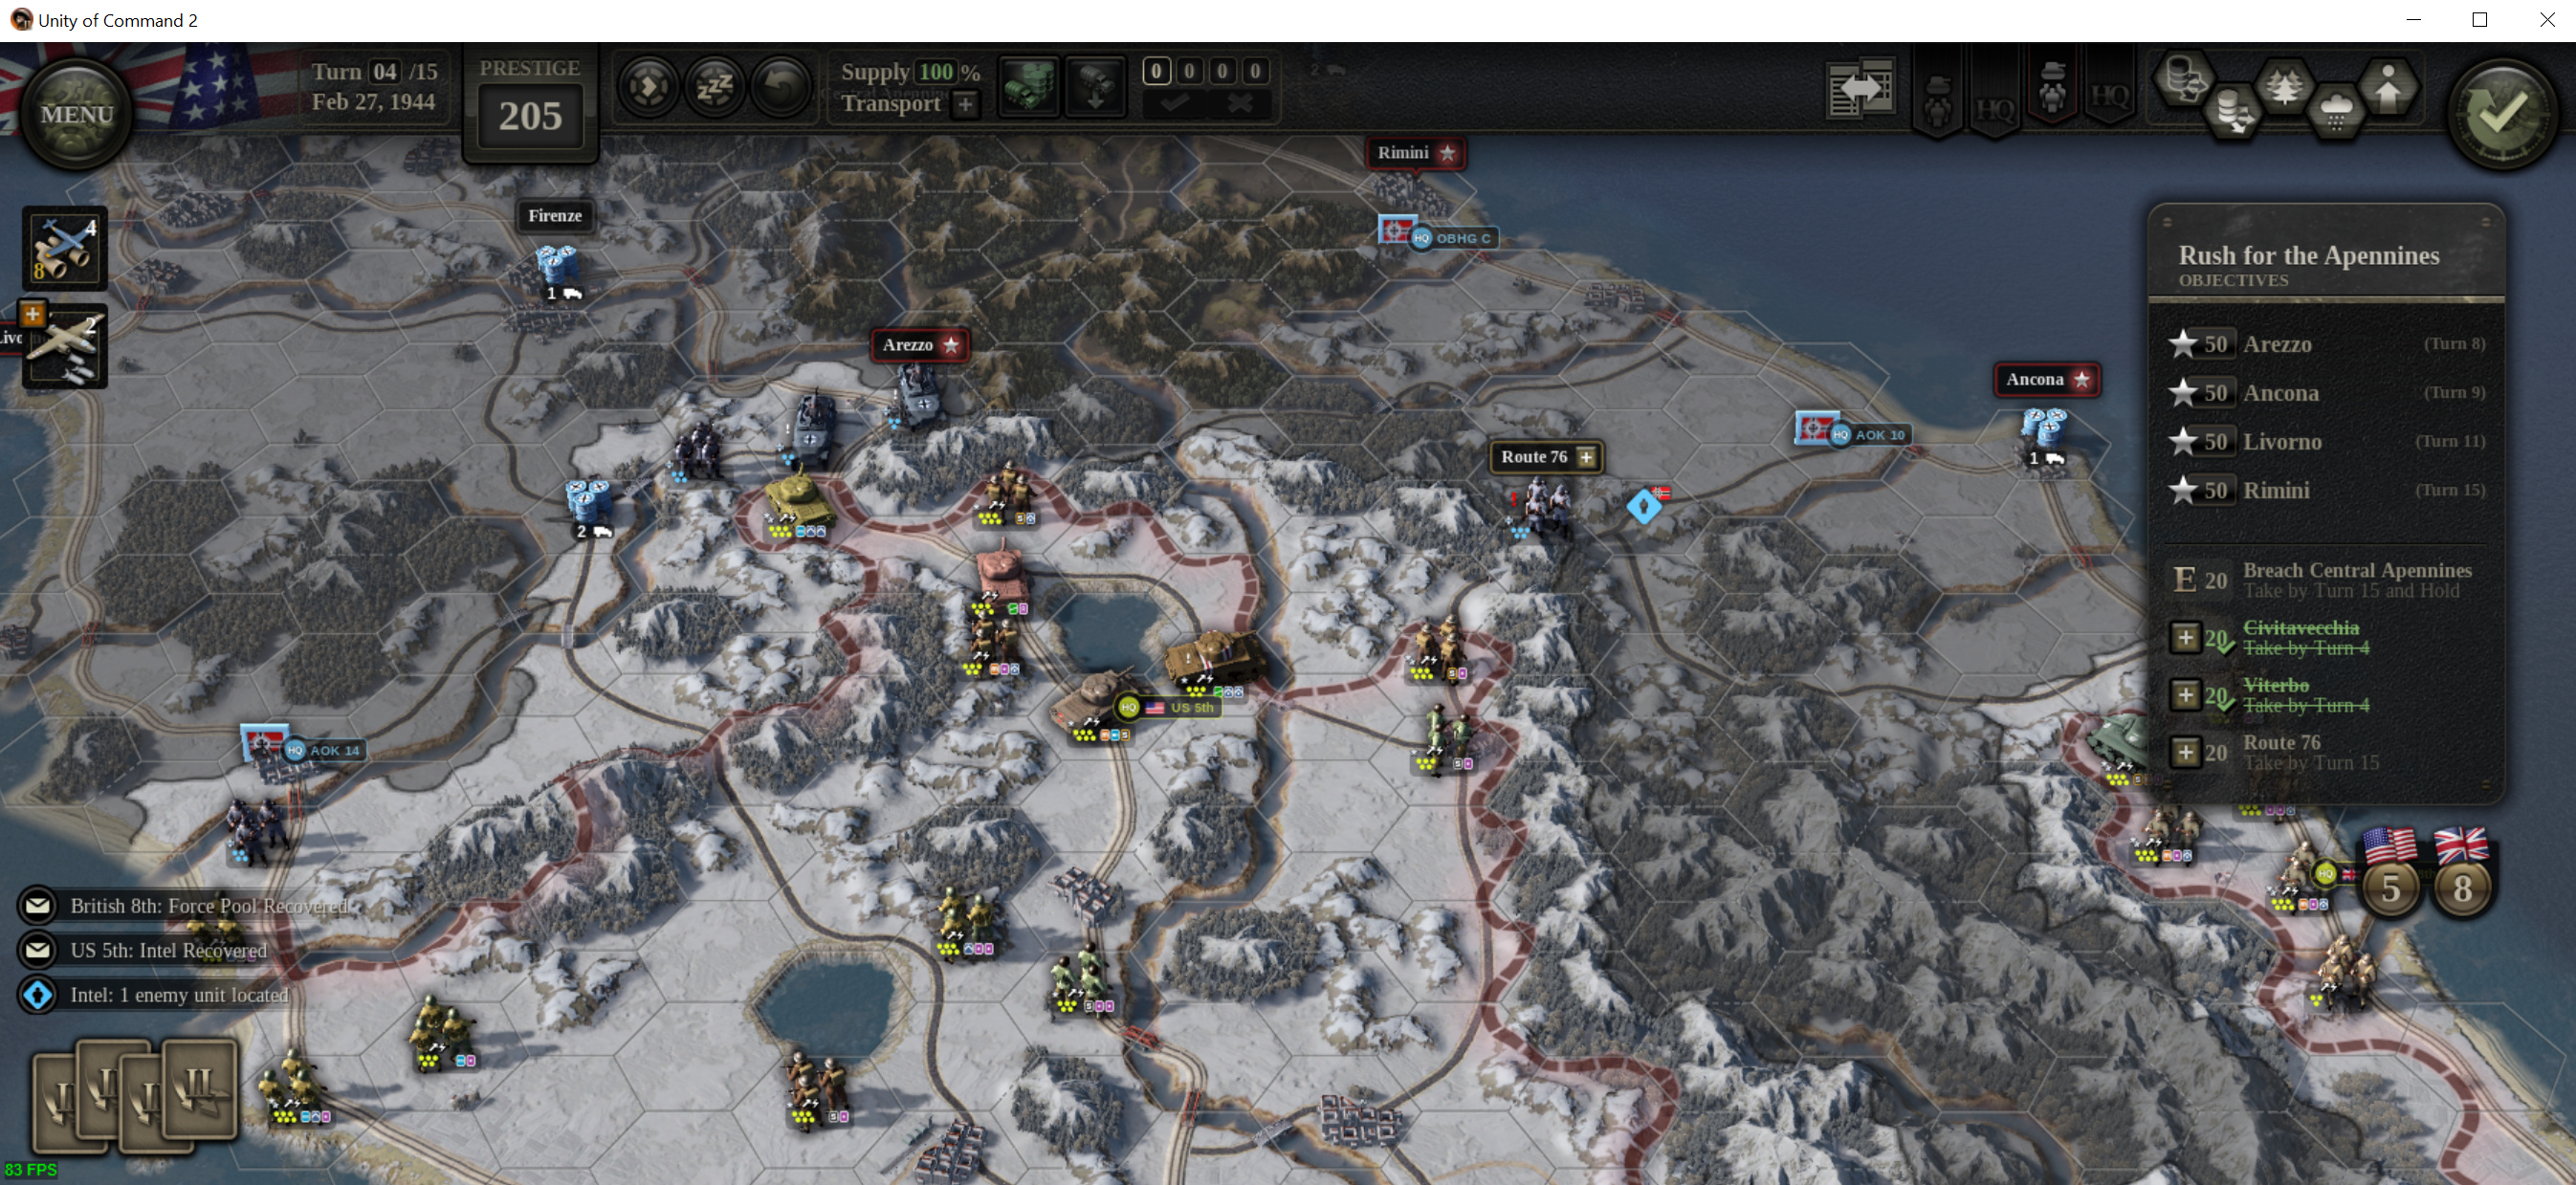
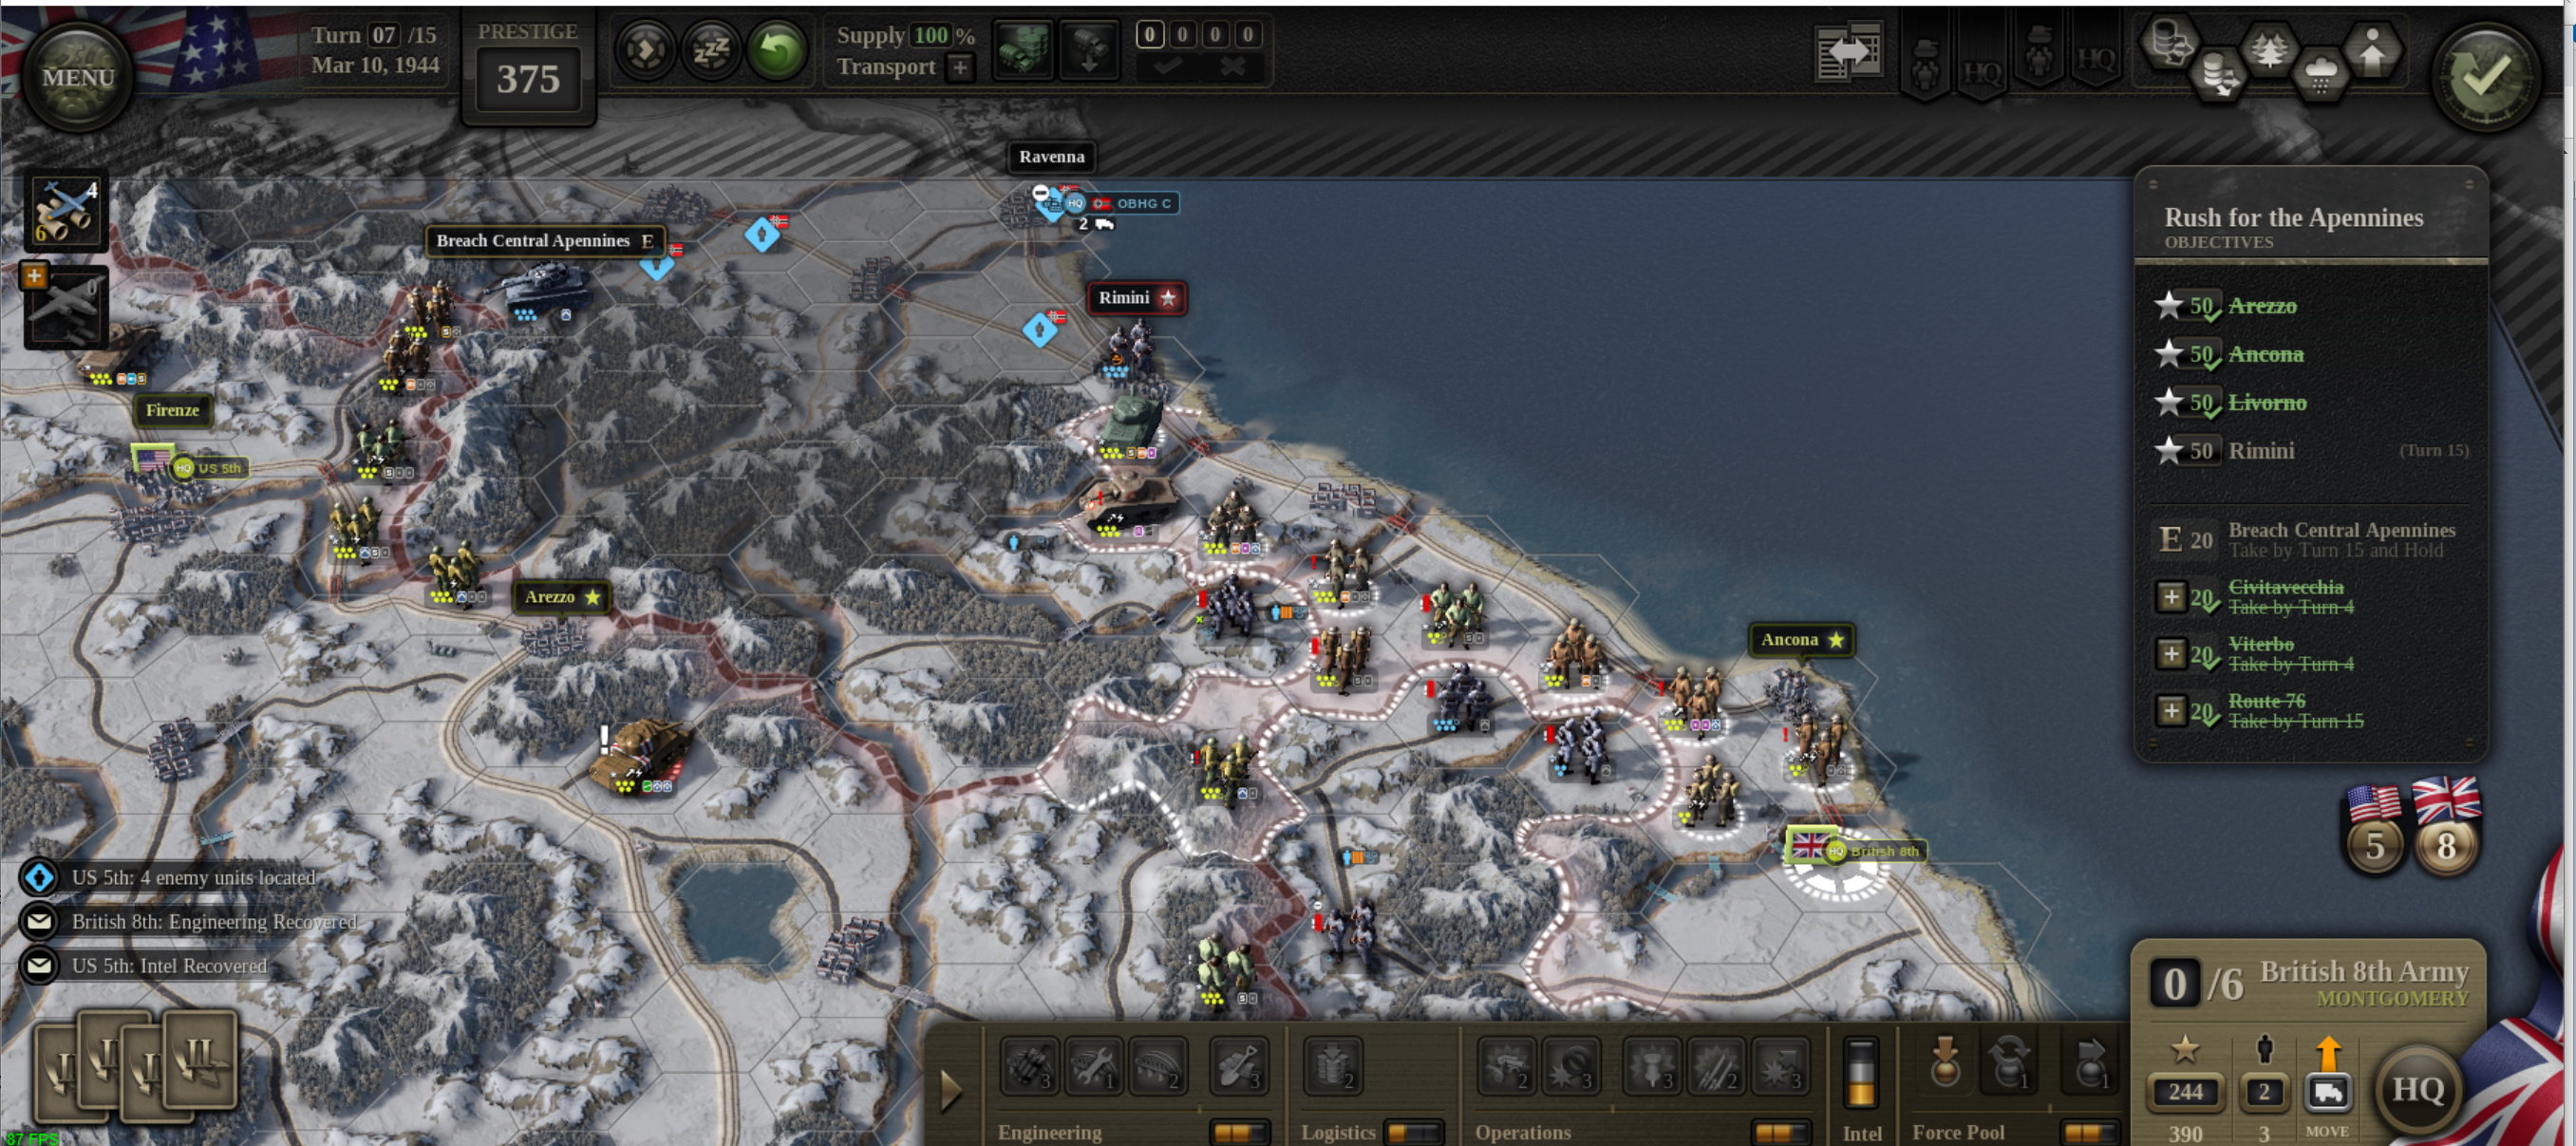
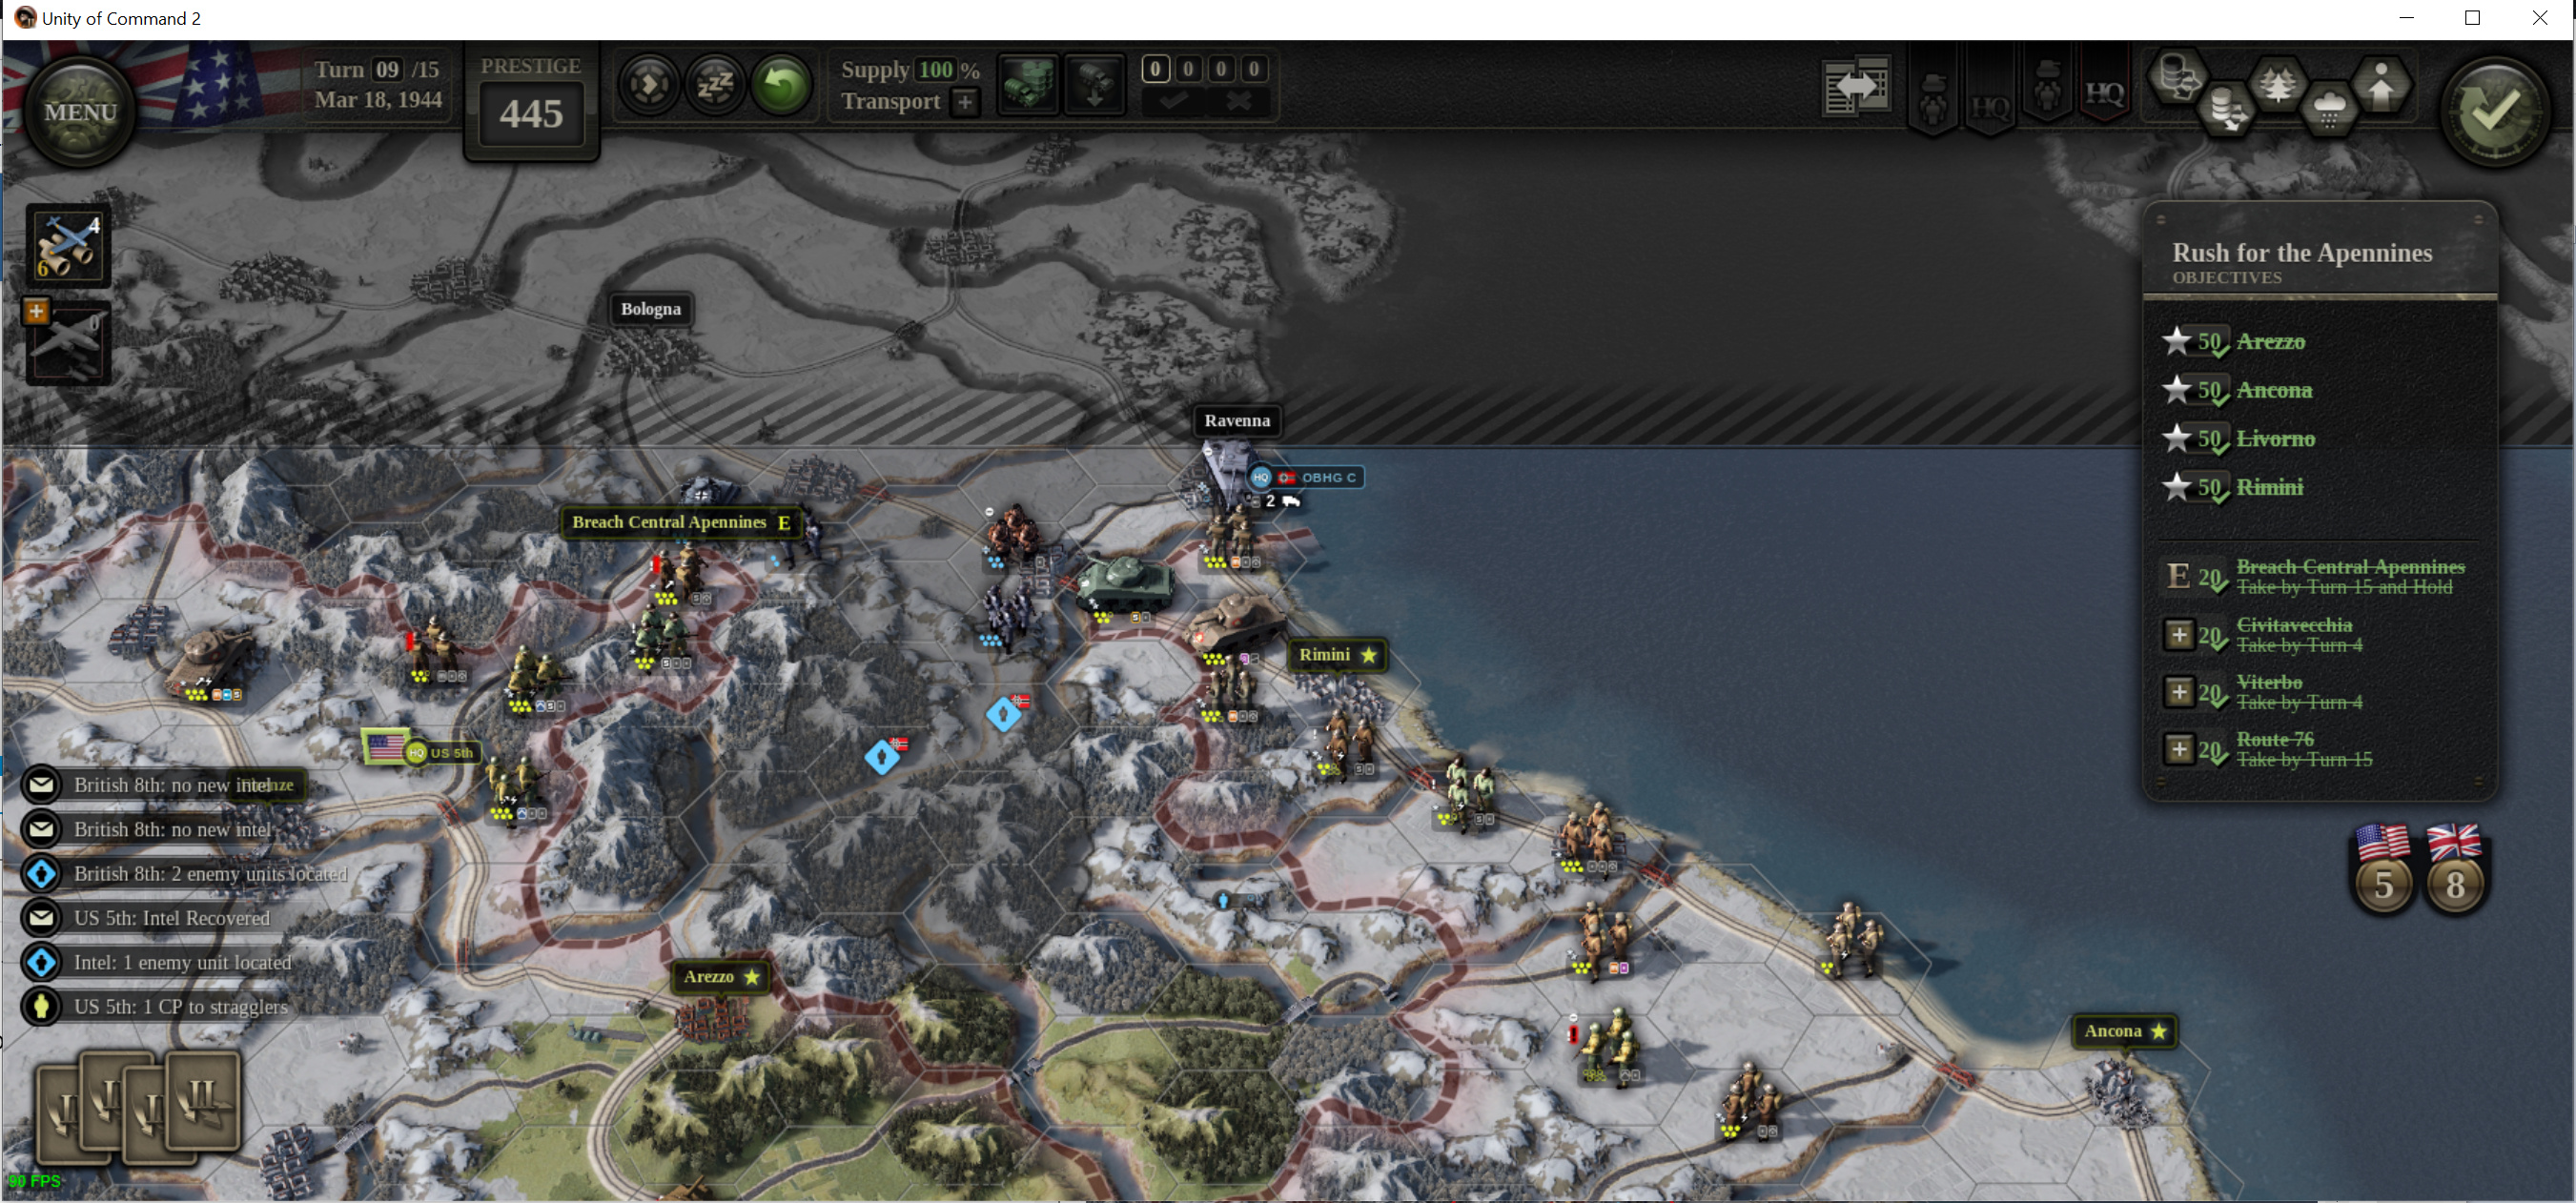
That said: has anyone managed to complete Rush for the Appenines? I’ve been banging my head against that one for three days now. I’ve managed to get within striking distance of Rimini on the last turn, but never with enough firepower or positioning to crack the hex (and that’s with getting all the other objectives, as well).
What is the difficulty you’re on?
I remember using “set piece” attacks to breach tough positions. But it typically requires one additional turn to exploit it.
Also I tend to “bypass” strong points to cut the supply lines while keeping on with the advance so there will be pockets of unsupplied enemies behind my main advance. I set up blocking units so they are unable to touch my own supply lines.
I’m replaying the map.
Battle Preparation Phase
Edit: Before ending my turn, I also moved the Britsih HQ so that it could cover my British tank unit in the west.
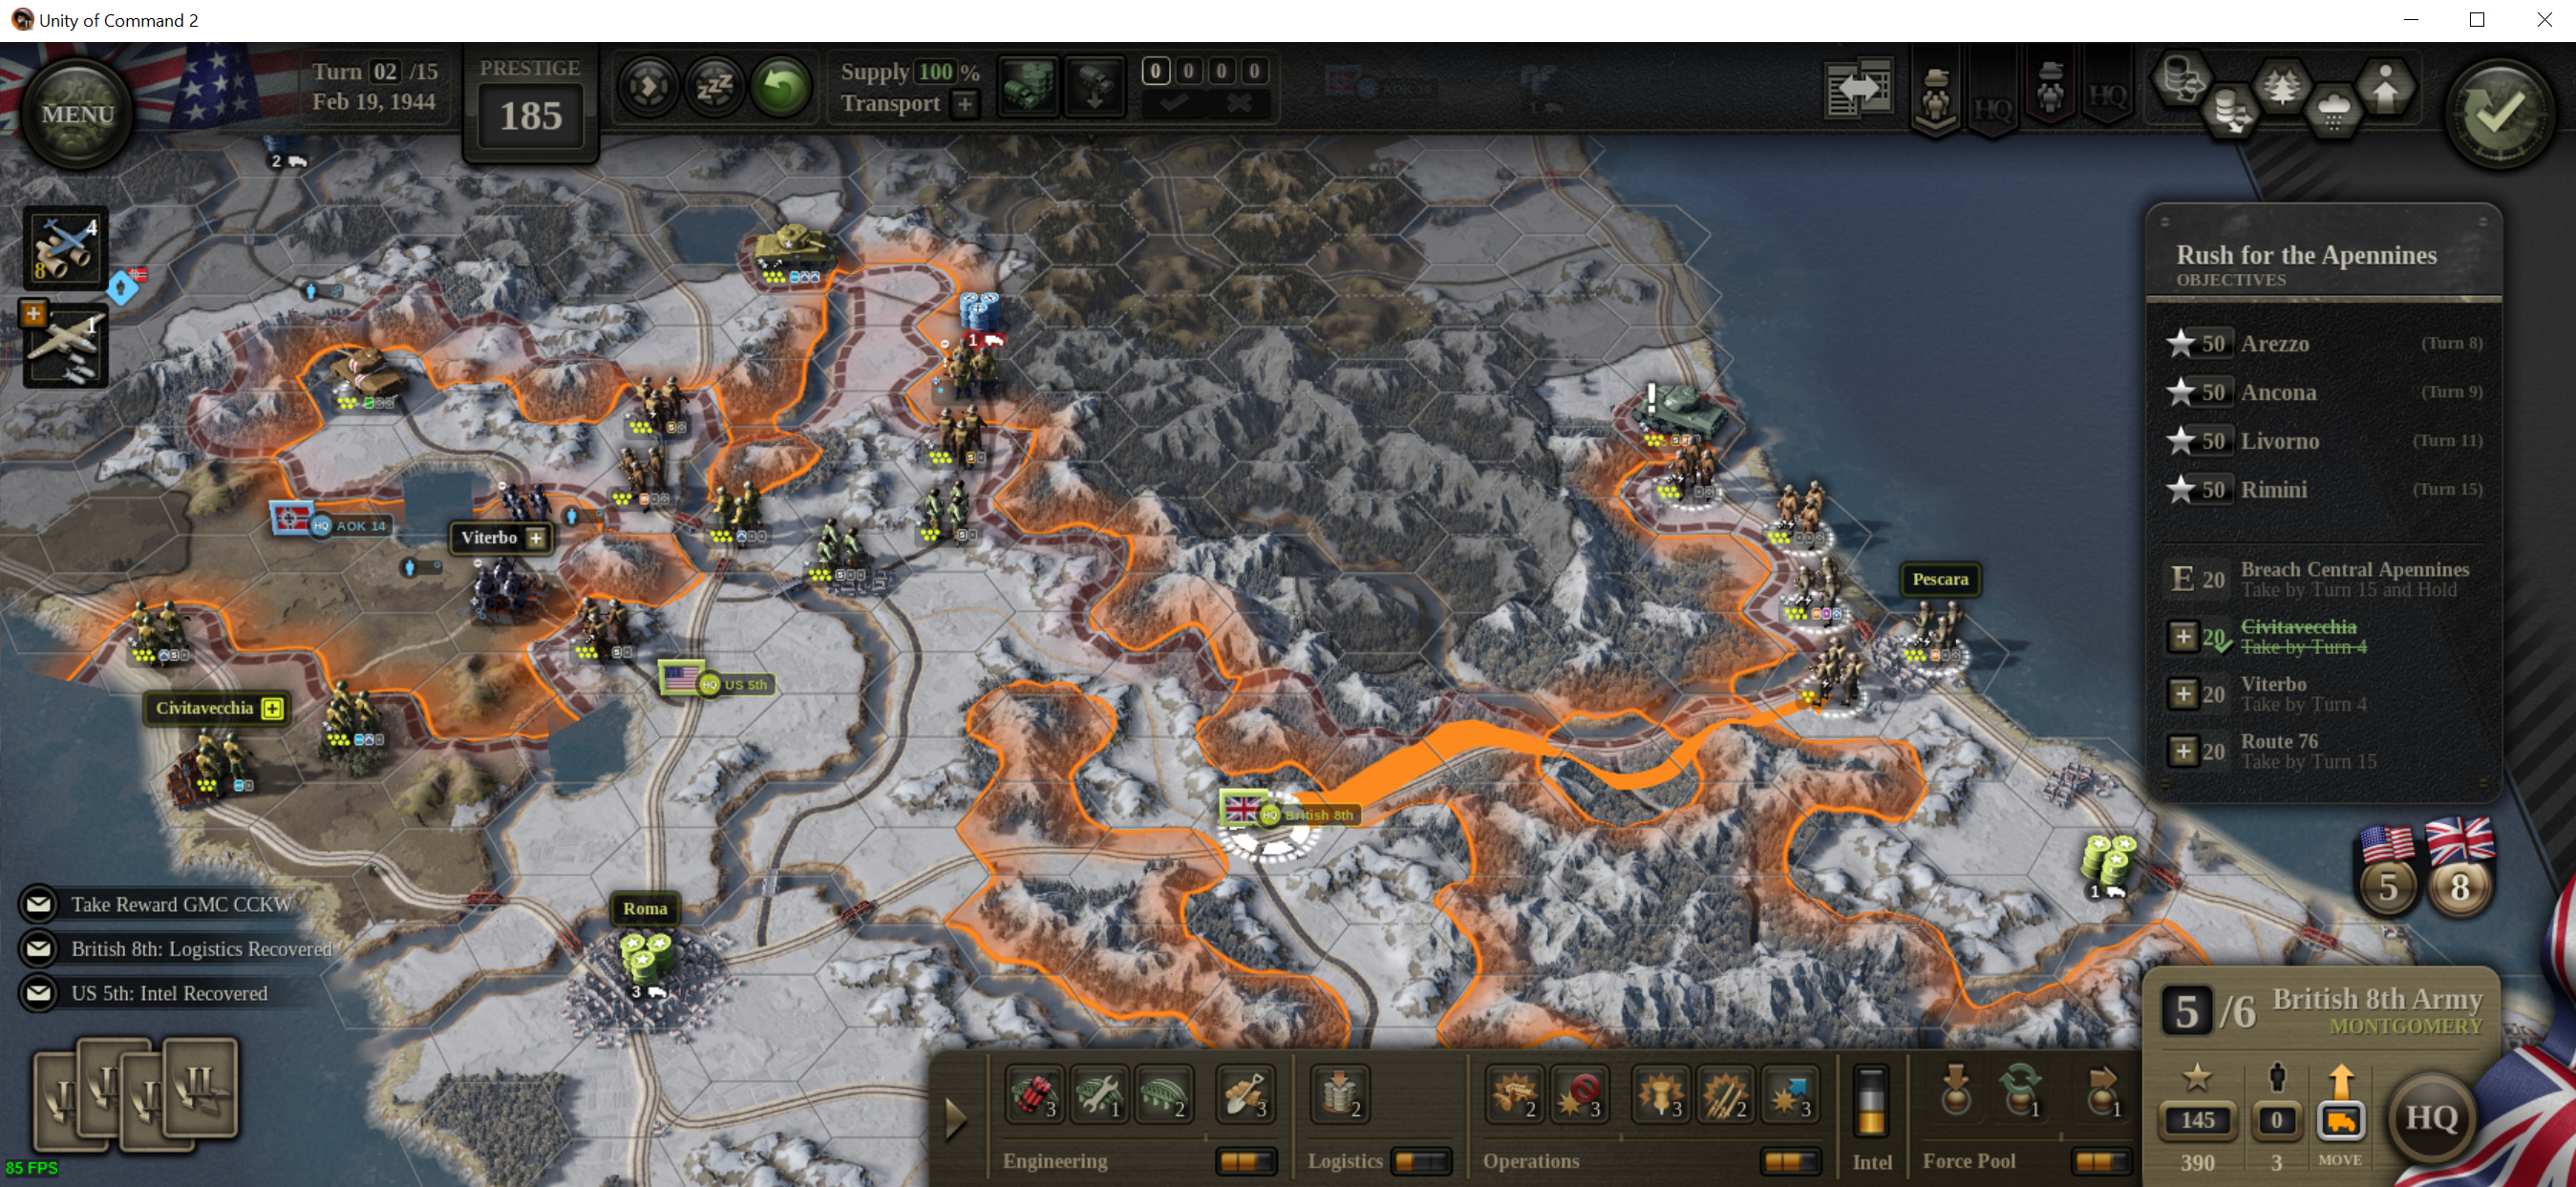
In Turn 2,
My infantry pushed along the west coast and I used my armour units to deeply push into enemy territory, I will need to make a choice for my British HQ. I’ll be needed to support the east coast push, so I’ll transfer it to the east. My British armour will have to be suffer supply loss next turn but it has achieve quite a bit for me. The incoming armour units will allow me to rotate it out from the front.
Placing the reinforcements and rushing the forward brings me to this.
On hindsight, I should have used my British armour in the thrust towards Route 76. That way, I can link up my British units on the west coast once I break through that crucial point. But never mind, we’ll see how it goes.
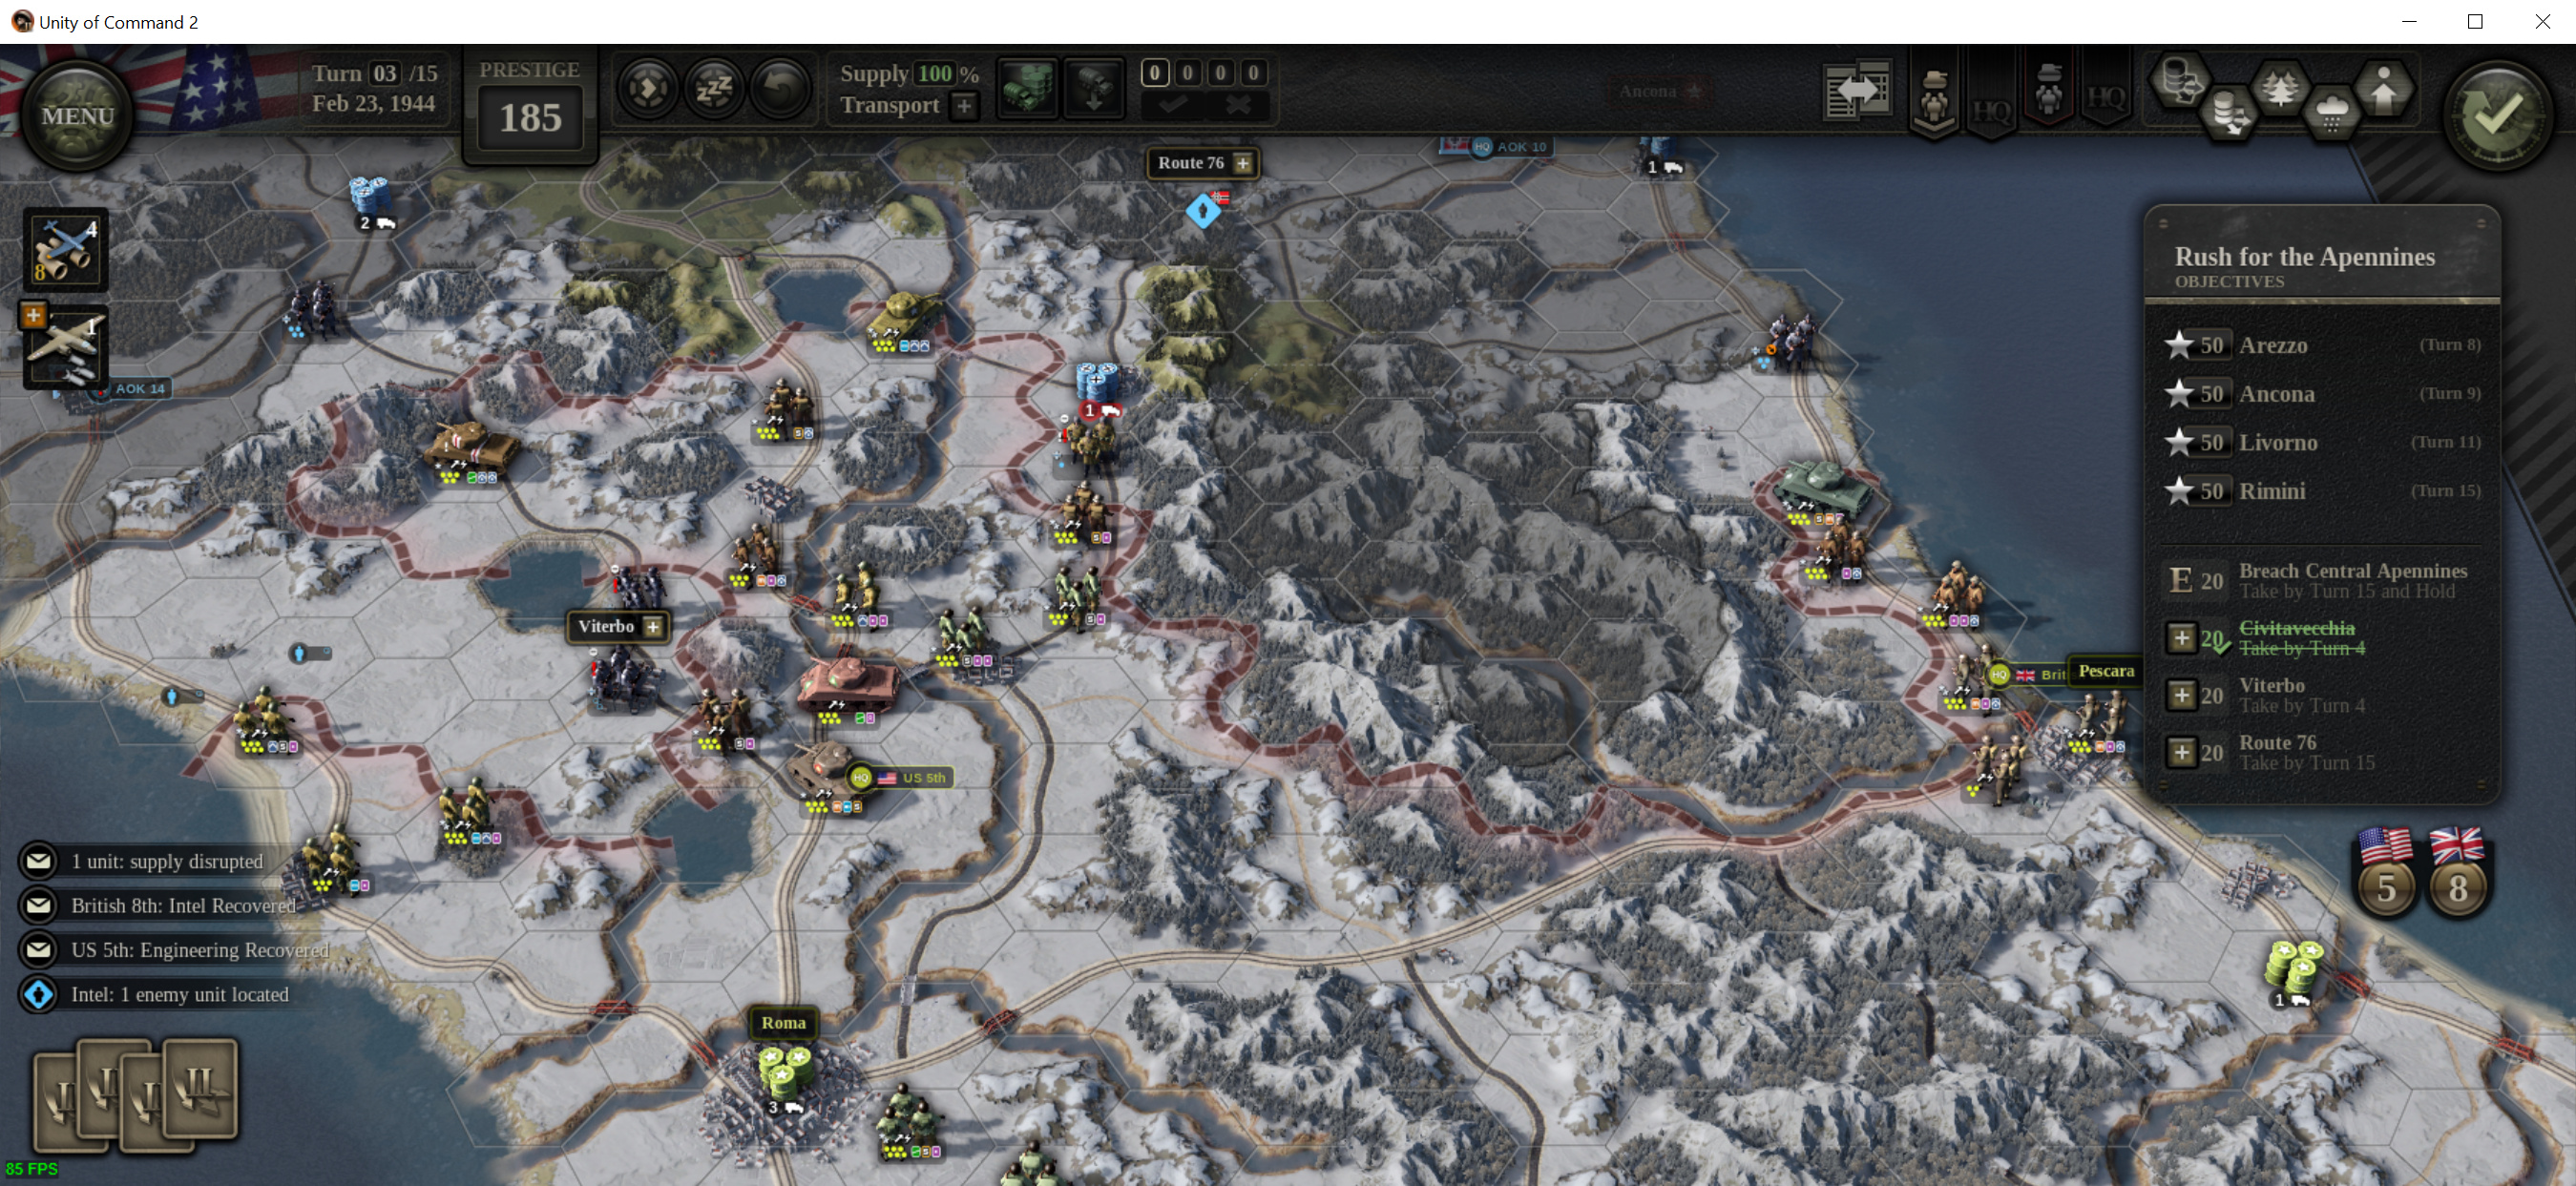
Turn 3
I still dont see much opposition, perhaps the reason is that I’m on Easy campaign. (I’ll probably have to start a normal campaign.)
I push hard towards the center. The British armour swing west. And mop up the flanked units with my infantry.
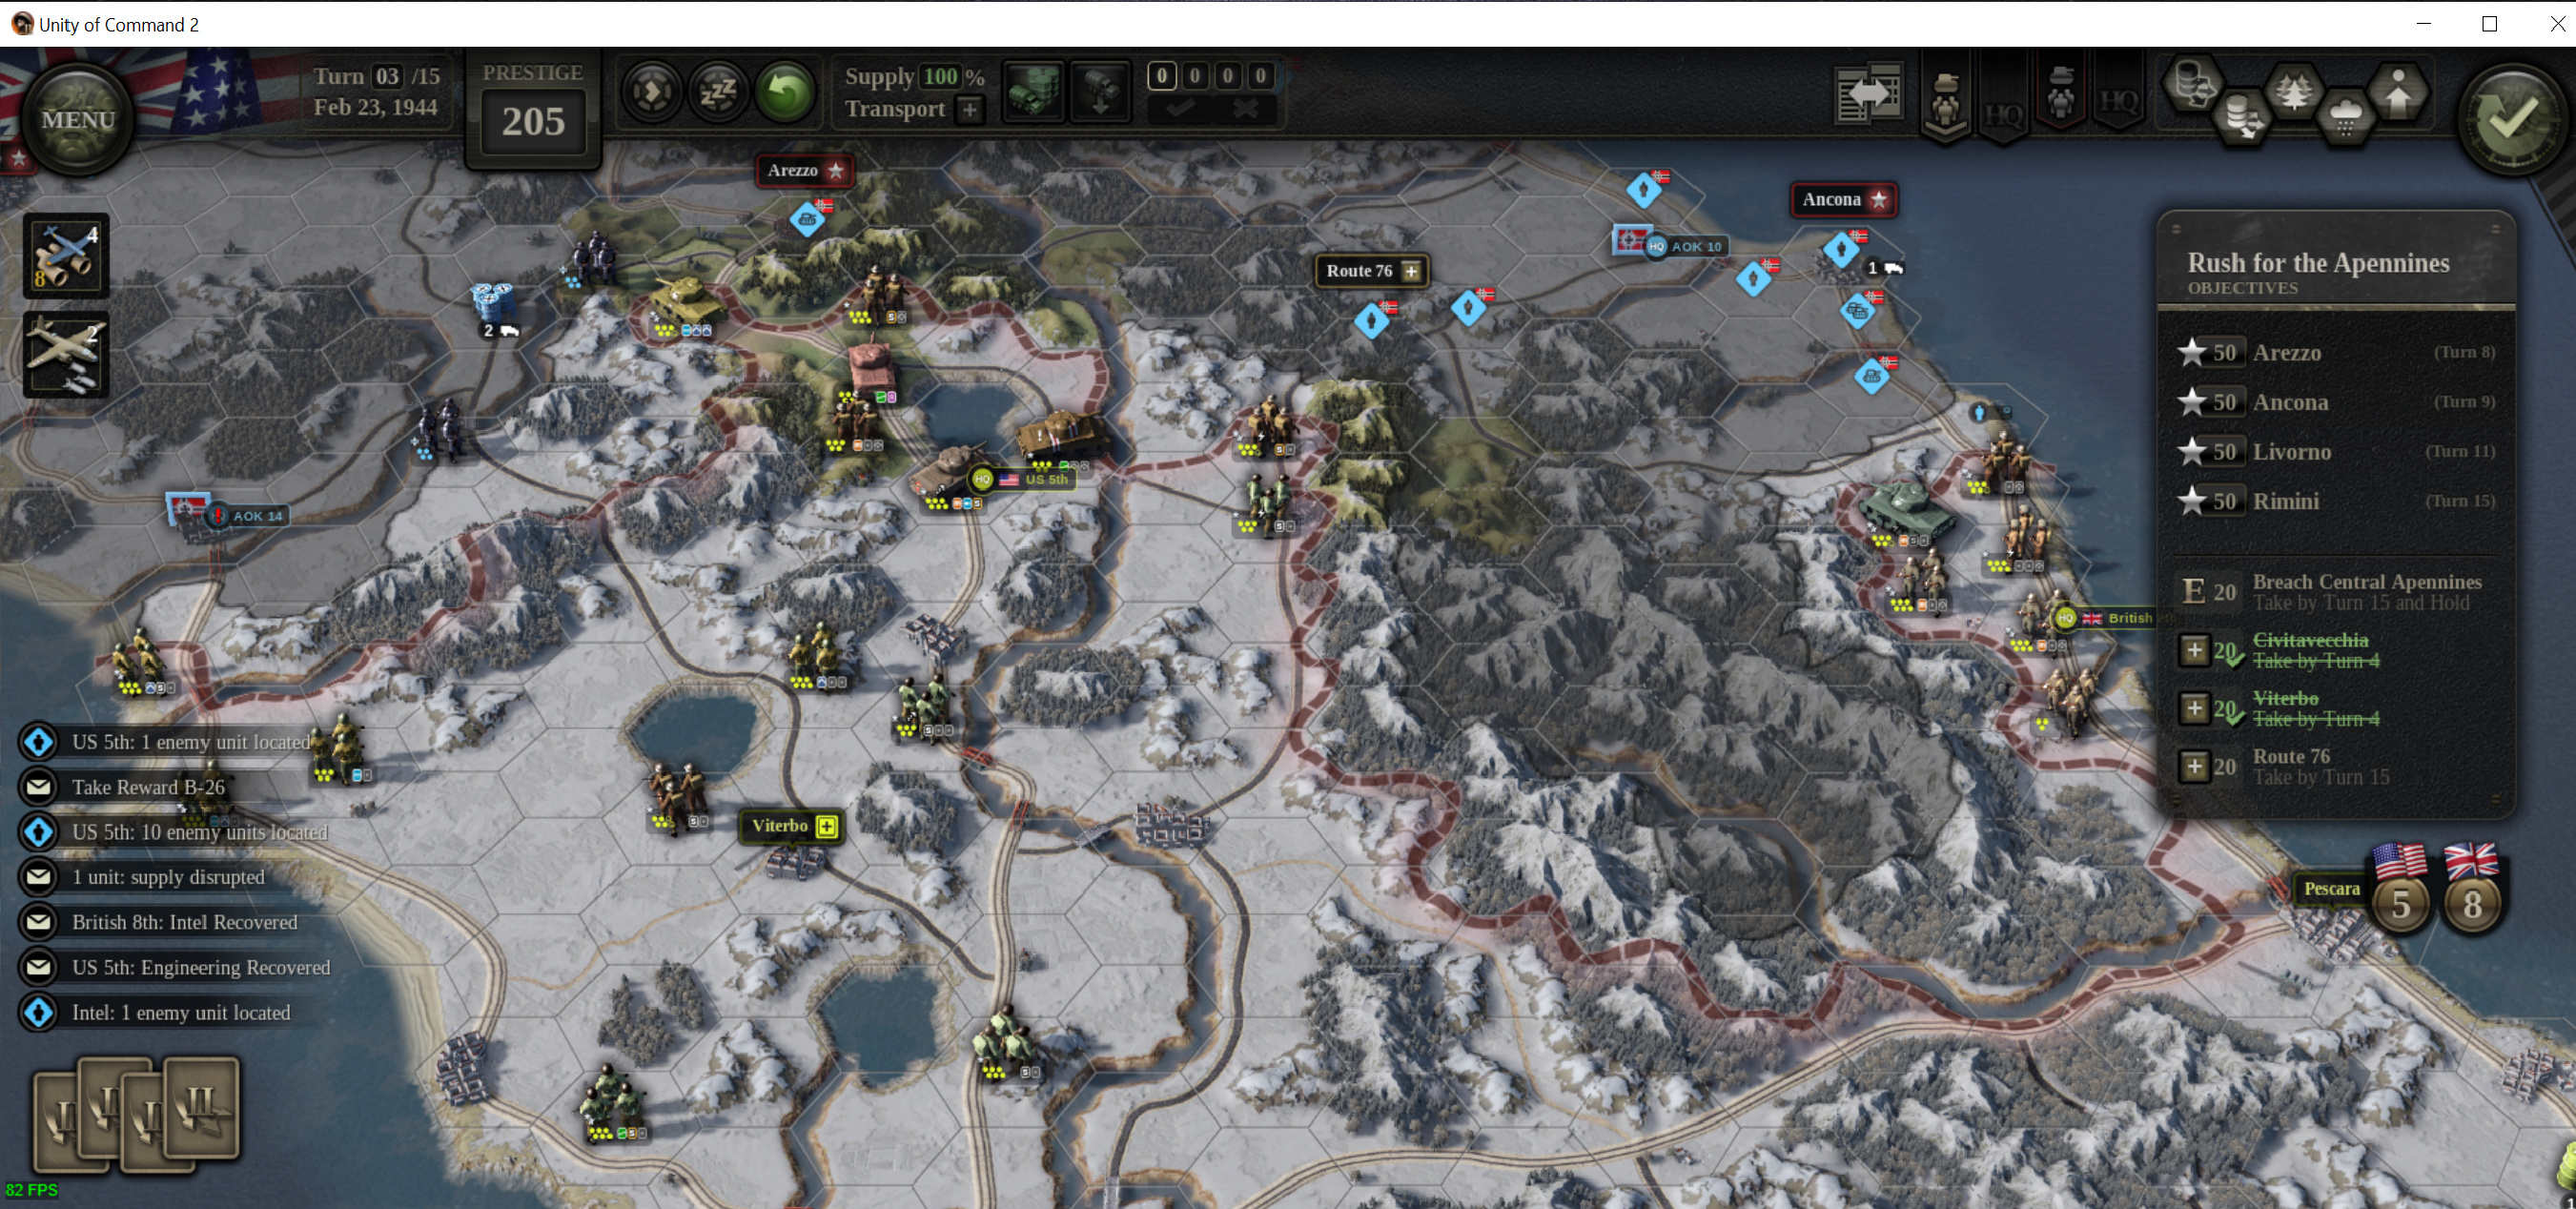
Turn 4:
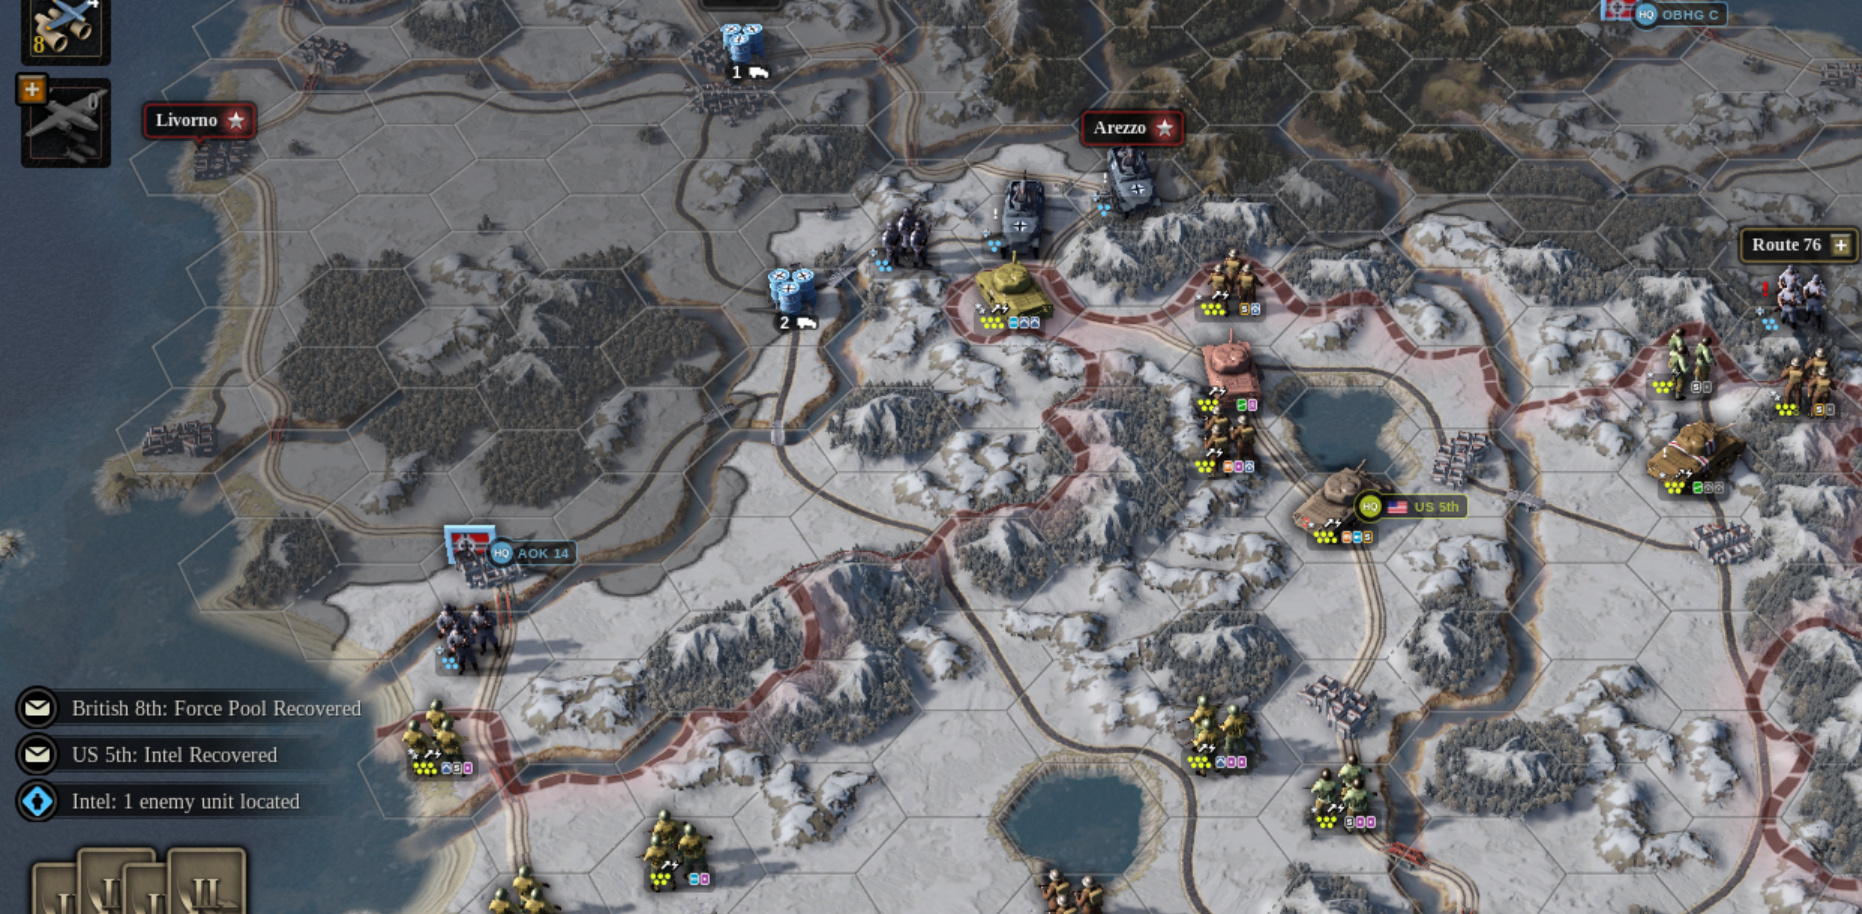
The enemy is revealed. Because I had advanced so rapidly, we can see that they had actually swung units from the east coast into the center to meet the advance. This is good news as the east coast is clear for very rapid advance.
Oops spoken too early! A mechanized unit blocks my way.
So I added another bomber unit and see if I can clear this roadblock with both air and tanks and infantry.
I do but an armour unit blocks the river crossing. I set it up for an attack the next turn and build pontoon bridges for a push and flank next turn.
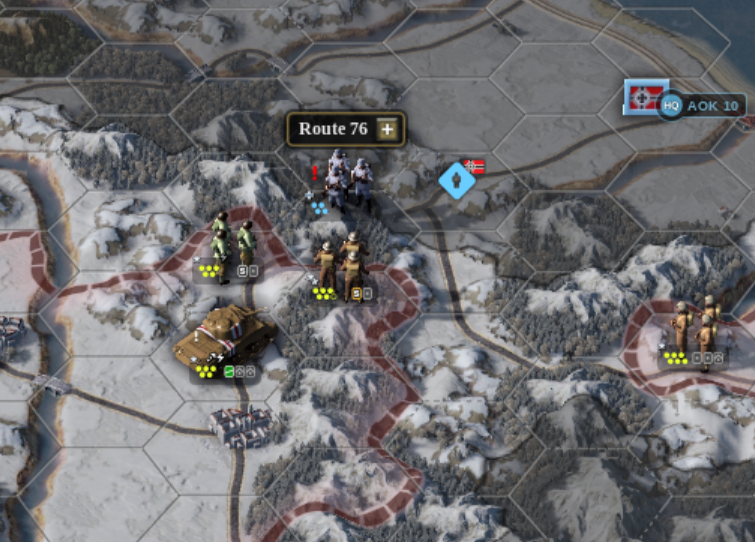
I prepare for an assault on Route 76.
And prepare to punch through the west with the powerful armour units that are well placed for attack…
… and achieving it.
I built some pontoon bridges down west too so that I could continue pushing forward.
Turn 5:
My supply lines are stretched and I’ll need to consolidate my gains. My forward units are out of supply. I’ll either need to link up the supply lines or I’ll have to reposition the units alternative I can do something risky and use my HQ’s emergency supplies capability.
On the west, I cut very deeply into the enemy territory. I bypass capturing Arrezo, preferring to starve it before attacking such a strong position. And I move my HQ up forward so that I can do emergency supply of my forward units. (But remembering to emergency supply my units facing route 76 before I move.)
On the east…
I’m facing a big group of units in a very crowded position. I’ll try to break the route 76 and hopefully try to achieve a breakout and try a flank along the coast as well…
Wow!
The coastal battle went extremely well, thanks to the dice rolls and my elite units! And with my pontoon bridges built last turn, they allowed me to flank and cut off the whole group in the east!
And the battle at Route 76 went well also with help from bombing.
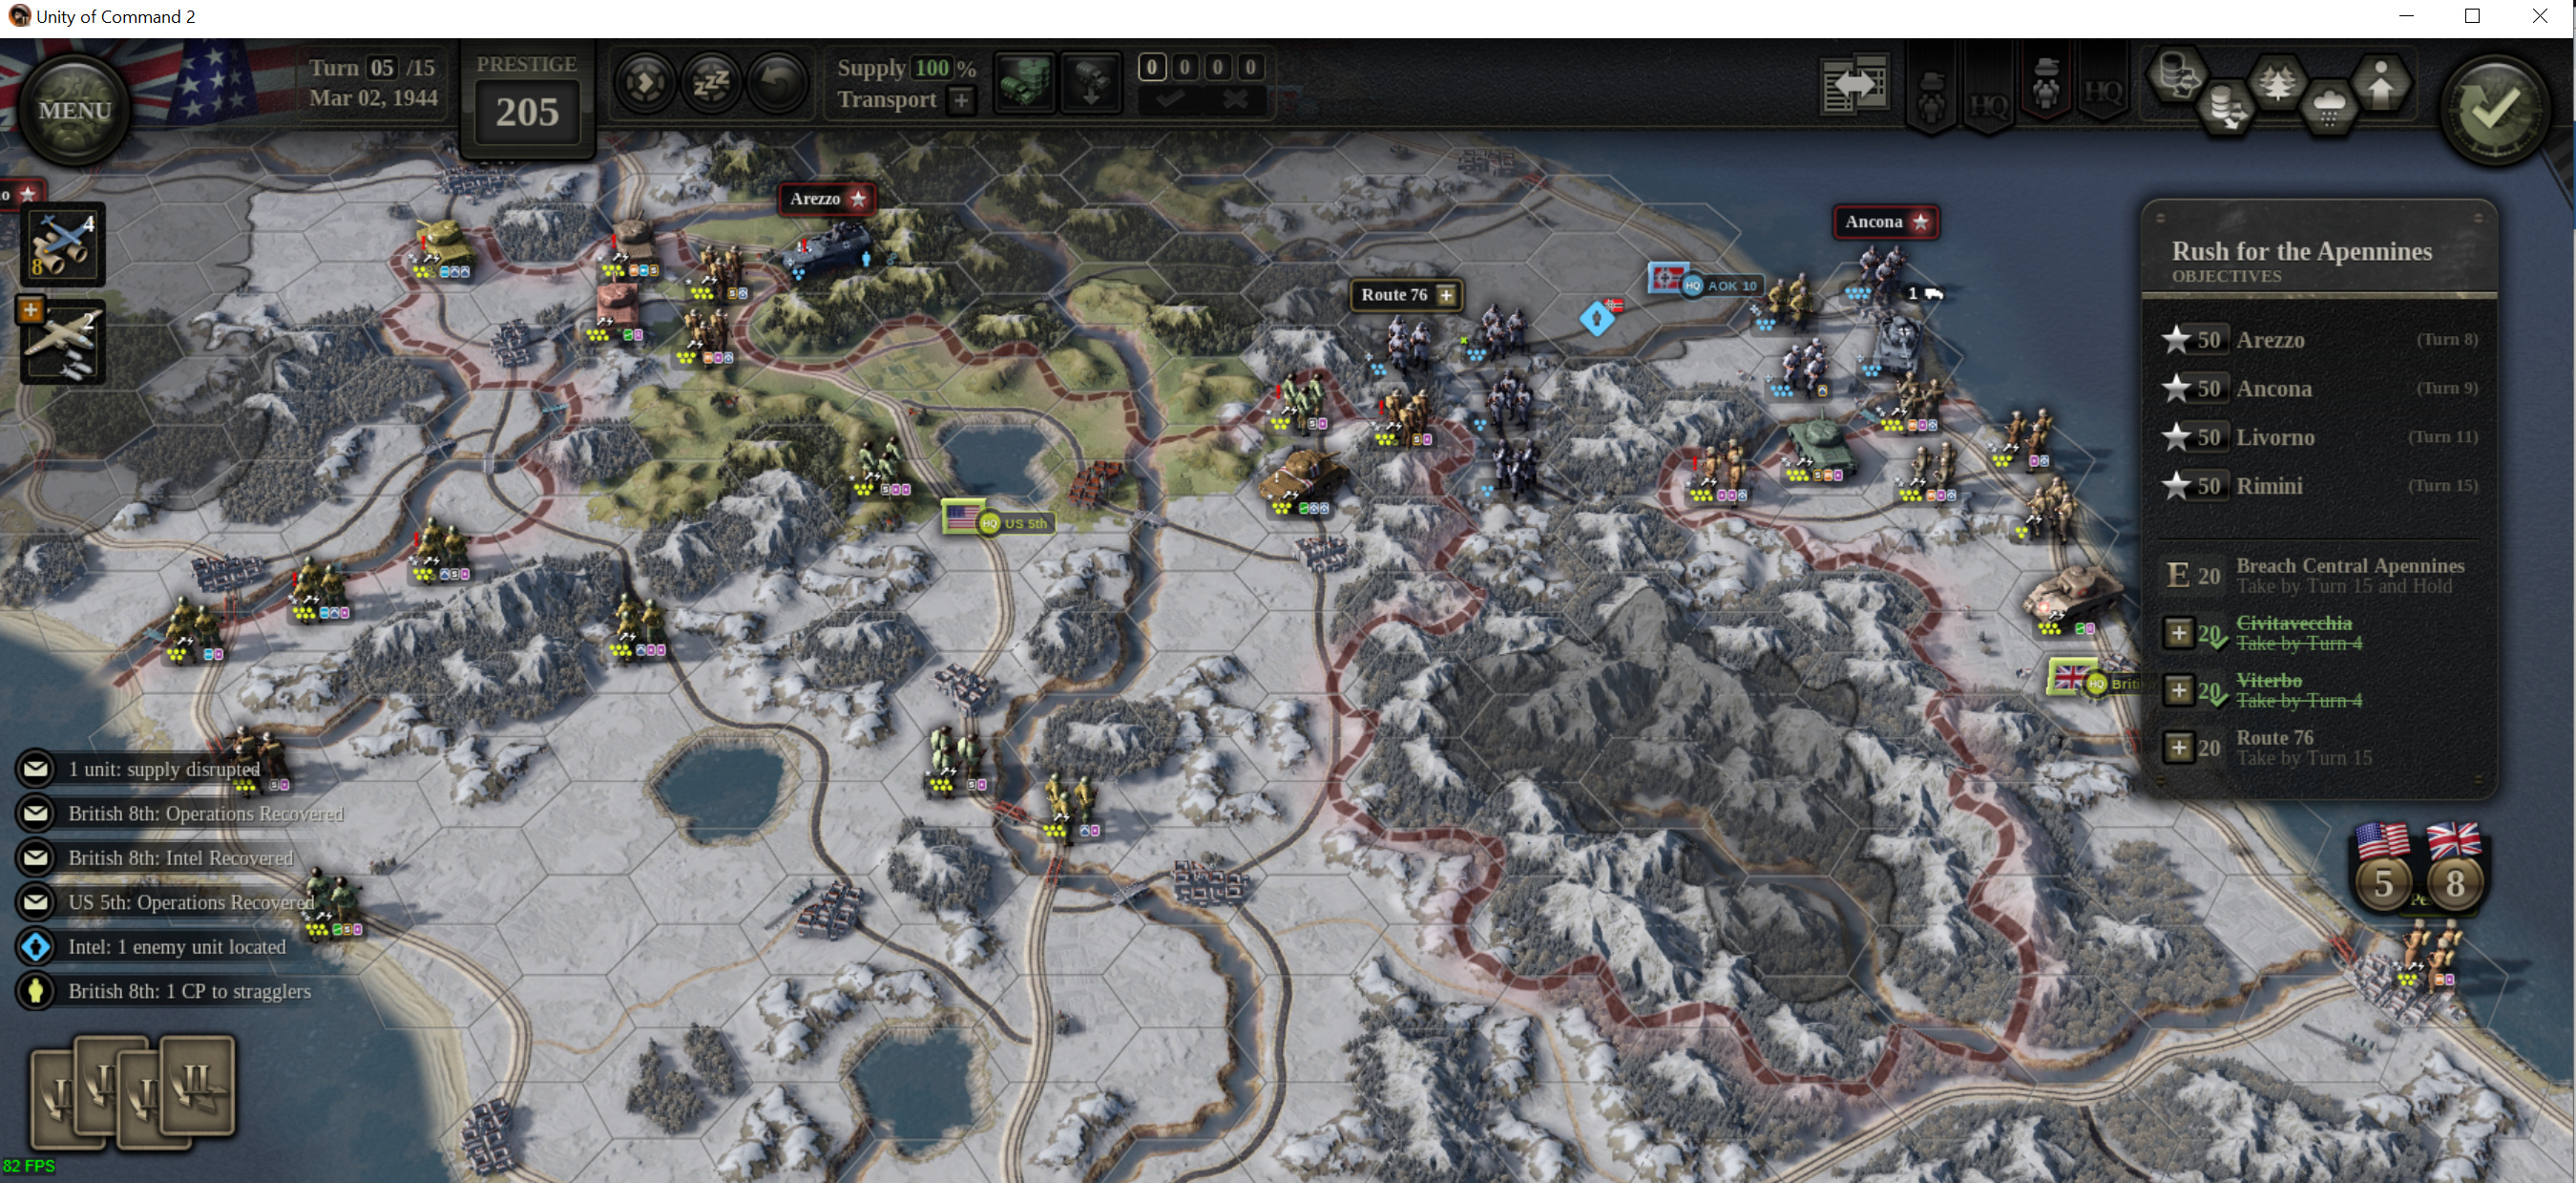
Overall we’re well on time to capture all the objectives with the enemy supply lines severed and their units out of position for our drive to Rimini.
(I’ll need to break here. Have to attend to something.)
On turn 6:
My thrusts have placed many of my units beyond reach of my supply lines.
The west:
The east:
On the west side, I’ll emergency supply my 3 armour units to take Livono and link up the supply line from the west coast.
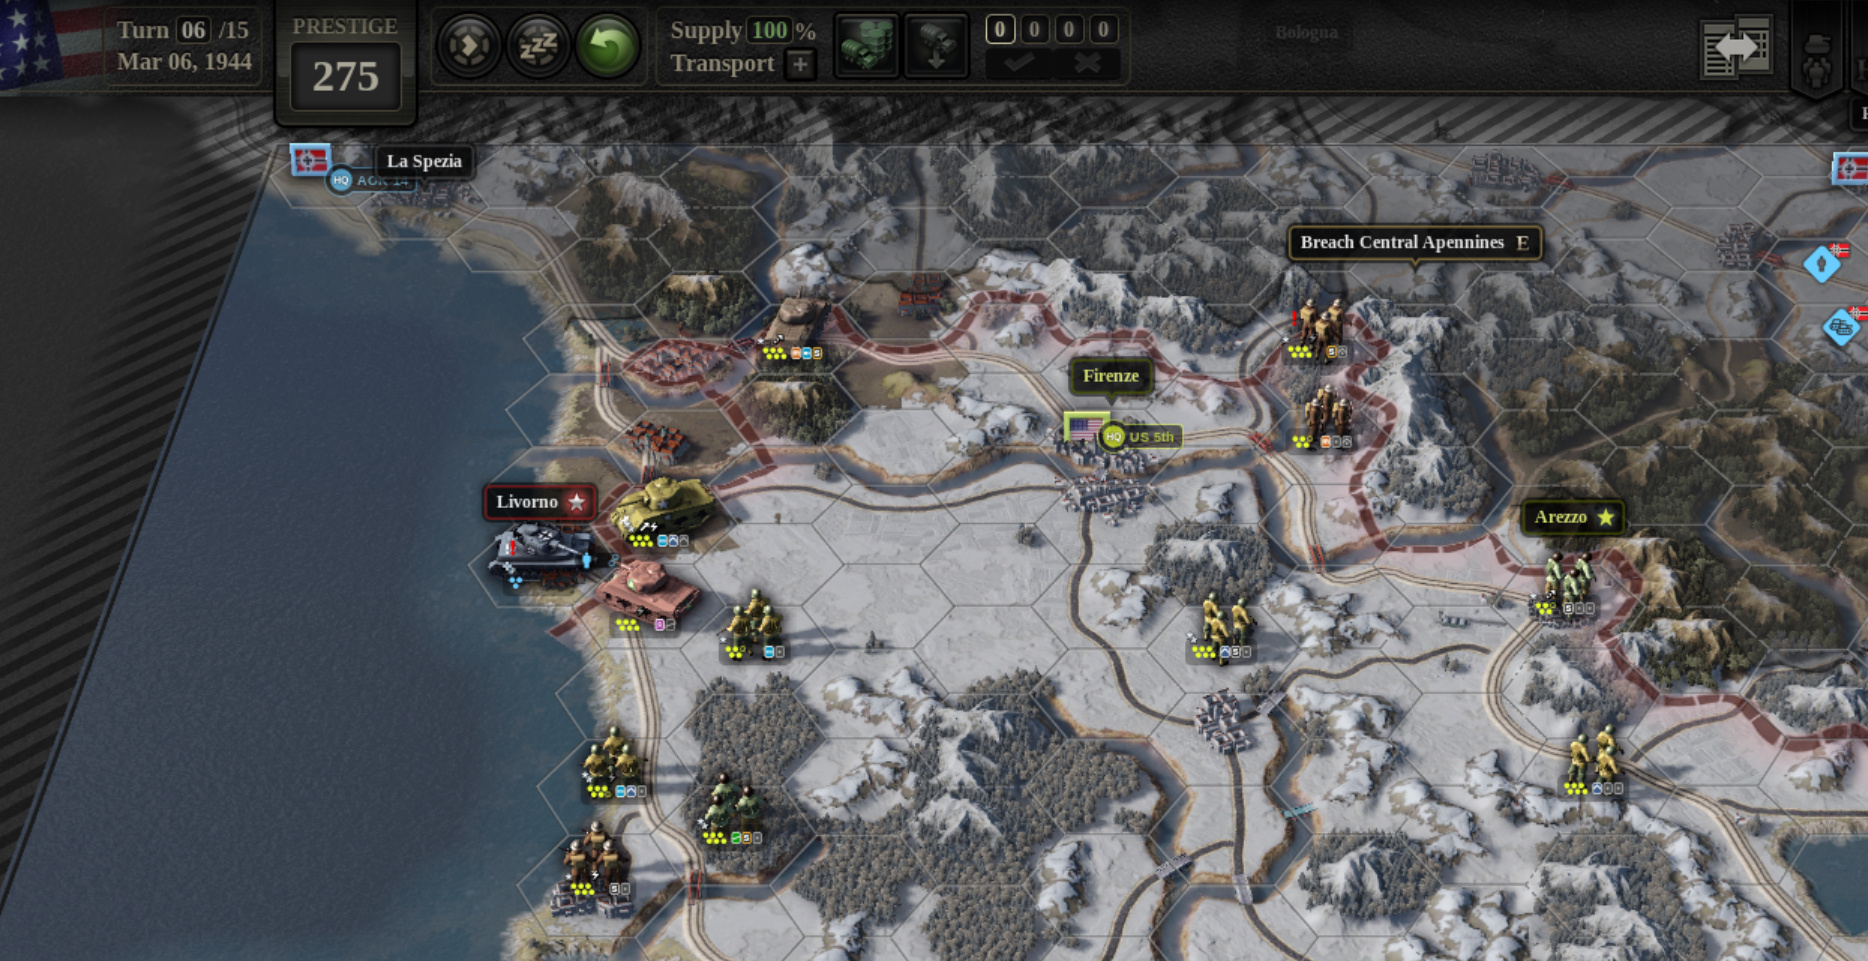
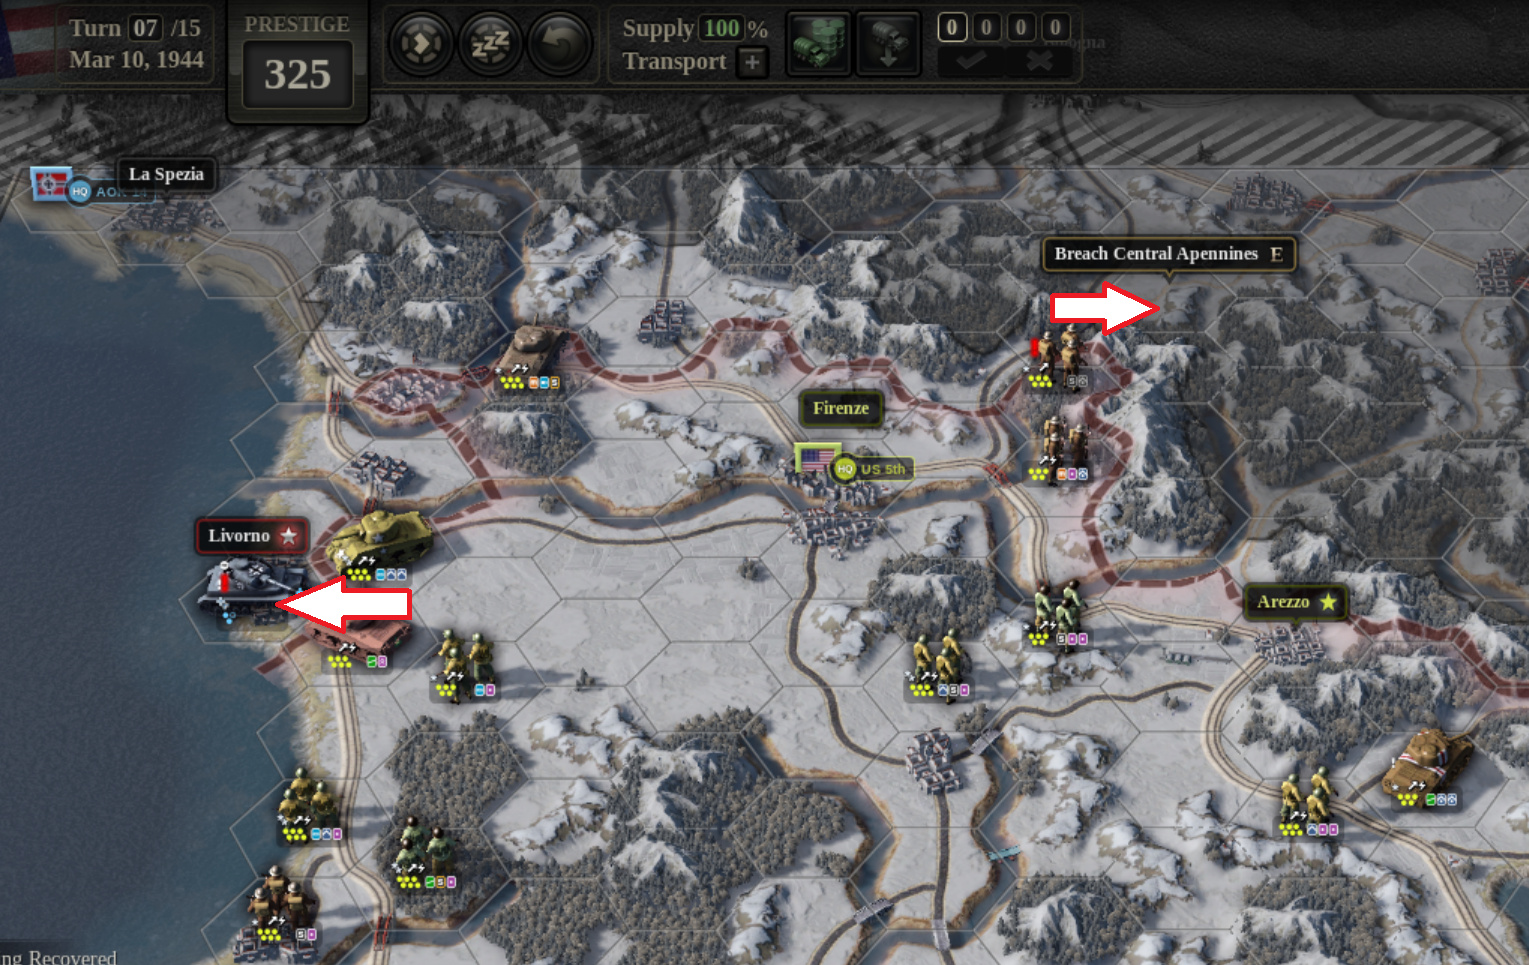
But I managed to break through Arezzo and linked up from that direction instead, so I’ll save my air bombardment for use in the east and save Livono for next turn, meanwhile I also advance towards objective E ‘Breach Central Apennines’.
The choice to be made in the east is harder.
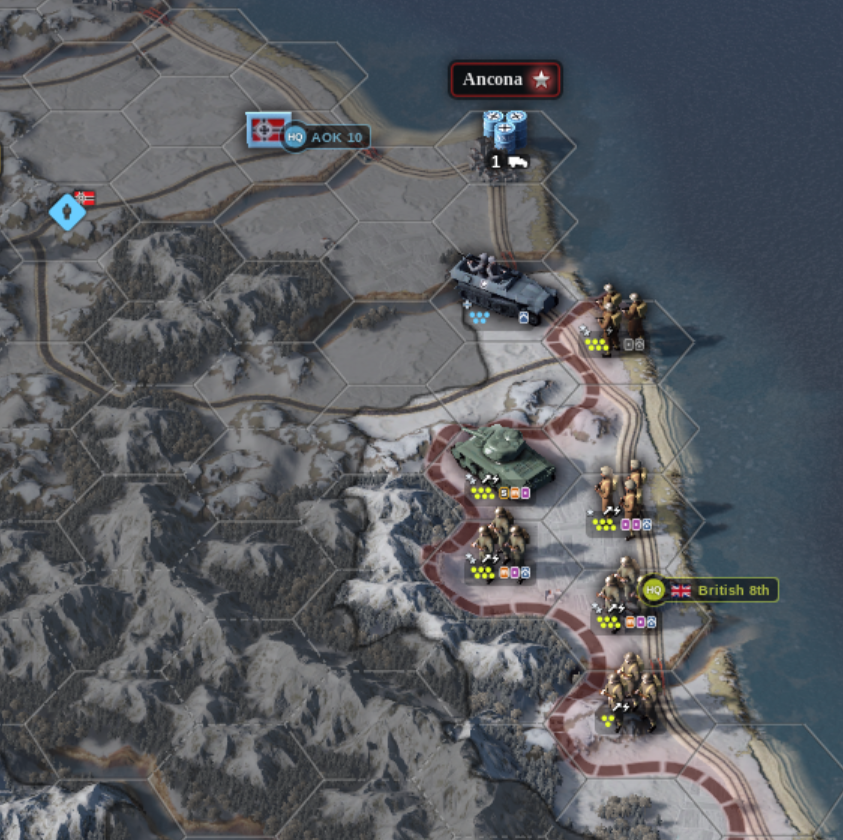
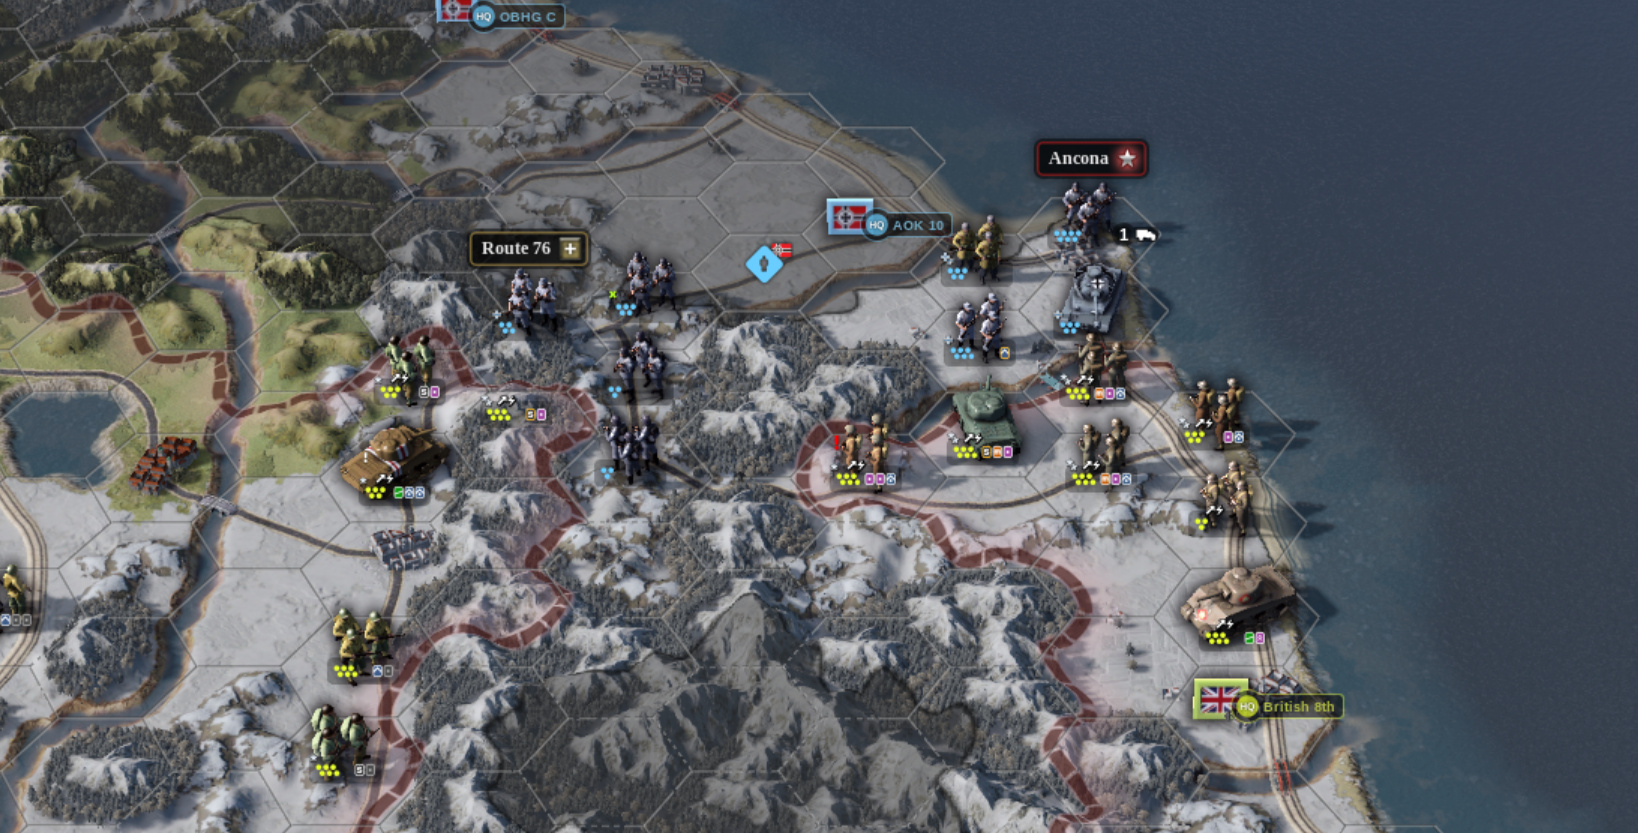
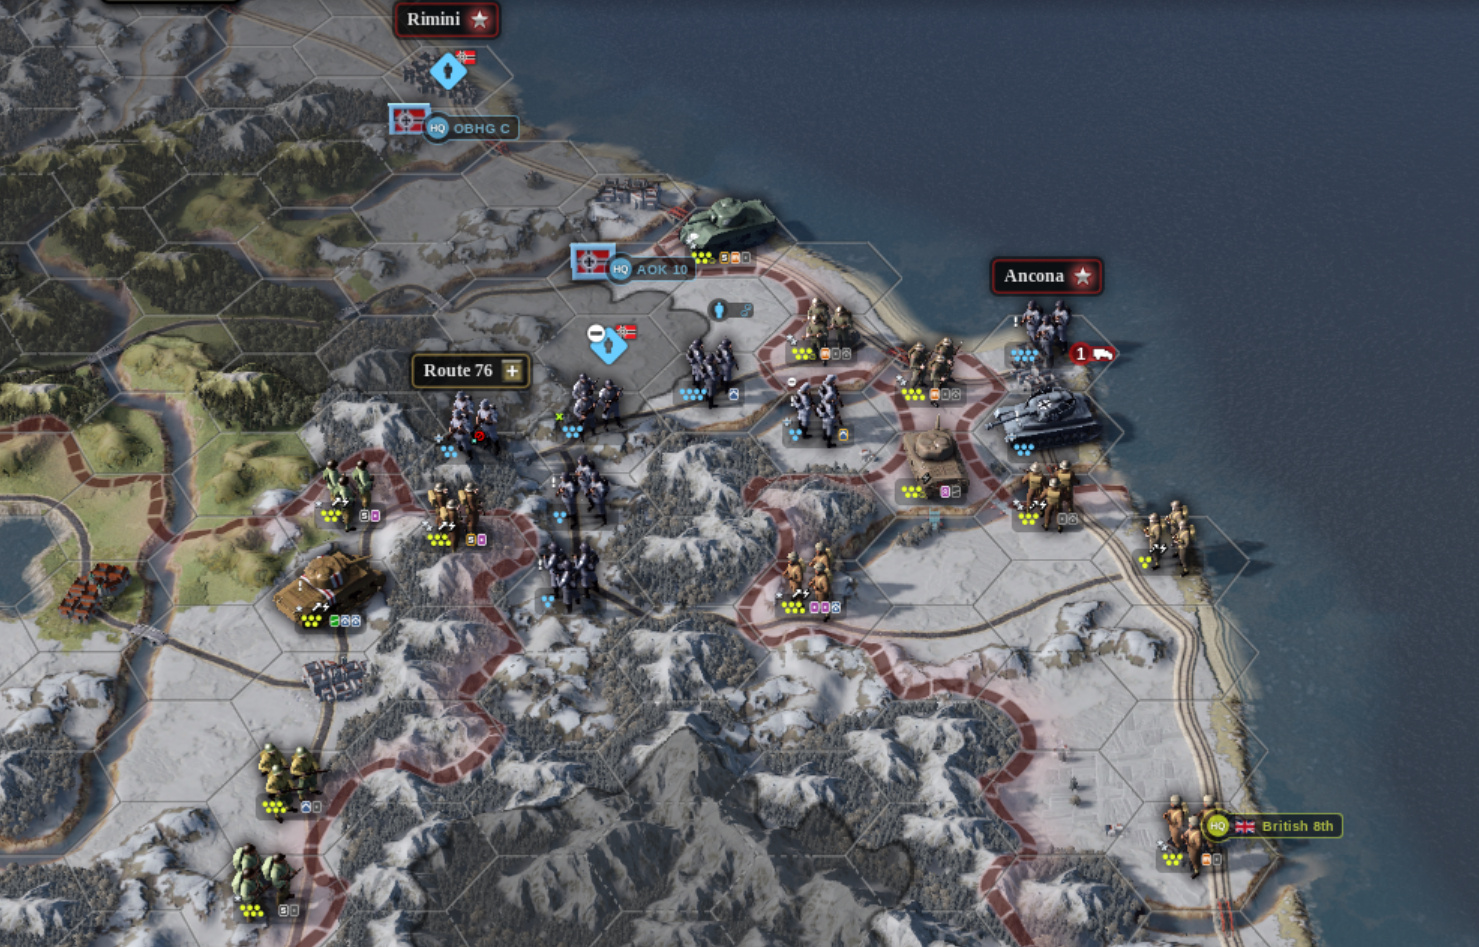
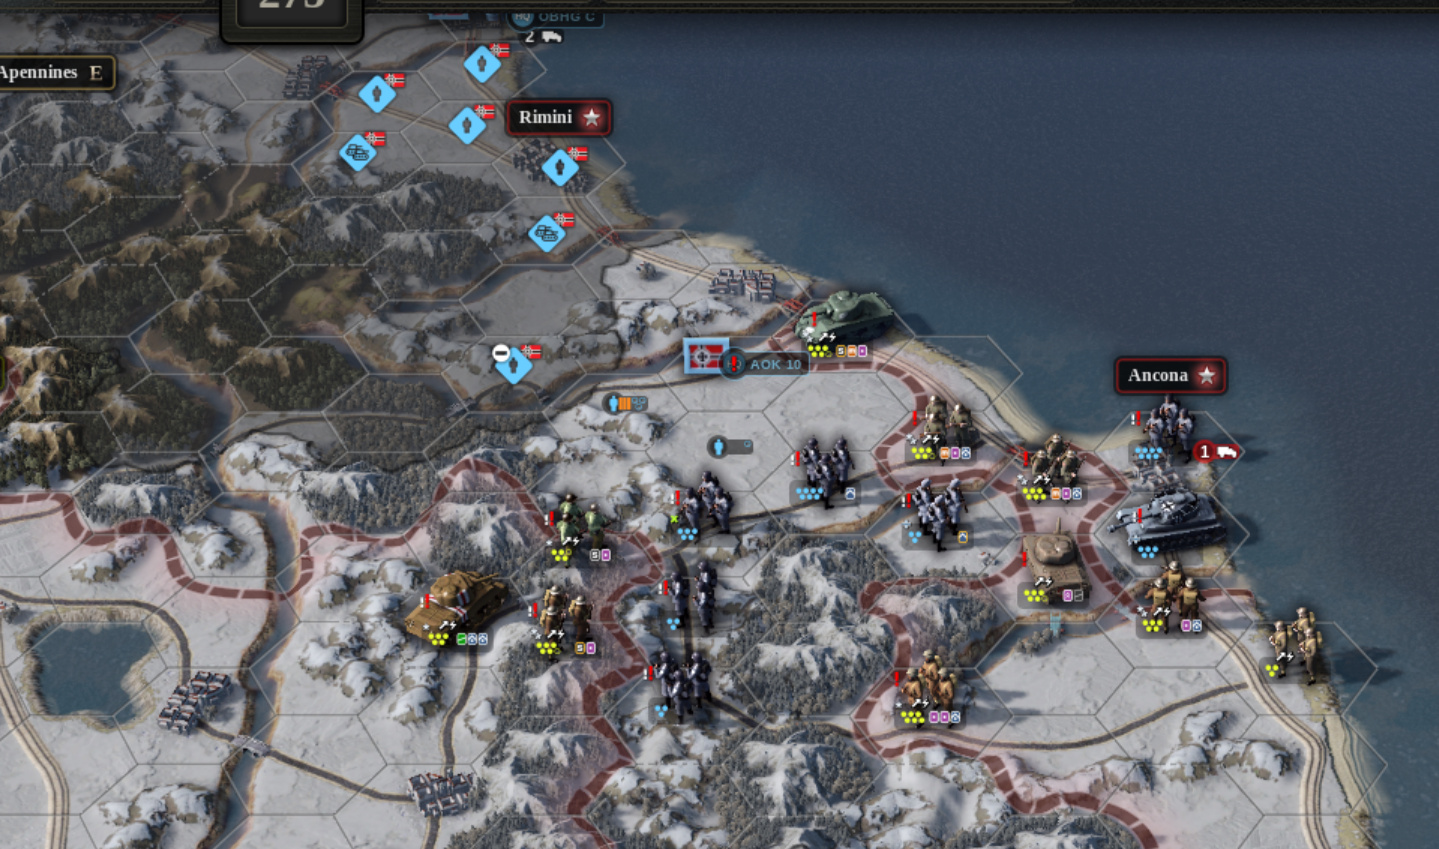
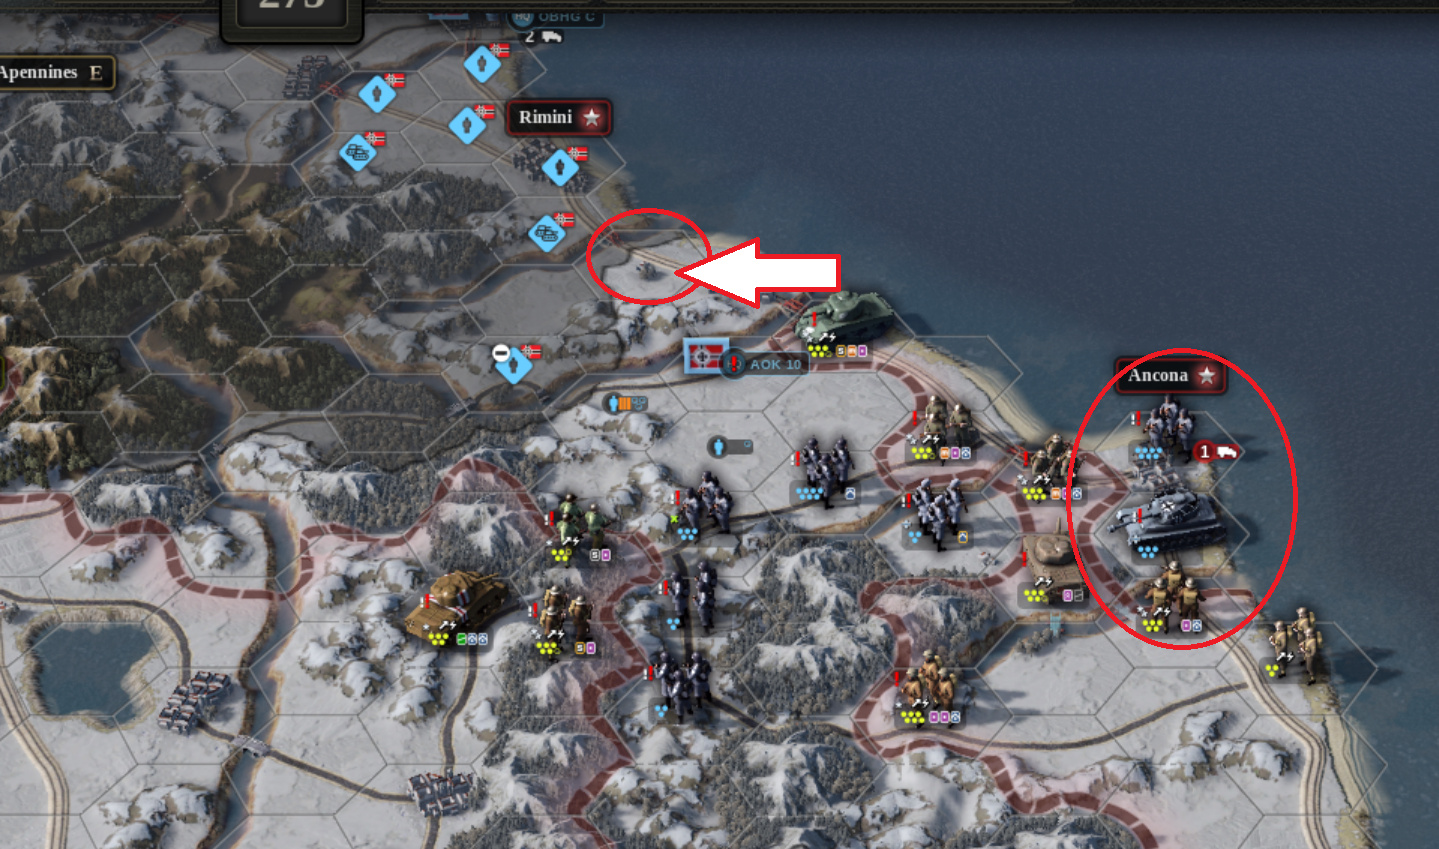
From the map we can see that Rimini is now fortified with many units. And my supply lines is streched. Since I have some turns left, I’ll concentrate capturing Ancona but also place move my tank to the river crossing just before Rimini.
The attack went well, the AI had placed a supply depot in Acona which actually resupplied many of my troops when captured!
I build a pontoon bridge so that my troops can flood into an attack position next turn.
The progress is good.
Turn 7:
The west is basically a mop up operation.
I emergency supplied my forward infantry unit and pushed forward. The US HQ will be able to keep 3 infantry supplied in the mountains as they approach “E Breach Central Apeninnes”. We’re on turn 7, so there should be more than enough time to take that objective.
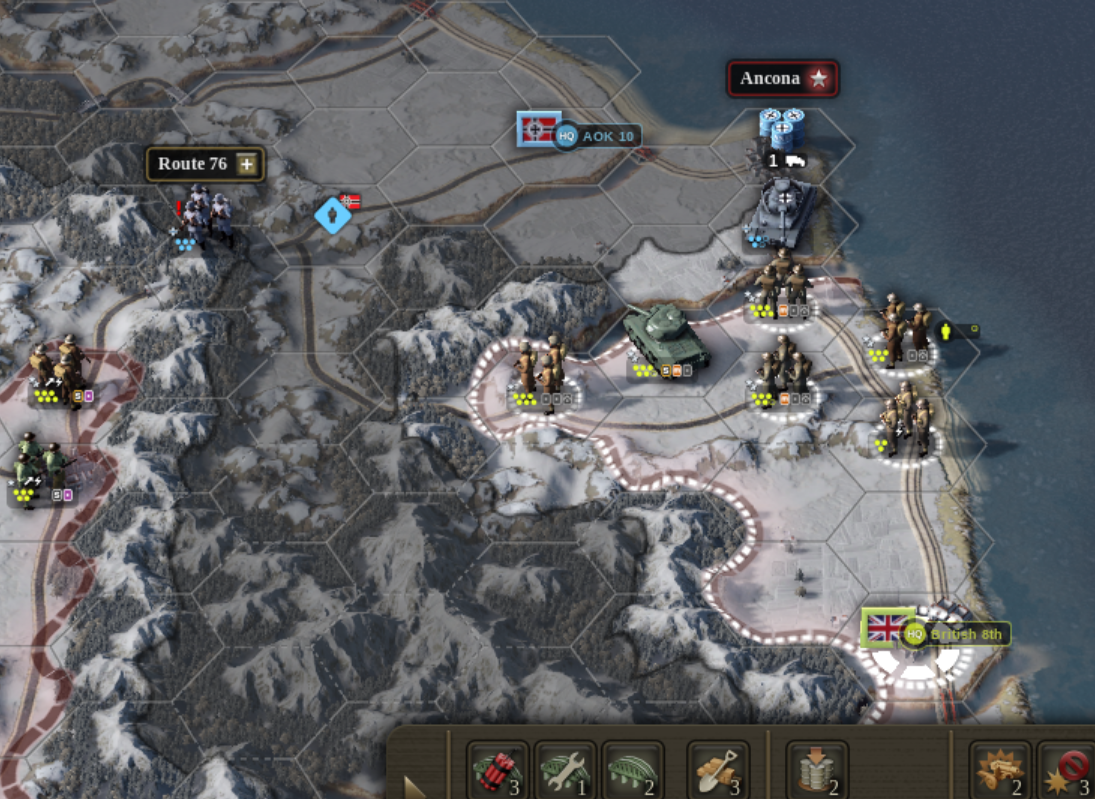
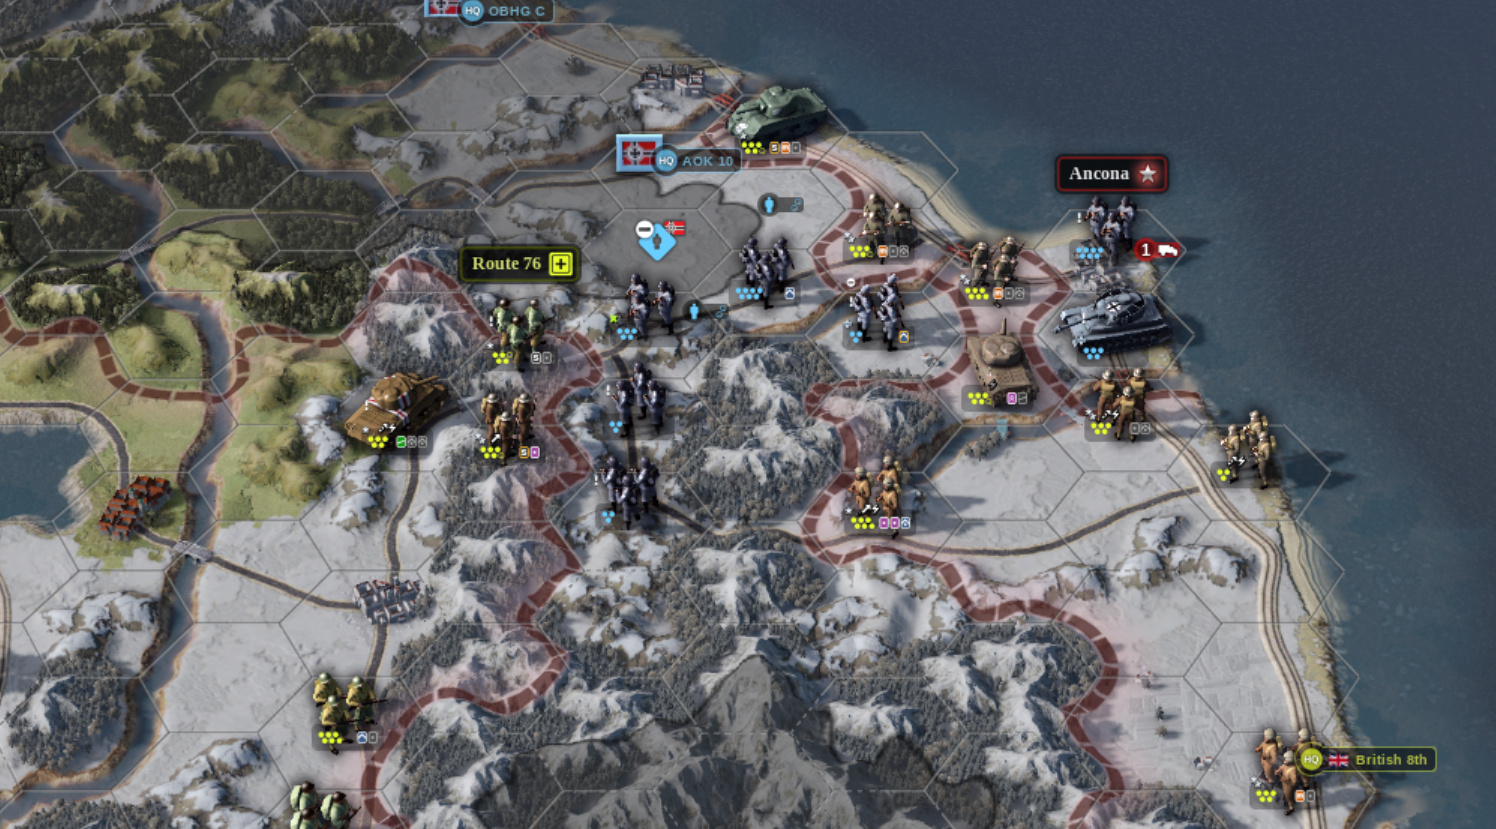
In the East, things are a bit more messy.
Still, we have some turns left for accomplishing our objective in Rimini.
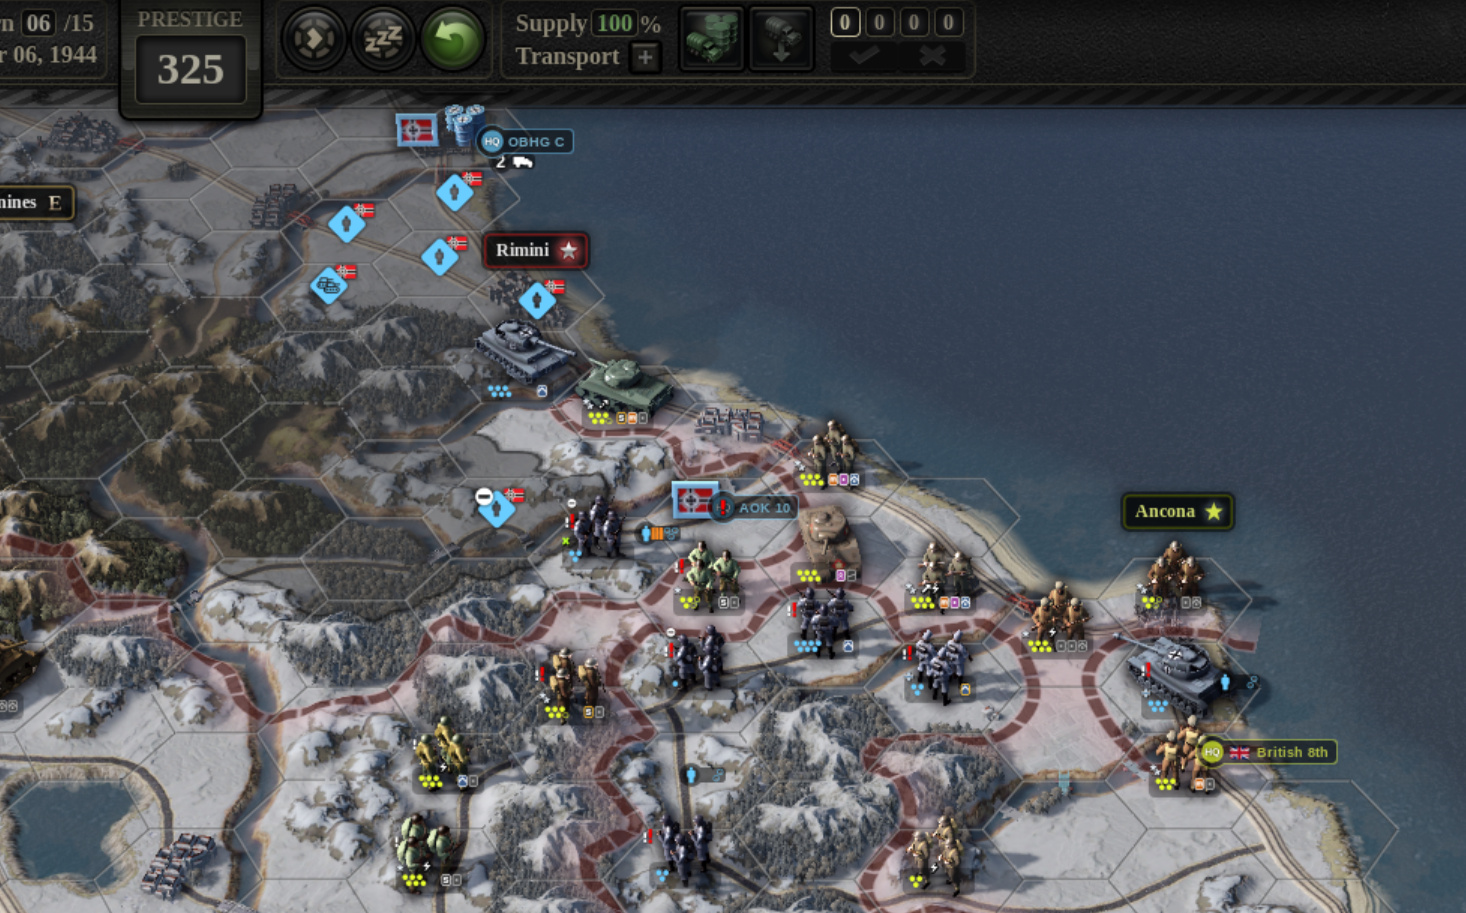
So we’ll focus establishing the supply line and see if we can set up positions for pushing across the river separating us from Rimini next turn.
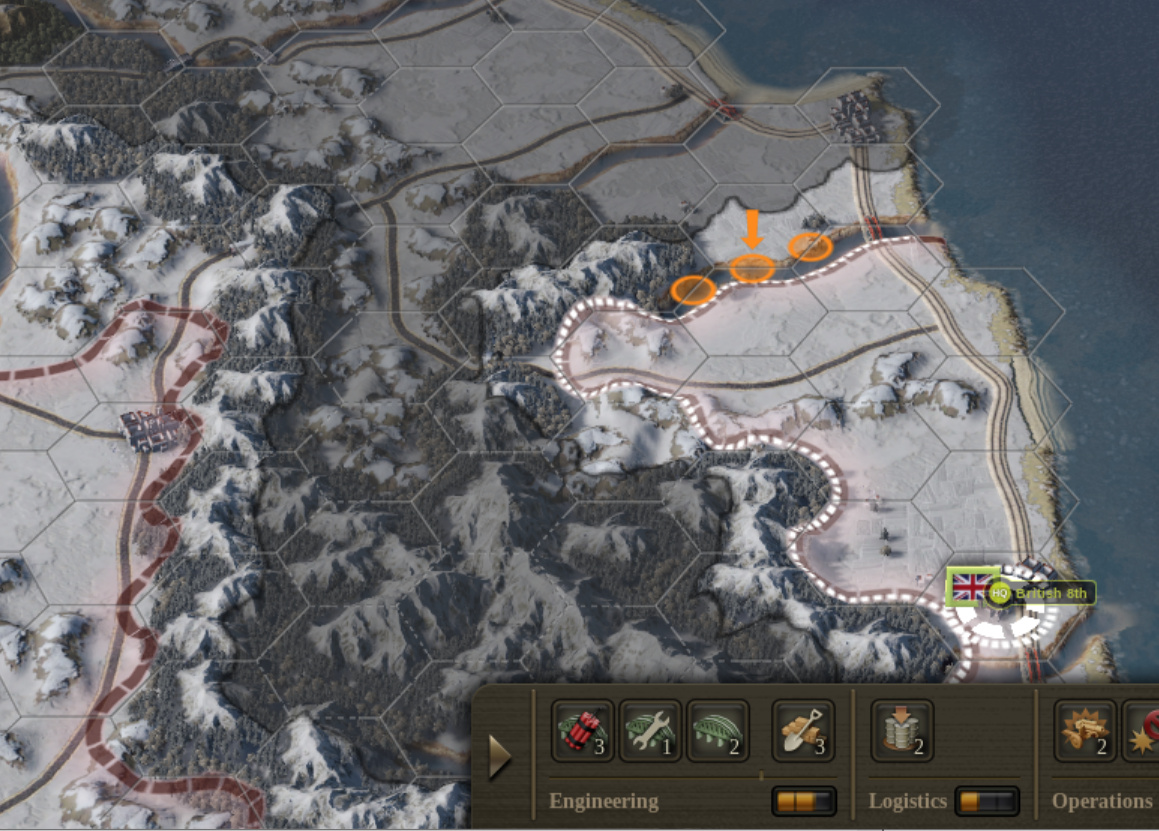
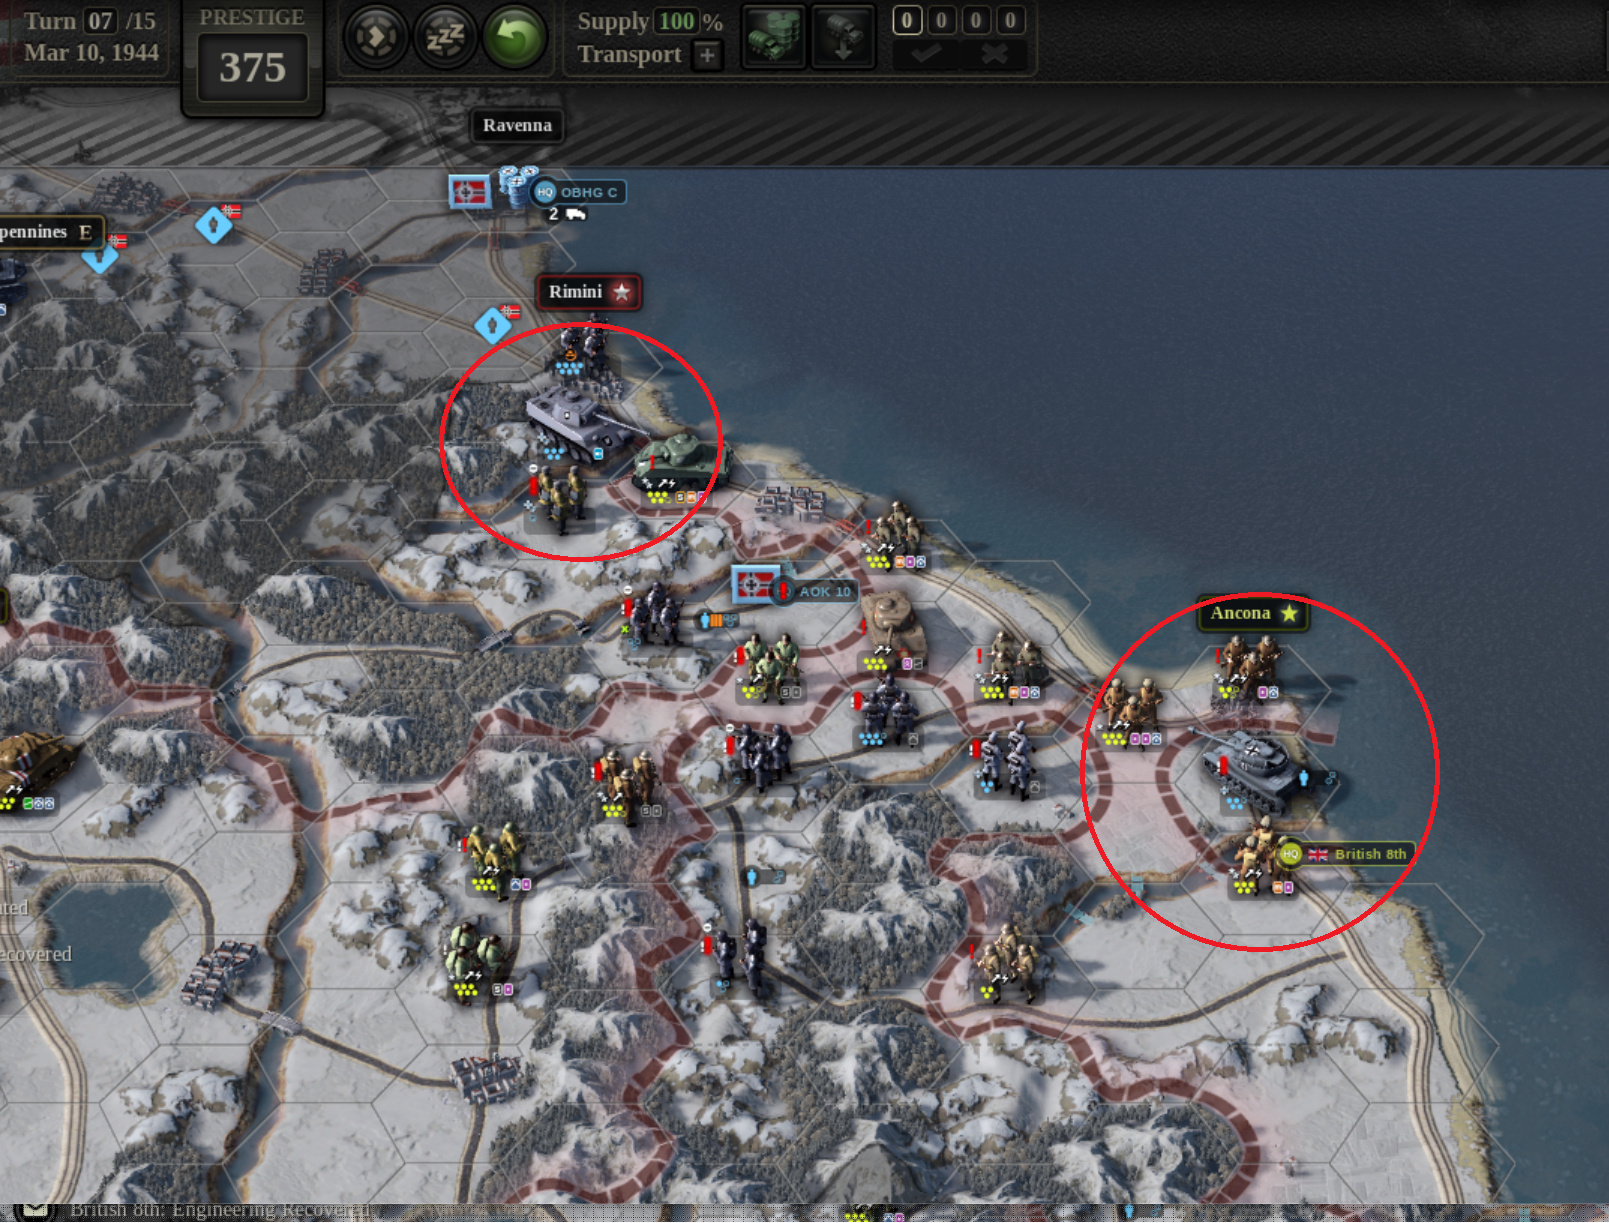
With airstrikes and my elite armour I had a fantastic roll and managed to dislodge the armour unit next to Rimini! And this allowed me to push past the bridge!
My supply line is now secured. And I spend my emergency supply to supply selected units.
We are well placed to capture the objectives.
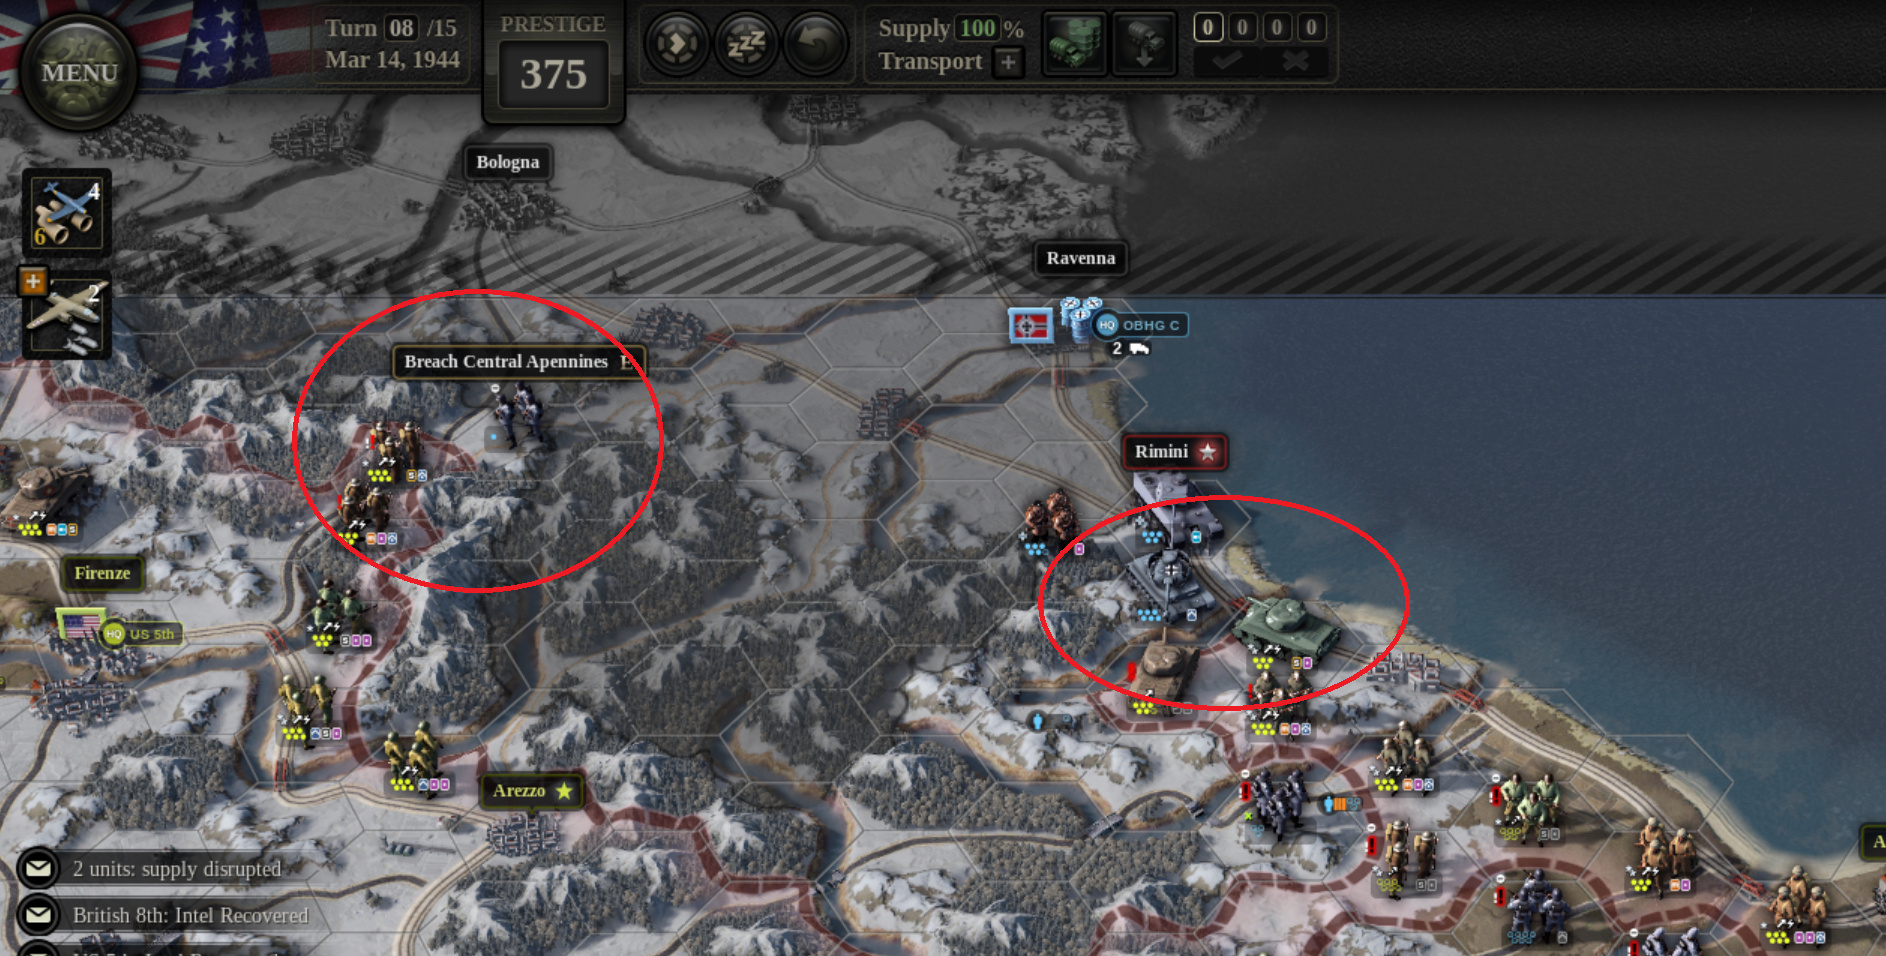
Turn 8:
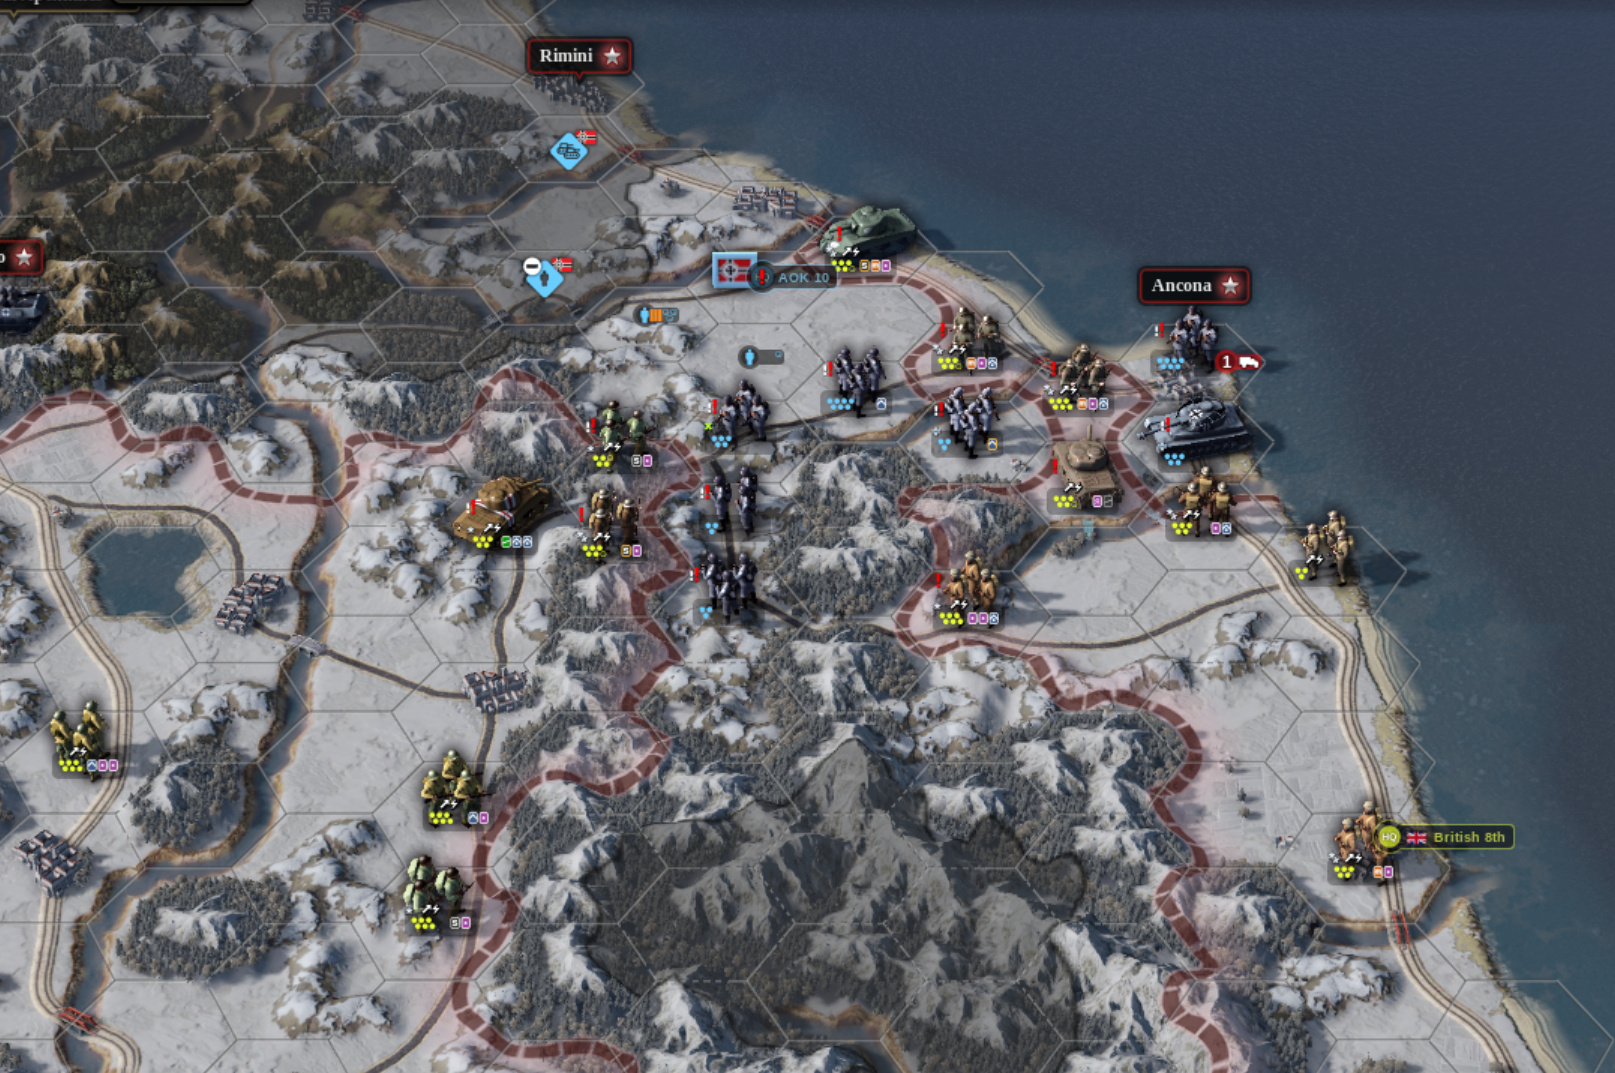
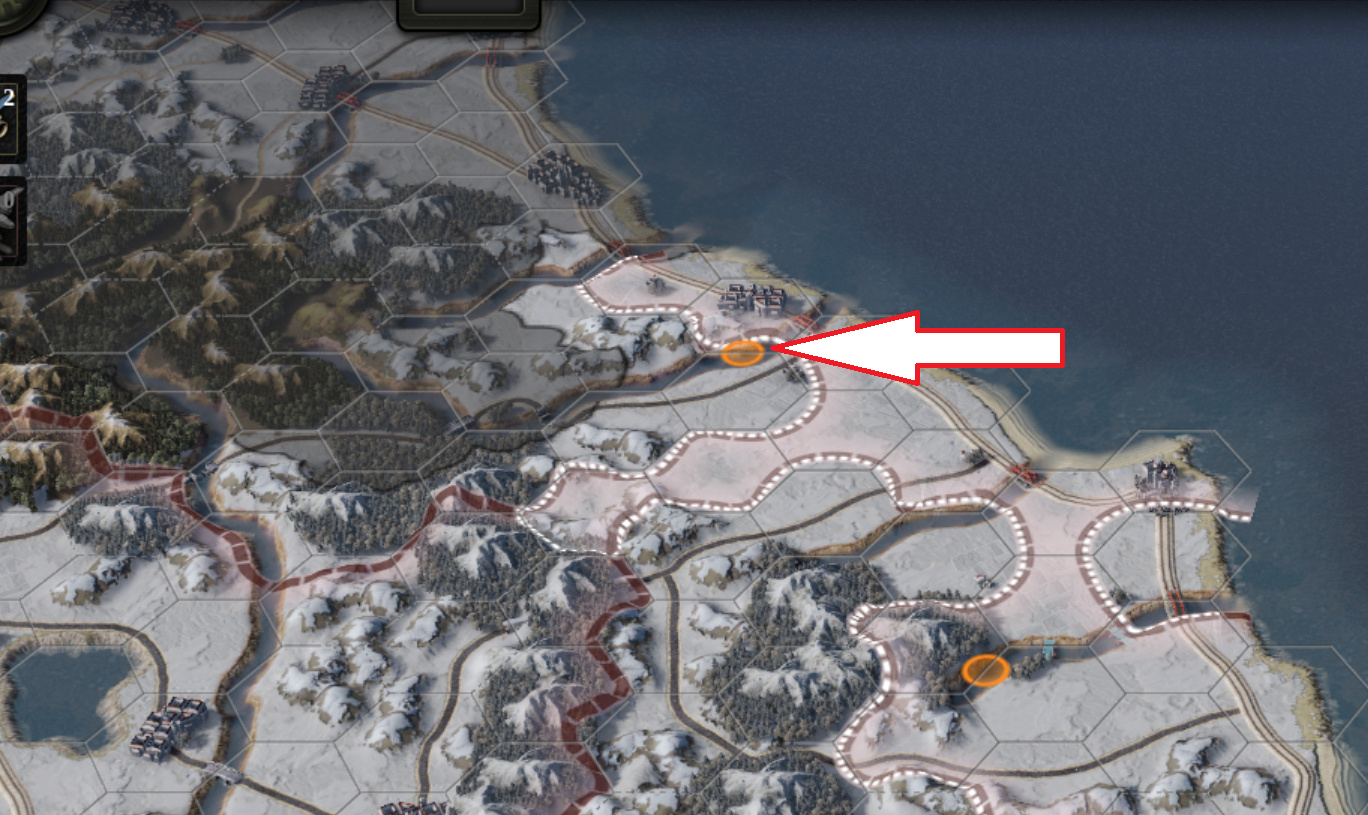
The AI counter attacked and managed to dislodge my unit from next to Rimini! I also lost 2 steps from my elite armour unit.
But they had achieved that by shifting their armour unit from the mountain Apeninnes, which will allow me to walk into it.
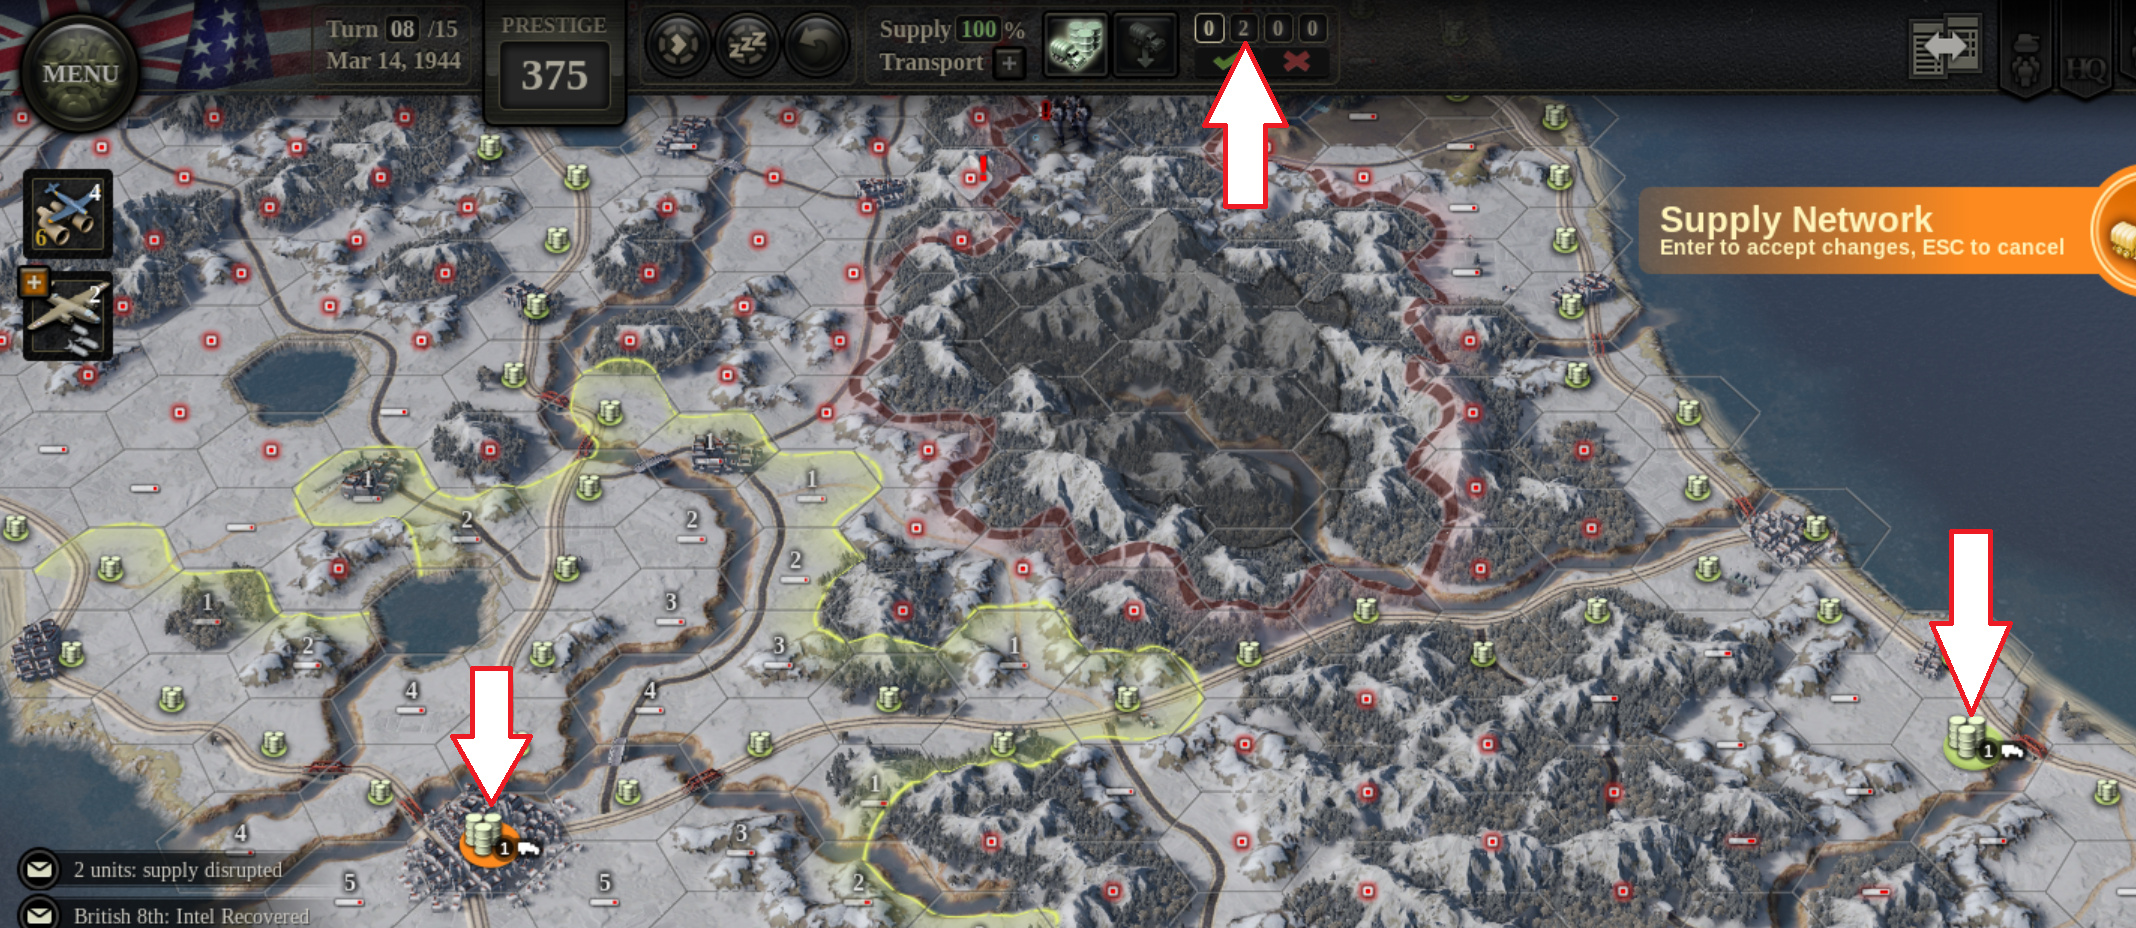
My supply line on the east is also very frayed. So I’ll reduce my supply depot in the west to 1 point so that I can deploy the trucks in the east the next turn.
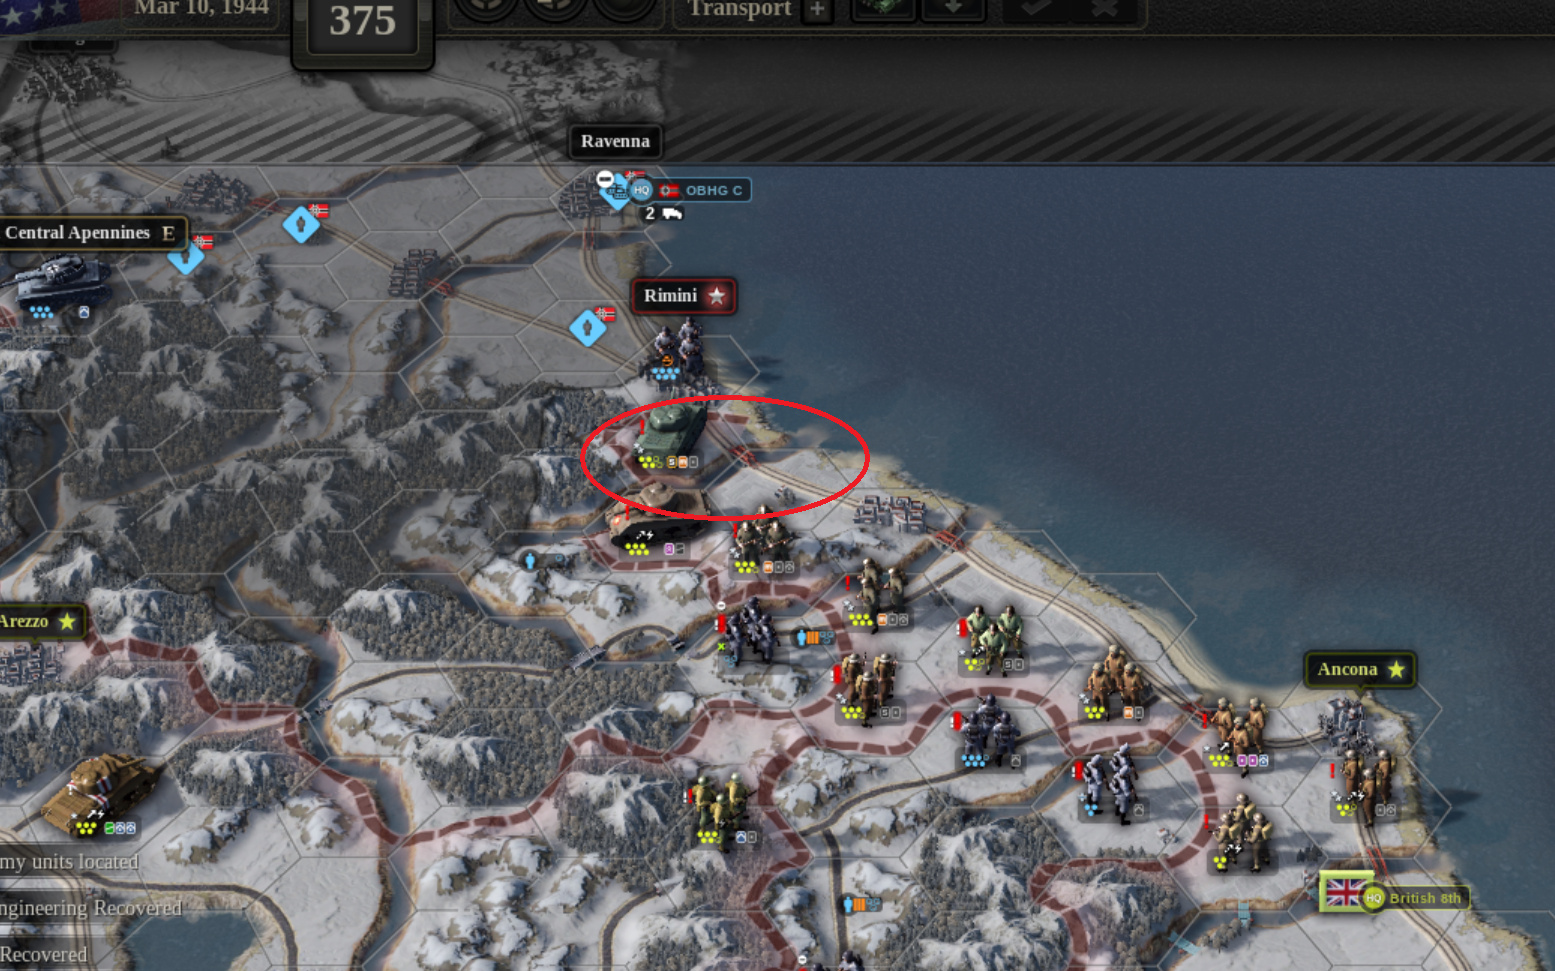
There was fierce fighting across the river and I managed to dislodge the armor unit guarding it.
Apeninnes was captured but because my units are out of my emergency supply zone… which will pose some issues for me.
We’ll see how the next turn play out.