Trolling Gandalf -- A LoTR:LCG AAR

Appreciate the feedback. I’m still going!

Day Five: The Best Troll is a Dead Troll

“Mutton yesterday, mutton today, and blimey, if it don’t look like mutton again tomorrow.”
-Troll, The Hobbit


Our party awakes on Day Five despondent, for the threat against them has risen and they have made little progress in their quest. The fourth day was an utter disaster, and all they can do is hope this new day will bring some modicum of success.

There are, fortunately, no creatures in the staging area. Our party consists only of our three heroes – our two allies were vanquished in the previous turn. Theodred has 2 resources and two wounds, Eowyn has one token and no wounds, and Beravor has no tokens and two wounds. In our hand, six cards: Gandalf, Faramir, Snowbourn Scout, Hasty Stroke, Lore of Imladris for healing (drawn at the end of Day Four), and Unexpected Courage. The current location remains the Gladden Fields.

Threat Level 36

Our threat level jumps from 34 to 36 – rising two, rather than one, because of the ‘forced effect’ of Gladden Fields.

Resource Phase. We draw another ally, the Northern Tracker. We add resource tokens to our heroes, and tap Theo’s Steward of Gondor attachment. This gives Theo 5, Beravor 1 and Eowyn 2.

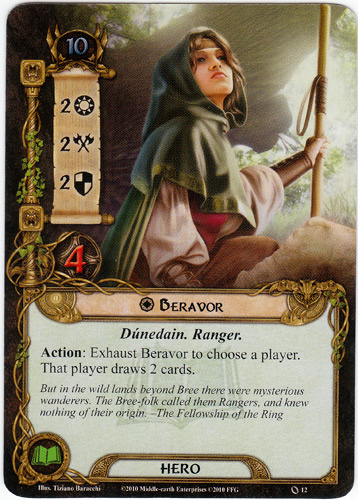
Planning Phase. Eowyn pays 2 to place the attachment Unexpected Courage on Beravor.

image

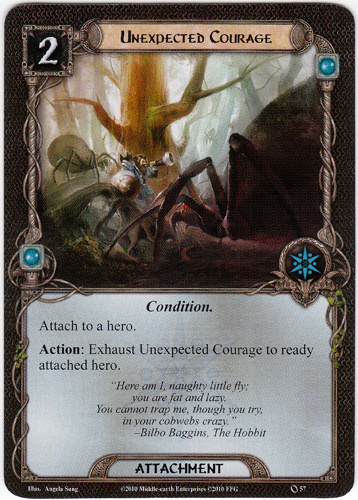
What a great card. It basically allows you to use a hero twice in a turn – you can, for example, commit them to a quest, then tap the attachment to use the hero for battle. Or, a hero could defend, then be readied to attack.

Continuing our spending spree, Theo pays 1 token to summon the Snowbourn Scout (again), which in turn lets us add one progress token to the Gladden Fields (now at 2 out of 3 needed to close). We now need to two more progress tokens to close that location.

Then – a move that is desperately needed to lift the spirits of our party: Theo spends 4 and Beravor spends 1 to summon the second Gandalf card in our hand.

As you recall, upon summoning, Gandalf brings you three options, one of which is to reduce the threat level by 5. And that is precisely what we do now.

Threat Level 31!

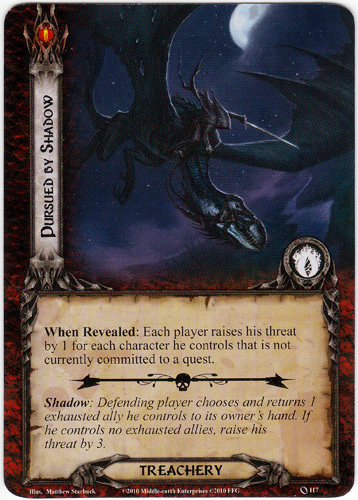
Quest Phase With no cards in the staging area, we commit just one hero, Eowyn, to questing. The Encounter card we draw is Treacherous Fog:

image

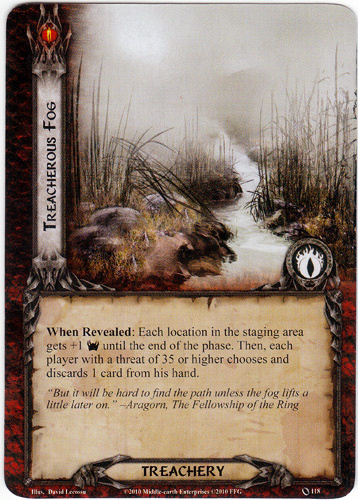
Since this is a treachery card, it has no effect on the questing. This means the quest resolves as:

Eowyn’ 4 minus 0 = 4 progress!

So we caught a break. One of the four progress tokens are applied to Gladden Fields, which closes that location, and the remaining three are applied to the current quest, “To the River.” This leaves us just one shy of the 8 needed to close it.

Combat Phase: Again we face two creatures, the Hill Troll, severely wounded (just one health left) and ensnared (so unable to attack) and Misty Mountain Goblins, who lost one health point out of three in the previous battle.

Time to die, Troll!

Since the Hill Troll is unable to attack, we need not declare a defender. We do though declare a single attacker – the wonderful Gandalf, who is as adept with an axe as with magic. His damage is 4, the Troll’s defense is 3, and the single damage is enough to slay the Troll.

Thus we have finally rid ourselves of the creature that loomed from the very start of this quest.

But the Goblins are still about. We declare our Snowbourne Scout as the defender, he of the redshirt. The encounter card drawn is the East Bight location, which has no shadow effect. But the Goblins’ attack alone (2) is enough to slay the Scout.

Next, Beravor and Theodred attack the goblins: 4 attack minus 1 defense - 3 damage. Dead goblins.

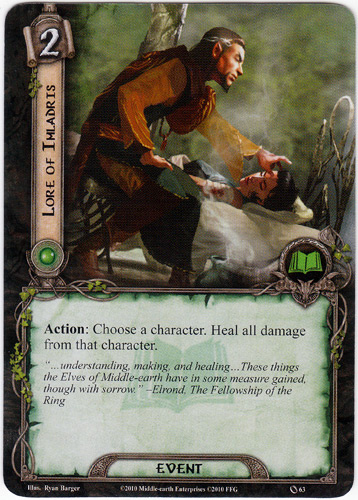
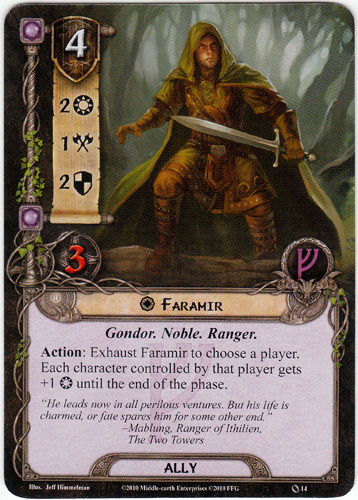
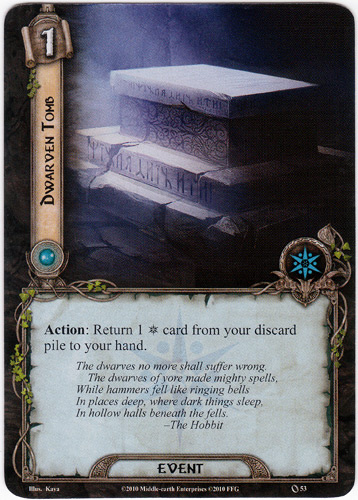
The day closes with some planning ahead: we play the card Unexpected Courage (shown above) to ready the exhausted Beravor, then exhaust Beravor again in order to draw two more cards: Faramir and Dwarven Tomb.

image image

Finally the party catches its collective breath: there are no more creatures in the encounter area, nor looming in the staging area. They can relax. But only briefly, for more danger awaits.

Good progress! Had to use two Gandalfs already, though, hope that third one isn’t late. :)

Yes, that was my thought exactly at that moment.

Great AAR! The LOTR LCG is such a tense, exciting solitaire game. I have almost all the expansions meticulously sorted for deck-building but haven’t played in months. I’m not a LOTR fan, which is part of what keeps me away, but I’d say purely on mechanics it’s my favorite solitaire game.

It is pretty fun to play solo, but the game really opens up when you play two-handed. There are a whole swathe of rules and abilities that don’t apply when you play single-handed.

Two-handed solitaire is definitely the way to play, but it adds a chunk of complexity to deck building that sometimes I prefer to skip.

Yay netdecking!

Day Six: On the Banks of the Anduin

“We will make such a chase as shall be accounted a marvel among the Three Kindreds: Elves, Dwarves, and Men.”
-Aragorn, The Two Towers


And on Day Six, our intrepid party rested on the banks of the Anduin, having dispatched to the Gates of Hell both the Hill Troll and the nasty Goblins. Our heroes slept in, then woke to a sumptuous breakfast and strong coffee left them by the departed ally Gandalf. What a guy! [You’ll recall that after he is used in a round, Gandalf must be discarded].

The woods are quiet. There are no creatures in the staging area, and no allies in the adventurers’ party. There are only Beravor, with one resource token and two wounds, Elwyn, with none of either, and Theodred, also with two wounds. Beravor also has the attachment Unexpected Courage, acquired on Day Five.

In our hand: two copies of Faramir, and one each of Hasty Stroke, Lore of Imladris for healing, the ally Northern Tracker, and a Dwarven Tomb.

Threat Level rises to 32

Resource Phase Bereavor adds a resource token and now has two, Elwyn has one and Theodred gains one. In addition he taps his attachment the Steward of Gondor for an additional two tokens.

We draw an event card – the alliterative Galadhrim’s Greeting!

image

Like Gandalf, the threat reduction of this card is pretty damn strong, and can be used strategically to keep monsters who may at some point hover in the staging area from automatically engaging us in combat.

Planning Phase. Since we face no threats at all at the moment, we opt to do nothing in the planning phase – we should save our resources for the coming days!

Quest Phase Again, since we eliminated the Goblins and Troll on Day Five, and there are no enemies in the staging area, we have no need to commit many heroes or allies to combat. This gives us a great opportunity to advance forward in the actual quest.

We commit only Eowyn to questing, in case the Encounter deck reveals an enemy with whom we must immediately engage.

In the staging portion of the quest phase, we draw a card from the Encounter Deck: the location Necromancer’s Past:

image

To resolve Eowyn’s questing, we subtract the Necromancer’s threat level of 3 from her Willpower strength of 4 to get a progress of 1. Since there is no current location, it is applied to the actual quest stage of “To the River,” and gives 8 needed to close that first portion of the quest!

This allows us to immediately move on to the next quest stage, Anduin Passage:

Note how this quest stage changes the rules of the game, albeit temporarily: each quest phase brings out two encounters cards, not just one. On the plus side, we will not be forced to engage enemies from the staging area when their engagement level is below the threat level. Engagement for this phase will be wholly optional.

Travel Phase: We opt at this point to travel to the location just revealed, Necromancer’s Past. As you see from the card’s travel stipulation, we must discard two cards at random. This forces me to lose the Dwarven Tomb and the strong ally, Northern Tracker.

Combat Phase: On this day, with no enemies either engaged or in the staging area, our valiant party gets a respite from combat.

We tap Beravor, which allows us to summon two more cards to our hand, making up for the cards lost to the Necromancer’s Pass, and bringing us more options to choose from in the ensuing turns: a second Galadhrim’s Greeting (who shuffled this deck?) and, one of our favorites, Sneak Attack.

image

And thus the quietest of days, one without a drop of bloodletting, comes to a close, and our party hopes we are ready for the threats that lay ahead.

Going to have to dig for that third Gandalf if you want the best rush this game provides: Sneak Attack-ing the big wizard.

Day Seven: A Battle to Crow About

The dwarves no more shall suffer wrong.
The dwarves of yore made mighty spells,
While hammers fell like ringing bells
In places deep, where dark things sleep,
In hollow halls beneath the fells.
-The Hobbit


Threat Level rises to 33

Our party wakes on Day Seven rested and content, for no enemies loom in the staging area, and yesterday we finished the first stage of the quest. We are now in a new area known as Anduin Passage. Our party’s current location is the Necromancer’s Pass.

The party again consists only of our three heroes – no allies were summoned in the past day. Beravor has two resource tokens and two wounds, Eowyn, one token and no wounds, and Theodred, with two wounds but a healthy purse of three tokens.

In our hand are two copies of Faramir, one each of Sneak Attack, Hasty Stroke, Lore of Imladris, and two copies of Galadhrim’s Greeting.

Resource Phase We give each of the three heroes an additional resource token. This gives Theodred a total of four, and he taps his Steward of Gondor for two more and a total of six. Lots o’ cash!

We draw a new card from the deck – the ally Erebor Hammersmith!

image

Planning Phase. Theodred spends four of his six resource tokens to summon one of our favorite allies, Faramir.

image

At this point it is important to keep in mind that the current quest phase, Anduin Passage (the second of three stages of this scenario) changes the rules of the game temporarily, while it is the current quest:

Reveal 1 additional card from the encounter deck each quest phase. Do not make engagement checks during the encounter phase. (Each player may still optionally engage 1 enemy each encounter phase.)

This is huge change on two counts. On the negative side, every time we quest not one but two encounter cards are drawn – increasing the likelihood that our intrepid party will come out on the short end of the quest. On the plus side is the other change – we are not required to engage with enemies in the staging areas whose threat level would normally make such engagements automatic. In other words, we can pick and choose our battles.

Thus, with the changes for this particular quest stage, questing itself is more difficult, but combat less so. Our strategies must change as a result.

Quest Phase We opt to commit Eowyn and Theo to the quest, and that gives Theo an extra resource token for 3.

Next, we reveal not one but two encounter cards, because of the special rules of Anduin Passage just noted.

image image

Despair couldn’t come at a better time – we have no progress tokens on the current quest, and thus its effect is moot. Eastern Crows go into the staging area, but they have the surge special condition, forcing us to draw yet another encounter card:

image

With Faramir and Beravor not committed, we are forced to raise the threat level by 2 to 35!

Finally, we are finished drawing encounter cards, and so we can resolve the quest. Eowyn and Theodred’s willpower combined is 5, less the threat of the Eastern Crows (1) gives us a progress of four. This allows us to close the current location, Necromancer’s Pass, and put the remaining two progress tokens on the quest location, Anduin’s Passage.

With a location in the staging area, we skip the travel phase, and move immediately to combat!

Normally, we would be required to engage with the Eastern Crows, as their threat of 30 is lower than our current threat level of 35. However, as noted above, Anduin’s Passage eliminates that rule for the time being.

So we don’t have to engage with the Crows, but in this instance – with no other enemies engaged – we choose to. It is the ideal time to fight this battle.

Defending against the Crows is Faramir, with his healthy defense of two. The shadow card on the Crows is Enchanted Stream, which has no shadow effect. So it is simply the Crows’ attack of one fully defended by Faramir’s shield. No damage to our party.

We exhaust Beravor, who attacks for two against the undefended Crows, slaying them with a healthy swing of her sword. They are now ex-crows.

The party settles back after the battle, but they have one more trick up their collective sleeves. We tap Beravor’s attachment, Unexpected Courage, which allows us to ready Beravor.

image image

Then we exhaust Beravor yet again, allowing us to use her special power and draw two more cards:

image image

With that, the tumultuous seventh day of our party’s adventure comes to a close, the threat level rises a notch to 36, and a second week of battles and questing awaits.

I really enjoyed playing LotR:LCG, but I dumped my whole collection of a thousand or so cards because I just can’t love deckbuilding. This whole AAR is about the fun part of the game, but the bulk of the game is making decks, which isn’t fun.

Also, two Gandalfs and the Forest Snare right off the bat? Those are the luckiest draws I’ve ever seen for this scenario. :) Great writeup though. I’m loving it.

Netdecking is definitely your friend for LOTR. I haven’t built a deck in years.

I also have no interest in deckbuilding. I just copy what others came up with, as is the case for this AAR. For me, this game is about story, adventure, in a world I know and enjoy.

Netdecking is the right answer.

Another option is to look at the Arkham Horror LCG. Though deckbuilding (or netdecking, as desired) is still a thing, it isn’t as pervasive as it is in LOTR. You build a deck for an entire campaign, and alter it slightly as you go.

I have the core box for this game down in storage in the basement, might have to bust it out after reading this write-up. I think I got it off Amazon years ago for a great price (Christmas sale or something) and never played it.

Success!

A wizard is never late! etc.

Great AAR @tylertoo!

Speaking of late, where’s the day’s update?

For some strange reason, I had to return to RL today. Yikes!

Day Eight: Annoying Wargs

Here and there through openings Frodo could catch sudden glimpses of rolling meads, and far beyond the hill in the sunset, and away on the edge of sight a dark line, where marched the southernmost ranks of the Mist Mountains.
-The Fellowship of the Ring


Threat Level 36

The sun rises on the banks of the Anduin and our three heroes assess their wounds. Beravor has three resources tokens and two wounds, Eowyn two tokens and no wounds, and Theodred three and two. Our intrepid ally from yesterday’s battle, Faramir, rests nearby, with nary a scratch.

And all is quiet, a quiet that belies the threat level. A quiet that is unsettling. There is no enemy in the staging area, nor in the engagement area. We have thus far dispatched all predators, and the two wounds on each of Theodred and Beravor are the most telling marks of the dangers so far past.

In our hand are nine cards: Sneak Attack, Hasty Stroke, two each of the threat reducer Galadhrim’s Greeting and Lore of Imrladris, another copy of Faramir, and two more allies: Henamarth Riversong (discussed at the end of the last post) and Erabor Hammersmith. This is a great hand – allies to summon and events to provide instant relief if we get into a jam. As is likely to happen soon enough.

There is no current location – and we have completed 2 of 16 progress toward the current quest, Banks of Anduin.

Resource Phase We add resources, leaving Eowyn with three, Beravor four, and Theodred with Six. We draw another card, another great event:

image

Planning Phase. It is time to spend some cash to summon more allies. Theodred spends four to summon Faramir’s cousin Faramir, henceforth known as Faramair II. Beravor, meanwhile, spending one to summon the stealthy Henamarth Riversong.

image

Riversong has a great action ability: exhaust to peak at the top card of the Encounter deck. This means we can calculate a battle far easier, since we will know whether the top card has a shadow effect. Even better, it means we can calculate questing even better – since we will know whether the top card adds to the threat level of a quest.

In short, he’s a covert spy who is weak but valuable.

Quest Phase Before deciding which of our allies will commit to questing, we employ the aforementioned Riversong to spy on the encounter deck. The top card, we learn, are some annoying creatures:

image

Wargs have the most annoying Forced effect, which often allows them to avoid a counter attack. We shall see soon enough if that happens here.

Now, in terms of planning for questing, knowing the Wargs are coming is helpful – we will face a threat level of at least two. Remember, though, we must draw a second encounter cards because of the special nature of this quest phase.

Without the knowledge of that second card, we opt to commit all three of our heroes to questing, Theo, Eowyn and Beravor. We are able to do this in part because we have twp allies at the ready: Faramir and his cousin Faramir.

Quest Resolution: We reveal two encounter cards, the expected Wargs and another tough threat: the location Necromancer’s Pass, with it threat level of three:

image

Here’s where we make a key strategic decision – to utilize one of the Faramirs to help with questing rather than save him for battle. Knowing that battle is optional (in this quest phase we are not obligated to engage with the Wargs) make the decision easier.

Faramir can be used here because of his special ability:

image

By tapping him now, each of our three heroes gets an extra willpower point for the questing. That gives us a total of 10 rather than seven.

Our 10 willpower minus the combined threat of five from the two encounter cards gives us five new progress tokens on the Banks of Anduin. Thus, we have progressed in the quest seven of the 16 steps.

Combat Phase: Here, our choice is weather to engage with the Wargs; it is optional. Because we have only Faramir II able to defend, and no one to attack, it would make sense to wait. But we have a trick up our sleeve: Beravor’s attachment, Unexpected Courage, allows us to ready her for battle! Thus we decide: bring on the Wargs!

Faramir defends. The shadow card drawn is Chieftan Ufthak, which has no shadow effect. The Wargs have three damage, Faramir has two defense, and so our brave ally suffers one point of damage.

Now in an ideal world, we could now attack the Wargs with Beravor. But the Wargs have an annoying forced ability – because there was no shadow effect, they flee back to the staging area before Beravor can do any damage!

The party of heroes and allies must now call it day; battling the Wargs will have to wait until Day Nine.

Really enjoying the play through @tylertoo. I’d never heard of this game and picked up a copy after seeing your AAR.

If I can pull out my rules lawyer card for a minute, for future reference you can’t have two copies of Faramir active at one time. That little circular symbol to the left of Faramir’s name is a Unique Card symbol and you can only have one active copy of a Unique Card in play at any given time.