It’s really gross on an attack-focused carry (Berserker works great) with a magic-focused supporting party (my last win: Pyromancer, Bard, Druid, Paladin).
I was thinking of berserker as an obvious one to try
Just beat Corruption 1, 3/3 since my second run died on Hydra.
Warlock/Frostmancer/Juggernaut + Brawler + Cleric.
Juggernaut was an awesome tank through the whole run.
Warlock is a great “glue” character. Decent damage, decent healing. Gets the job done.
Frostmancer is amazing vs groups, less amazing single-target. Great debuffing though.
Didn’t love Brawler. Didn’t have a great plan for him, but he was mostly just an incompetent offtank.
Cleric did Cleric things. His heal was pretty ridiculous on Juggernaut with his enormous health pool and the Vampire Armor (reduce damage and take it as Bleed instead), since it does %health and removes all stacks of a debuff (aka the vampire bleed).
Almost bought it on King this time! He’s nasty if you don’t have a massive damage situation to kill his minions relatively quickly. Warlock pulled it out at the end mano a mano though.
Taking five potion slots, four filled with Holy Water (everyone goes immune for 2.5 seconds) into the final battle made it preeeeettttttty easy. In general I felt this comp wasn’t great, tbh. Witch Stick with fast attacks is pretty great though.
Bloodmage + Warlock = win lol.
I haven’t figured out how to make brawler go that extra mile just yet. I especially haven’t figured out a way to capitalize on his passive. At the moment my best brawler runs just maximize his Active Attack output and lower monster armor values. But that seems as straight-forward as it gets.
He doesn’t tank well, and although I can give him big DPS, he hasn’t outdone Pyro or Cleric yet on that front.
I haven’t unlocked all the other characters yet, nor have I seen all the event items. And there’s also a couple artifacts I have yet to try with him. I have a feeling he’ll really shine when I get access to the right equipment and allies.
Warlock, Blood Mage, Paladin, Rogue, Fiend just breezed through corruption 4. Fiend is the only swing spot for me, could be anything there almost I think. Those first 4 are a super combo, that work pretty well even if you don’t get ideal gear. I think I’ll try that same team and sticking a Juggernaut or someone else tanky in there for those times when my palie goes down. My palie had the buff to healing done, the immunity chest plate, and the shield gloves this time, and rarely died.
It’s really interesting to see how items play out as you level them up and try different things. Some stuff that I wrote off is actually really good if maxed, and visa versa.
I also just figured out how important “adjacent” was lol. Having your tank in the same 4 square as your ranged characters = bad. Can’t believe I went this long stacking people in the same square. I guess it pays to read the tooltips sometimes lol.
Ah, I just had such a great Corruption 3 run and unlocked Druid. Managed to level up the Outlaw and Illusionist in the process. I guess technically all 5 leveled up, but the Outlaw and Illusionist started at level 0.
Yesterday I did a lot of experimenting and didn’t make a whole lot of progress. Today I wanted to go back to something tried and true and then introduce unproven players to the party in stages 2 and 3. My initial lineup was Paladin, Cleric, Fiend. My Fiend was the main tank and my Paladin was off-tank. On stage 2 I picked up the Outlaw for his poison. Games were taking a while because my group had low DPS but great sustainability, and the Outlaw’s poison Active seemed like a great fit. It was.
The final addition to the group was the Illusionist. I wanted as many bodies as possible between the monsters and my Outlaw, because he was carrying the group DPS-wise, and the Illusionist provides bodies to spare.
I put everybody but the Fiend in the top section, and had the Fiend sit solo at the bottom. Every time my Illusionist triggered his active attack his clone would appear at the bottom next to the Fiend, so when the Fiend would go down the (big) monsters would switch to a clone. In 5 seconds my Fiend would be back on his feet and by the time he’d go down again there would be more clones there for (big) monsters to focus on.
Except for monsters that had AOE’s or randomly attacked targets, nobody up top ever got hit with anything (except for one guy that would just attack whoever had the highest HP).
This was such a great setup (Fiend + Illusionist clones in their own area), and it was the first time I felt like I was using Illusionist anywhere close to its potential.
My damage spread was pretty much Outlaw doing 67% of the damage (almost all poison), with cleric coming in second at 16% Smite damage, and the other 17% split up amongst the others. As for heals, Cleric and Paladin did all the heavy lifting with heals and shields.
Oh, and I forgot to add, on map three I landed on an Event that would allow me to permanently reduce the attack and defense on all heroes in exchange for upgrading ALL ITEMS. I took that deal, because that was a 1,500 gold value and the upgrades alone would easily make up the loss and then some.
Which tooltip is this? My dudes are usually adjacent as so many skills (healing) affect adjacent heroes. Why do I want a tank away from ranged characters?
Lots of monsters have abilities that splash on adjacent characters. Bard and Warlock, at least, don’t need to be adjacent to heal.
I’m a dork and didn’t realize until reaching Corruption 5 that all the corruption penalties from current and earlier corruption difficulties stacked. I just thought the only active penalty was whichever one was displayed in the inn when choosing your party members.
A lot of games in the deckbuilder genre work the same way. The ascension/corruption levels just add up incrementally.
Yeah, that was me yesterday as well, then went to Juggernaut, cleric, warlock, outlaw, assassin and steamrolled pretty hard. I can’t get ranger to work for me. I’ve heard it is super strong, but seems quite gear dependent
Been looking forward to unlocking fiend so I can try that setup.
I have unlocked all characters, but still can’t reliably get past second trip to town. So bad at this game.
If you are struggling, go with a beefy group. Try something like outlaw with (juggernaut/Paladin) and warlock. Put your first blue orb on outlaw and set him up as the first target.
Other than that, you might need to consider your own choices more carefully. Whether you are trying to amplify strengths or cover weaknesses kind of depends on the situation.
I just finished what was probably my favorite run so far:
The idea here was to use the Druid as a buff bot for the berserker, whom I have had trouble using at times. Because the Druid’s active requires adjacency, it was focused on him. Meanwhile, my warlock started doing regularly in act 2, so I added in the juggernaut to tank after the outlaw goes stealth. All 5 have some form of heal. Three benefit from strong shields.
This run was real touch and go in act 3, with morale down to single digits. It took a lot of thought with item shuffling and where to upgrade things before it all just clicked. Even then, I was moving heroes and items around someFights. This really is, to me, a thinking person’s autobattler, which is what I love about it.
Look at the tooltips you get when hovering over monsters. Whenever a monster ability has ‘adjacent’ in the description, it means that it hits ALL characters in the same 4 tile. This can be particularly huge in a few fights where that means you have 4 characters with a huge dot or bleed or debuff, instead of one. It’s one reason I don’t like the cleric for example, because he has to be adjacent to the tank to heal it, and as such, will always get any debuff or damage the tank takes from adjacent casting mobs.
It’s the thing that makes character items that rely on being adjacent problematic as well. In order to take advantage of the buff, you also have to eat all the downside. In my experience, it’s never worth it, as the damage multiplier that mobs get from landing some of those things is way beyond the benefit you get from the skill requiring you to be adjacent.
There are some fights that are almost impossible to win if you ignore this.
It’s not like you can avoid having adjacent characters. Though the dev is actually working on actively encouraging use of both squares more, even when you don’t have to. For instance, one really strong item that gives shields to adjacent, now only works if there less than 3 in the group (it’s the ring in the bottom slot of the Druid I posted above. And you can manipulate the rules to your advantage as I did there, because the druid is going to be buffing the berserker, but the warlock no longer had to be adjacent to heal.
In the fights that need it, you usually can. Depends on party makeup for sure I suppose, but with 5 characters, just keeping your tank on one set of tiles, and the rest of your party on the other works wonders. Sometimes if you are relying on adjacent buffs, you have to bite the bullet and throw another character in with the tank, but only having 2 of your characters with a huge dot, is much easier to manage than 4.
There are some ways to deal with it…depending on what skill the mob is using that triggers the adjacent…like…you can have that immunity chest that will stop burning, poison etc, those are a must have for characters that need to stick with the tank like the cleric.
There are a lot of ways to do things in this game, when I figured out the adjacent problem defense wise, it really helped me get through a couple of fights/mobs that were previously kicking my butt, just thought I’d bring it up in case other people hadn’t noticed. I went for a long time ignoring it.
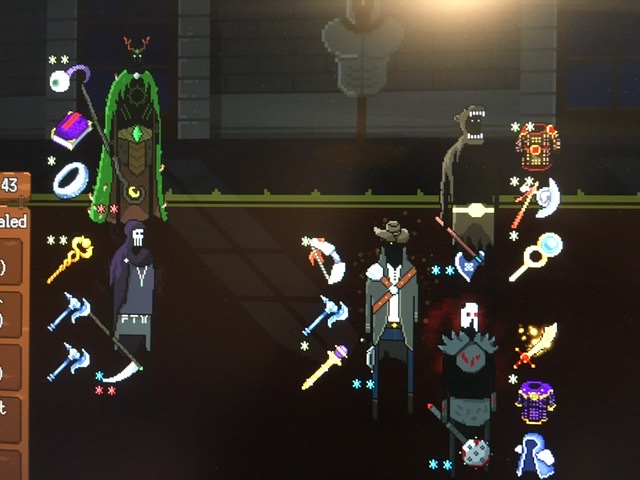
AH HAHA, Such a great game just now. I reached Corruption 6 and did it by being a bastard to my enemies.
I had a fully upgraded Pharaoh’s Mark on my Fiend which would curse enemies 3 times for every 25 gold I had. I saved up nearly 600 gold, so at the start of each battle my enemies were effectively neutered long enough for my Reverie Totem to kick in and reduce all their attack speeds to 5.0 in short order.
I found the Reverie Totem on the first map, and when I found it I had no gold, but I did have 4 items. I sold everything and went all-in on the totem. It paid off in spades. I put the Reverie totem on my Alchemist, and later maxed out his own attack speed so he’d be dumping dozens of stacks of poisons every second, and then duplicating stacks with his Active. Everybody else in the group served as a tank and healing to keep the Alchemist untouched. Everything melted.
And I just unlocked the Bloodmage, the final locked guy in my Inn.
I just meant you have to have them somewhere, but sure. I like that you have to think about fights and move guys around. The strategy doesn’t always change from fight to fight, but it certainly can.
I believe he is looking into adding a button to swap formations between squares, which will be a nice QoL feature
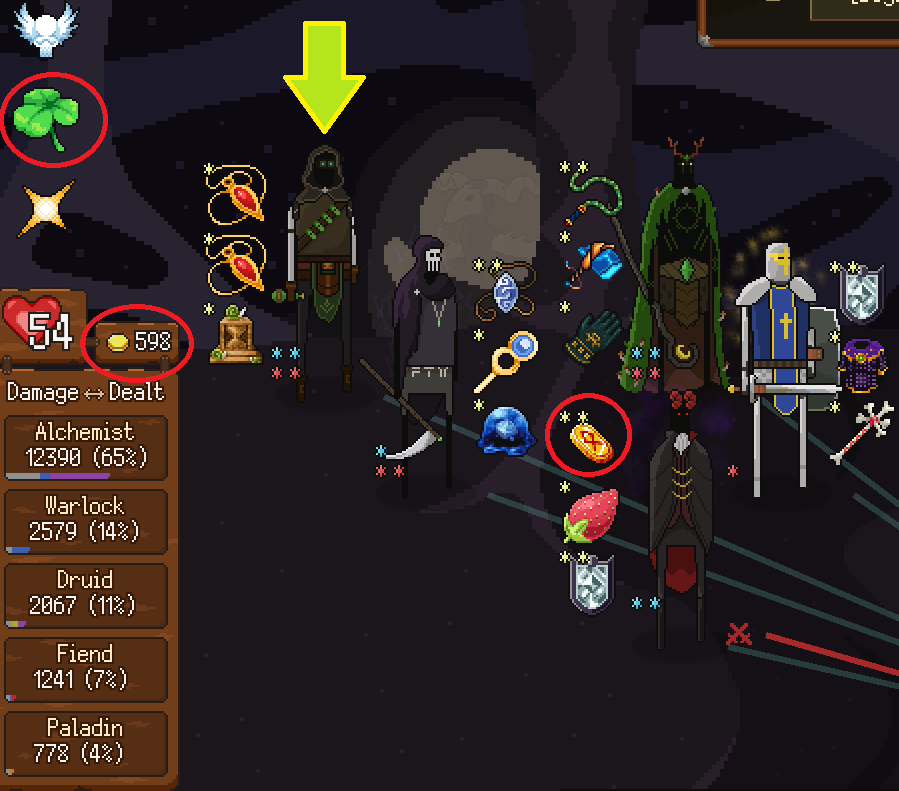
Awesome! I just won my first run with bloodmage. I decided to pair him up with the Paladin as a buddy. I also had some great luck with items:
That codex on the bloodmage never ended up triggering that often because he was too well protected. Not shown here is an upgraded ragnarok that dropped from the act 3 boss. I dropped that on the bars in place of the symbiote and he lead the party in Damage on the next fight, lol
The reason everything is upgraded is because I hit the event that upgraded every item you have!
I love that event. When I hit it last game my gold was too precious to spend so I took the stat hit. So far the stats always seem to be a good trade for me because my upgraded items more than make up for it.